大家都知道,在开发过程中应该尽可能减少用户等待时间,让程序尽可能快的完成运算。可是无论是哪种语言开发的程序最终往往转换成汇编语言进而解释成机器码来执行。但是机器码是按顺序执行的,一个复杂的多步操作只能一步步按顺序逐个执行。改变这种状况可以从两个角度出发:对于单核处理器,可以将多个步骤放到不同的线程,这样一来用户完成UI操作后其他后续任务在其他线程中,当CPU空闲时会继续执行,而此时对于用户而言可以继续进行其他操作;对于多核处理器,如果用户在UI线程中完成某个操作之后,其他后续操作在别的线程中继续执行,用户同样可以继续进行其他UI操作,与此同时前一个操作的后续任务可以分散到多个空闲CPU中继续执行(当然具体调度顺序要根据程序设计而定),及解决了线程阻塞又提高了运行效率。苹果从iPad2 开始使用双核A5处理器(iPhone中从iPhone 4S开始使用),A7中还加入了协处理器,如何充分发挥这些处理器的性能确实值得思考。今天将重点分析iOS多线程开发:
一、简单介绍
线程的创建:
self.thread=[[NSThread alloc]initWithTarget:self selector:@selector(test) object:nil];
说明:创建线程有多种方式,这里不做过多的介绍。
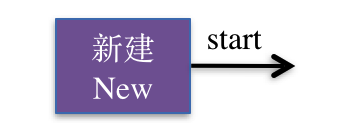
线程的开启:
[self.thread start];

线程的运行和阻塞:
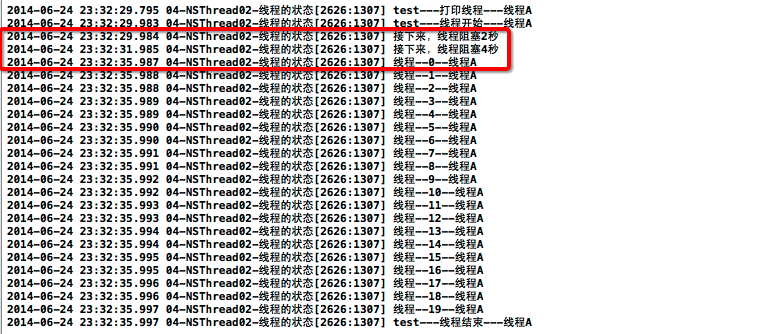
(1)设置线程阻塞1,阻塞2秒
[NSThread sleepForTimeInterval:2.0];
(2)第二种设置线程阻塞2,以当前时间为基准阻塞4秒
NSDate *date=[NSDate dateWithTimeIntervalSinceNow:4.0];
[NSThread sleepUntilDate:date];
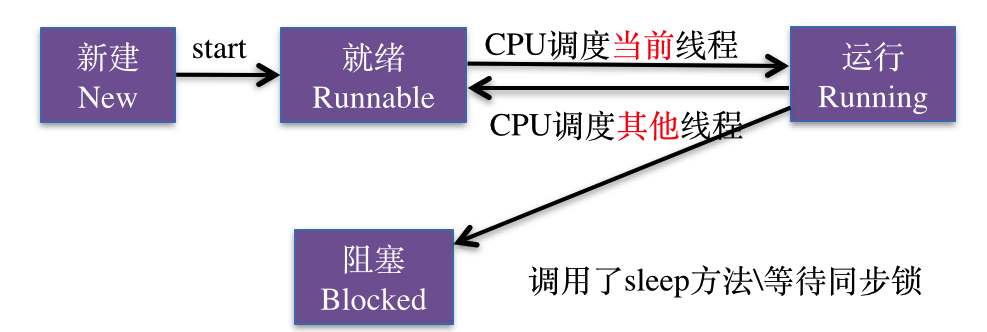
线程处理阻塞状态时在内存中的表现情况:(线程被移出可调度线程池,此时不可调度)

线程的死亡:
当线程的任务结束,发生异常,或者是强制退出这三种情况会导致线程的死亡。

线程死亡后,线程对象从内存中移除。

二、代码示例
代码示例1:
|
1
2
3
4
5
6
7
8
9
10
11
12
13
14
15
16
17
18
19
20
21
22
23
24
25
26
27
28
29
30
31
32
33
34
35
36
37
38
39
40
41
42
43
44
45
|
//// YYViewController.m// -NSThread-线程的状态//// Created by apple on --.// Copyright (c) 年 itcase. All rights reserved.//#import "YYViewController.h"@interface YYViewController ()@property(nonatomic,strong)NSThread *thread;@end@implementation YYViewController- (void)viewDidLoad{[super viewDidLoad];//创建线程self.thread=[[NSThread alloc]initWithTarget:self selector:@selector(test) object:nil];//设置线程的名称[self.thread setName:@"线程A"];}//当手指按下的时候,开启线程-(void)touchesBegan:(NSSet *)touches withEvent:(UIEvent *)event{//开启线程[self.thread start];}-(void)test{//获取线程NSThread *current=[NSThread currentThread];NSLog(@"test---打印线程---%@",self.thread.name);NSLog(@"test---线程开始---%@",current.name);//设置线程阻塞,阻塞秒NSLog(@"接下来,线程阻塞秒");[NSThread sleepForTimeInterval:.];//第二种设置线程阻塞,以当前时间为基准阻塞秒NSLog(@"接下来,线程阻塞秒");NSDate *date=[NSDate dateWithTimeIntervalSinceNow:.];[NSThread sleepUntilDate:date];for (int i=; i<; i++) {NSLog(@"线程--%d--%@",i,current.name);}NSLog(@"test---线程结束---%@",current.name);}@end |
打印查看:
代码示例2(退出线程):
|
1
2
3
4
5
6
7
8
9
10
11
12
13
14
15
16
17
18
19
20
21
22
23
24
25
26
27
28
29
30
31
32
33
34
35
36
37
38
39
40
41
42
43
44
45
46
47
48
49
|
//// YYViewController.m// -NSThread-线程的状态//// Created by apple on --.// Copyright (c) 年 itcase. All rights reserved.//#import "YYViewController.h"@interface YYViewController ()@property(nonatomic,strong)NSThread *thread;@end@implementation YYViewController- (void)viewDidLoad{[super viewDidLoad];//创建线程self.thread=[[NSThread alloc]initWithTarget:self selector:@selector(test) object:nil];//设置线程的名称[self.thread setName:@"线程A"];}//当手指按下的时候,开启线程-(void)touchesBegan:(NSSet *)touches withEvent:(UIEvent *)event{//开启线程[self.thread start];}-(void)test{//获取线程NSThread *current=[NSThread currentThread];NSLog(@"test---打印线程---%@",self.thread.name);NSLog(@"test---线程开始---%@",current.name);//设置线程阻塞,阻塞秒NSLog(@"接下来,线程阻塞秒");[NSThread sleepForTimeInterval:.];//第二种设置线程阻塞,以当前时间为基准阻塞秒NSLog(@"接下来,线程阻塞秒");NSDate *date=[NSDate dateWithTimeIntervalSinceNow:.];[NSThread sleepUntilDate:date];for (int i=; i<; i++) {NSLog(@"线程--%d--%@",i,current.name);if (==i) {//结束线程[NSThread exit];}}NSLog(@"test---线程结束---%@",current.name);}@end |
打印示例:

注意:人死不能复生,线程死了也不能复生(重新开启),如果在线程死亡之后,再次点击屏幕尝试重新开启线程,则程序会挂。

以上内容是小编给大家介绍的IOS多线程开发之线程的状态 ,希望大家喜欢。


