前提
今天在群里聊天的时候有群友问如何捕获错误日志,我说可以自己写,也可以用第三方的比如腾讯的bugly,友盟的错误统计等等,但是那些是别人的东西,作为一个程序员当然是要知其然,并且要知其所以然。因此今天就在此写一下关于捕获错误日志的文章,希望可以给新手指导,大佬请绕行。
首先
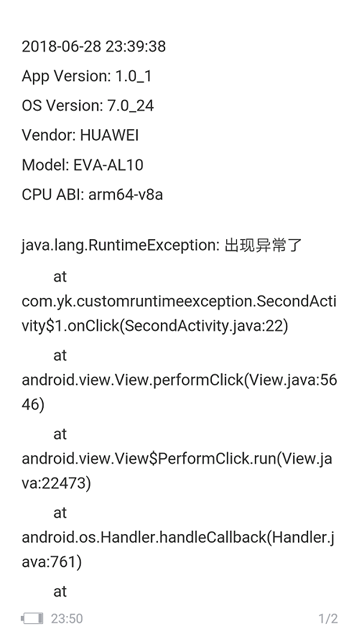
要捕获错误日志当然是调用系统的了,这样最方便,也是大家常用的了,废话不多说,直接上图,no pic say a xx.

错误日志.png
其次
上面的图是日志信息,下面来看看代码如何编写。
捕获错误日志信息类
|
1
2
3
4
5
6
7
8
9
10
11
12
13
14
15
16
17
18
19
20
21
22
23
24
25
26
27
28
29
30
31
32
33
34
35
36
37
38
39
40
41
42
43
44
45
46
47
48
49
50
51
52
53
54
55
56
57
58
59
60
61
62
63
64
65
66
67
68
69
70
71
72
73
74
75
76
77
78
79
80
81
82
83
84
85
86
87
88
89
90
91
92
93
94
95
96
97
98
99
100
101
102
103
104
105
106
107
108
109
110
111
112
113
114
115
116
117
118
119
120
121
122
123
124
125
126
127
128
129
130
131
132
133
134
135
136
137
138
139
140
141
142
143
144
145
146
147
148
|
public class CrashHandler implements UncaughtExceptionHandler { private static final String TAG = "CrashHandler"; private static final boolean DEBUG = true; private static final String FILE_NAME = "crash";// log文件的后缀名private static final String FILE_NAME_SUFFIX = ".txt";private static CrashHandler sInstance = new CrashHandler();// 系统默认的异常处理(默认情况下,系统会终止当前的异常程序)private UncaughtExceptionHandler mDefaultCrashHandler;private Context mContext;//log路径private String mLogPath=null;// 构造方法私有,防止外部构造多个实例,即采用单例模式private CrashHandler() {}public static CrashHandler getInstance() { return sInstance;}// 这里主要完成初始化工作public void init(Context context,String logPath) { // 获取系统默认的异常处理器 mDefaultCrashHandler = Thread.getDefaultUncaughtExceptionHandler(); // 将当前实例设为系统默认的异常处理器 Thread.setDefaultUncaughtExceptionHandler(this); // 获取Context,方便内部使用 mContext = context.getApplicationContext(); this.mLogPath=logPath;}/** * 这个是最关键的函数,当程序中有未被捕获的异常,系统将会自动调用#uncaughtException方法 * thread为出现未捕获异常的线程,ex为未捕获的异常,有了这个ex,我们就可以得到异常信息。 */@Overridepublic void uncaughtException(Thread thread, Throwable ex) { try { // 导出异常信息到SD卡中 dumpExceptionToSDCard(ex); // 这里可以通过网络上传异常信息到服务器,便于开发人员分析日志从而解决bug uploadExceptionToServer(); } catch (IOException e) { e.printStackTrace(); } // 打印出当前调用栈信息 ex.printStackTrace(); // 如果系统提供了默认的异常处理器,则交给系统去结束我们的程序,否则就由我们自己结束自己 if (mDefaultCrashHandler != null) { mDefaultCrashHandler.uncaughtException(thread, ex); } else { Process.killProcess(Process.myPid()); }}/** * 写入SD卡 * * @param ex * @throws IOException */@SuppressLint("SimpleDateFormat")private void dumpExceptionToSDCard(Throwable ex) throws IOException { // 如果SD卡不存在或无法使用,则无法把异常信息写入SD卡 if (!Environment.getExternalStorageState().equals( Environment.MEDIA_MOUNTED)) { if (DEBUG) { Log.e(TAG, "sdcard unmounted,skip dump exception"); return; } } File dir = new File(mLogPath); if (!dir.exists()) { dir.mkdirs(); } long current = System.currentTimeMillis(); String time = new SimpleDateFormat("yyyy-MM-dd HH:mm:ss") .format(new Date(current)); // 以当前时间创建log文件 File file = new File(mLogPath + FILE_NAME + time + FILE_NAME_SUFFIX); try { PrintWriter pw = new PrintWriter(new BufferedWriter(new FileWriter( file))); // 导出发生异常的时间 pw.println(time); // 导出手机信息 dumpPhoneInfo(pw); pw.println(); // 导出异常的调用栈信息 ex.printStackTrace(pw); pw.close(); } catch (Exception e) { Log.e(TAG, "dump crash info failed"); }}private void dumpPhoneInfo(PrintWriter pw) throws NameNotFoundException { // 应用的版本名称和版本号 PackageManager pm = mContext.getPackageManager(); PackageInfo pi = pm.getPackageInfo(mContext.getPackageName(), PackageManager.GET_ACTIVITIES); pw.print("App Version: "); pw.print(pi.versionName); pw.print('_'); pw.println(pi.versionCode); // android版本号 pw.print("OS Version: "); pw.print(Build.VERSION.RELEASE); pw.print("_"); pw.println(Build.VERSION.SDK_INT); // 手机制造商 pw.print("Vendor: "); pw.println(Build.MANUFACTURER); // 手机型号 pw.print("Model: "); pw.println(Build.MODEL); // cpu架构 pw.print("CPU ABI: "); pw.println(Build.CPU_ABI);}/** * 上传到服务器(这里需要实现) */private void uploadExceptionToServer() {}} |
APP(自定义的Application)
|
1
2
3
4
5
6
7
8
9
10
11
12
|
public class APP extends Application { //log路径 private static final String LOG_PATH= Environment .getExternalStorageDirectory().getPath() + File.separator + "Live" + File.separator + "log" + File.separator; @Overridepublic void onCreate() { super.onCreate(); CrashHandler.getInstance().init(this,LOG_PATH);}} |
MainActivity
|
1
2
3
4
5
6
7
8
9
10
11
12
13
14
15
16
17
18
19
20
21
22
23
24
25
26
27
28
29
30
31
32
33
34
35
36
37
38
39
40
41
42
43
44
45
46
47
48
49
50
51
52
|
class MainActivity : AppCompatActivity(){var mBtnSecond:Button?=null;override fun onCreate(savedInstanceState: Bundle?) { super.onCreate(savedInstanceState) setContentView(R.layout.activity_main) checkPermission() initView()}fun initView(){ mBtnSecond=findViewById(R.id.btn_second) mBtnSecond?.setOnClickListener{ var intent= Intent(this,SecondActivity::class.java) startActivity(intent) }}/** * 6.0以下版本(系统自动申请) 不会弹框 * 有些厂商修改了6.0系统申请机制,他们修改成系统自动申请权限了 */private fun checkPermission(){ val permissionItems = ArrayList<PermissionItem>() permissionItems.add(PermissionItem(Manifest.permission.READ_EXTERNAL_STORAGE, "读取空间", R.drawable.permission_ic_phone)) permissionItems.add(PermissionItem(Manifest.permission.WRITE_EXTERNAL_STORAGE,"存储空间",R.drawable.permission_ic_storage)) HiPermission.create(this) .title("亲爱的上帝") .msg("为了能够正常使用,请开启这些权限吧!") .permissions(permissionItems) .style(R.style.PermissionDefaultBlueStyle) .animStyle(R.style.PermissionAnimScale) .checkMutiPermission(object : PermissionCallback { override fun onClose() { Toast.makeText(this@MainActivity,"用户关闭了权限",Toast.LENGTH_LONG).show(); } override fun onFinish() { Toast.makeText(this@MainActivity,"初始化完毕!",Toast.LENGTH_LONG).show(); } override fun onDeny(permission: String, position: Int) { } override fun onGuarantee(permission: String, position: Int) { } })} } |

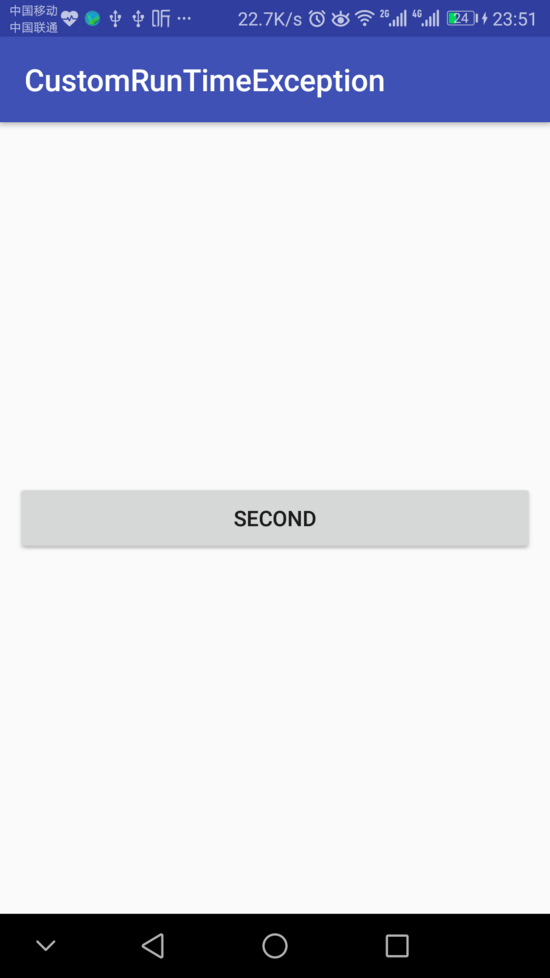
MainActivity.png
CrashActivity
|
1
2
3
4
5
6
7
8
9
10
11
12
13
14
15
16
17
18
19
20
21
22
23
24
25
26
27
28
|
public class CrashActivity extends AppCompatActivity {Button mBtnCrash;@Overrideprotected void onCreate(Bundle savedInstanceState) { super.onCreate(savedInstanceState); setContentView(R.layout.activity_second); mBtnCrash=findViewById(R.id.btn_crash); mBtnCrash.setOnClickListener(new View.OnClickListener() { @Override public void onClick(View v) { Toast.makeText(CrashActivity.this,"出现异常了",Toast.LENGTH_LONG).show(); throw new RuntimeException(toUtf8("出现异常了")); } });}public static String toUtf8(String str) { String result = null; try { result = new String(str.getBytes("UTF-8"), "UTF-8"); } catch (UnsupportedEncodingException e) { e.printStackTrace(); } return result;}} |

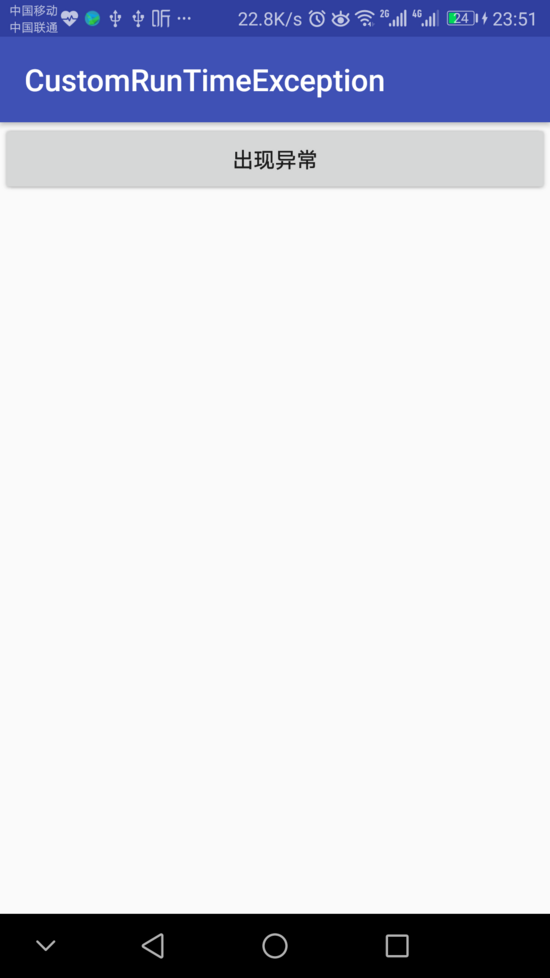
CrashActivity.png
最后
这里需要注意的是,在MainActivity中用的是Kotlin写的权限控制,也就是运行时权限
implementation 'me.weyye.hipermission:library:1.0.7'
要保存日志当然需要SD卡的读写权限。
项目地址:https://gitee.com/1032200695/CrashException
以上就是本文的全部内容,希望对大家的学习有所帮助,也希望大家多多支持服务器之家。
原文链接:https://www.jianshu.com/p/d231e62e4e6c


