avd的全称为:android virtual device,就是android运行的虚拟设备,他是android的模拟器识别。建立的android要运行,必须创建avd,每个avd上可以配置很多的运行项目。创建avd的方法有两种。一是通过eclipse开发环境,二是通过命令行创建。
1.1版本的emulator在设置好环境变量后,直接在命令行中输入 emulator就可以启动了,但是1.5版本中加了个所谓的avd(android virtual device),avd就相当于是一个模拟器的,不过你可以利用avd创建基于不同版本的模拟器,然后使用emulator-avd avdname命令启动不同的模拟器,下面就介绍如何创建avd:
1.查看当前支持版本(在列出的版本中我们需要记住id值,这个值在第2步中使用):
android list targets
2.创建avd(最后的2表示创建1.5版本的avd):
android create avd –n avdname –t 2
3.查看是否创建成功(如果成功会显示刚才我们创建的avd信息):
android list avd
4.启动模拟器:
emulator -avd avdname
5.选择启动的皮肤(横向的模拟器)
emulator -avd avdname -skin hvga-l
6.按ctrl+f11,可以直接改变模拟器的横纵摆放。
7. 实际创建avd的过程以及错误处理方法
首先创建一个avd,使用命令行方式创建,例如:
d:/android/android-sdk-windows-1.5_r3/tools>android create avd -n avd15 -t 2
android 1.5 is a basic android platform.
do you wish to create a custom hardware profile [no]
created avd ‘avd15′ based on android 1.5
用android list avd命令列出当前的avd:
d:/android/android-sdk-windows-1.5_r3/tools>android list avd
available android virtual devices:
name: avd15
path: d:/我的文档/.android/avd/avd15.avd
target: android 1.5 (api level 3)
skin: hvga
注意上面的avd的目录,把上面目录中的/.android的文件夹拷贝到c:/documents and settings/administrator,因为我用的是administrator登陆的,所以拷贝到这个目录下,实际应该拷贝到相应的c: /documents and settings/用户名 下,注意用户名要是英文名。
这时候如果用emluator -avd avd15,会得到如下的错误:
emulator: error: no search paths found in this avd's configuration.
weird, the avd's config.ini file is malformed. try re-creating it.
这个错误的原因是c:/documents and settings/administrator/.android/avd目录中的ini文件中包含了中文字符-我的文档,所以要修改这个ini文件 -avd15.ini,修改path为path=c:/documents and settings/administrator/.android/avd/avd15.avd。
这时候,就可以启动emulator了:
d:/android/android-sdk-windows-1.5_r3/tools>emulator -avd avd15
emulator: emulator window was out of view and was recentred
可以看到google的android模拟器了。
运行eclipse中的工程,选择andorid project.会弹出android avd error对话框,选择yes,

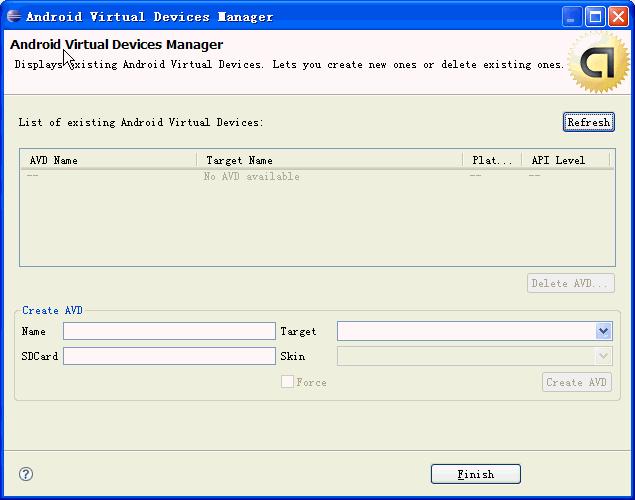
然后出现android virtual device manager:

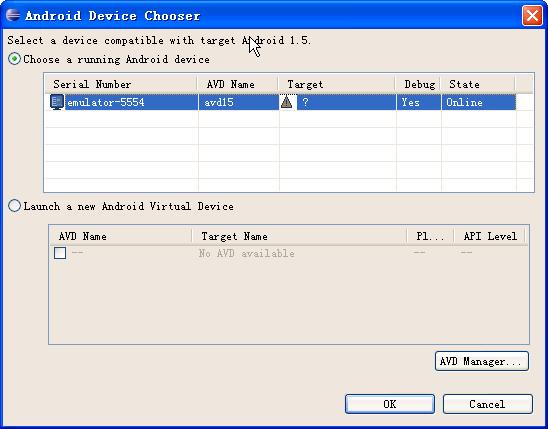
直接点击finish,然后出现 android device chooser对话框:

当前运行的emulator会显示出来,选中它,然后ok.
此时,在emulator中可以显示工程的应用程序。
总结一下:
先启动emulator,然后再运行eclipse中的工程。


