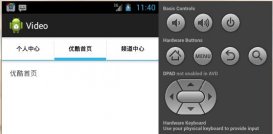
大家好,记得上次我带着大家一起实现了一个类似与淘宝客户端中带有的图片滚动播放器的效果,但是在做完了之后,发现忘了加入图片自动播放的功能(或许是我有意忘记加的.....),结果图片只能通过手指滑动来播放。于是今天我将再次带领大家,添加上之前遗漏的功能,让我们的图片播放器更加完善。
这次的程序开发将完全基于上一次的代码,如果有朋友还未看过上篇文章,请先阅读Android实现图片滚动和页签控件功能的实现代码。
既然是要加入自动播放的功能,那么就有一个非常重要的问题需要考虑。如果当前已经滚动到了最后一张图片,应该怎么办?由于我们目前的实现方案是,所有的图片都按照布局文件里面定义的顺序横向排列,然后通过偏移第一个图片的leftMargin,来决定显示哪一张图片。因此当图片滚动在最后一张时,我们可以让程序迅速地回滚到第一张图片,然后从头开始滚动。这种效果和淘宝客户端是有一定差异的(淘宝并没有回滚机制,而是很自然地由最后一张图片滚动到第一张图片),我也研究过淘宝图片滚动器的实现方法,并不难实现。但是由于我们是基于上次的代码进行开发的,方案上无法实现和淘宝客户端一样的效果,因此这里也就不追求和它完全一致了,各有风格也挺好的。
好了,现在开始实现功能,首先是打开SlidingSwitcherView,在里面加入一个新的AsyncTask,专门用于回滚到第一张图片:
|
1
2
3
4
5
6
7
8
9
10
11
12
13
14
15
16
17
18
19
20
21
22
23
24
25
26
27
|
class ScrollToFirstItemTask extends AsyncTask<Integer, Integer, Integer> { @Override protected Integer doInBackground(Integer... speed) { int leftMargin = firstItemParams.leftMargin; while (true) { leftMargin = leftMargin + speed[0]; // 当leftMargin大于0时,说明已经滚动到了第一个元素,跳出循环 if (leftMargin > 0) { leftMargin = 0; break; } publishProgress(leftMargin); sleep(20); } return leftMargin; } @Override protected void onProgressUpdate(Integer... leftMargin) { firstItemParams.leftMargin = leftMargin[0]; firstItem.setLayoutParams(firstItemParams); } @Override protected void onPostExecute(Integer leftMargin) { firstItemParams.leftMargin = leftMargin; firstItem.setLayoutParams(firstItemParams); } } |
然后在SlidingSwitcherView里面加入一个新的方法:
|
1
2
3
4
5
6
|
/** * 滚动到第一个元素。 */public void scrollToFirstItem() { new ScrollToFirstItemTask().execute(20 * itemsCount); } |
这个方法非常简单,就是启动了我们新增的ScrollToFirstItemTask,滚动速度设定为20 * itemsCount,这样当我们需要滚动的图片数量越多,回滚速度就会越快。定义好这个方法后,只要在任意地方调用scrollToFirstItem这个方法,就可以立刻从当前图片回滚到第一张图片了。
OK,然后我们要定义一个方法用于启动自动播放功能。仍然是在SlidingSwitcherView中新增如下代码:
|
1
2
3
4
5
6
7
8
9
10
11
12
13
14
15
16
17
18
19
20
21
22
23
24
25
26
27
28
29
30
31
32
33
|
/** * 用于在定时器当中操作UI界面。 */private Handler handler = new Handler(); /** * 开启图片自动播放功能,当滚动到最后一张图片的时候,会自动回滚到第一张图片。 */public void startAutoPlay() { new Timer().scheduleAtFixedRate(new TimerTask() { @Override public void run() { if (currentItemIndex == itemsCount - 1) { currentItemIndex = 0; handler.post(new Runnable() { @Override public void run() { scrollToFirstItem(); refreshDotsLayout(); } }); } else { currentItemIndex++; handler.post(new Runnable() { @Override public void run() { scrollToNext(); refreshDotsLayout(); } }); } } }, 3000, 3000); } |
我们可以看到,这个方法里启用了一个定时器,每隔三秒就会执行一次。然后在定时器的执行逻辑里面进行判断当前图片是否是最后一张,如果不是最后一张就滚动到下一张图片,如果是最后一张就回滚到第一张图片。其中需要注意,定时器中的代码是在子线程中运行的,而滚动图片操作和更新页签操作都是UI操作,因此需要放到Handler中去执行。
之后只要在Activity创建的时候去调用SlidingSwitcherView的startAutoPlay方法,自动播放功能就实现了!!
结束了?Naive!! 如果就这么结束了,怎么对得起大家的期待,如此简单的功能还要用一篇文章来讲简直是弱爆了。
接下来才是今天的重点,我们要使用自定义属性来启用自动播放功能,这样才能让你更加接近高手,才能让你更加玩转Android。
那我们继续,在res/values目录下新建一个attrs.xml文件,里面加入代码:
|
1
2
3
4
5
6
7
|
<?xml version="1.0" encoding="UTF-8"?> <resources> <attr name="auto_play" forMymat="boolean" /> <declare-styleable name="SlidingSwitcherView"> <attr name="auto_play" /> </declare-styleable> </resources> |
其中,auto_play是我们将要使用的属性名,格式是布尔型。SlidingSwitcherView这个值可以随意,主要在代码中需要引用相应的id。
然后重写SlidingSwitcherView的构造函数,在里面加入从布局文件中获取自定义属性的代码:
|
1
2
3
4
5
6
7
8
9
|
public SlidingSwitcherView(Context context, AttributeSet attrs) { super(context, attrs); TypedArray a = context.obtainStyledAttributes(attrs, R.styleable.SlidingSwitcherView); boolean isAutoPlay = a.getBoolean(R.styleable.SlidingSwitcherView_auto_play, false); if (isAutoPlay) { startAutoPlay(); } a.recycle(); } |
可以看到,我们在构造函数中去获取auto_play的值,如果为true,就调用startAutoPlay方法,从而启用了自动播放的功能。
接下来就是见证奇迹的时刻!让我们打开activity_main.xml,在里面加入两行关键性代码。在最外层的LinearLayout加入在我们自定义的com.example.viewswitcher.SlidingSwitcherView加入myattr:auto_play="true"。完整XML代码如下:
|
1
2
3
4
5
6
7
8
9
10
11
12
13
14
15
16
17
18
19
20
21
22
23
24
25
26
27
28
29
30
31
32
33
34
35
36
37
38
39
40
41
42
43
|
<LinearLayout xmlns:android="http://schemas.android.com/apk/res/android" xmlns:tools="http://schemas.android.com/tools" xmlns:myattr="http://schemas.android.com/apk/res/com.example.viewswitcher" android:layout_width="fill_parent" android:layout_height="fill_parent" android:orientation="vertical" tools:context=".MainActivity" > <com.example.viewswitcher.SlidingSwitcherView android:id="@+id/slidingLayout" myattr:auto_play="true" android:layout_width="fill_parent" android:layout_height="100dip" > <LinearLayout android:layout_width="fill_parent" android:layout_height="fill_parent" android:orientation="horizontal" > <Button android:layout_width="fill_parent" android:layout_height="fill_parent" android:background="@drawable/image1" /> <Button android:layout_width="fill_parent" android:layout_height="fill_parent" android:background="@drawable/image2" /> <Button android:layout_width="fill_parent" android:layout_height="fill_parent" android:background="@drawable/image3" /> <Button android:layout_width="fill_parent" android:layout_height="fill_parent" android:background="@drawable/image4" /> </LinearLayout> <LinearLayout android:layout_width="60dip" android:layout_height="20dip" android:layout_alignParentBottom="true" android:layout_alignParentRight="true" android:layout_margin="15dip" android:orientation="horizontal" > </LinearLayout> </com.example.viewswitcher.SlidingSwitcherView> </LinearLayout> |
也就是说,我们只需要通过设定myattr:auto_play是等于true还是false,就可以决定是否启用自动播放功能,非常简单方便。
好了,今天的讲解到此结束,有疑问的朋友请在下面留言。
以上就是这篇文章的全部内容了,希望本文的内容对大家的学习或者工作具有一定的参考学习价值,如果有疑问大家可以留言交流,谢谢大家对服务器之家的支持。
原文链接:https://blog.csdn.net/guolin_blog/article/details/8796877


