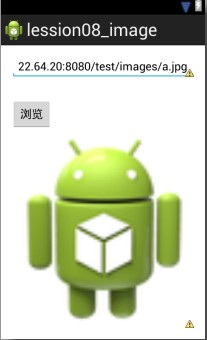
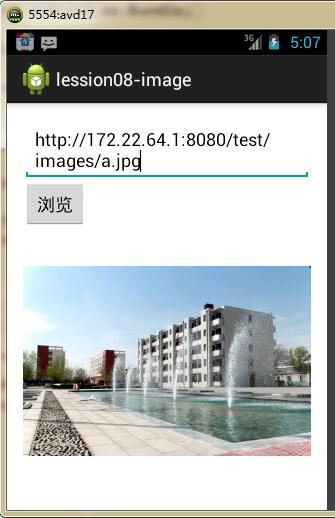
本文实例讲述了android互联网访问图片并在客户端显示的方法。分享给大家供大家参考,具体如下:
1、布局界面
|
1
2
3
4
5
6
7
8
9
10
11
12
13
14
15
16
17
18
19
20
21
22
23
24
25
26
27
28
29
30
31
32
33
34
35
36
37
38
39
40
|
<relativelayout xmlns:android="http://schemas.android.com/apk/res/android" xmlns:tools="http://schemas.android.com/tools" android:layout_width="match_parent" android:layout_height="match_parent" android:paddingbottom="@dimen/activity_vertical_margin" android:paddingleft="@dimen/activity_horizontal_margin" android:paddingright="@dimen/activity_horizontal_margin" android:paddingtop="@dimen/activity_vertical_margin" tools:context=".mainactivity" > <edittext android:id="@+id/url_text" android:layout_width="wrap_content" android:layout_height="wrap_content" android:layout_alignparentleft="true" android:layout_alignparentright="true" android:layout_alignparenttop="true" android:ems="10" android:inputtype="textpostaladdress" android:text="@string/url_text" > <requestfocus /> </edittext> <button android:id="@+id/btn_text" android:layout_width="wrap_content" android:layout_height="wrap_content" android:layout_alignleft="@+id/url_text" android:layout_below="@+id/url_text" android:layout_margintop="32dp" android:onclick="sendhttp" android:text="@string/btn_text" /> <imageview android:id="@+id/iv_ie" android:layout_width="wrap_content" android:layout_height="wrap_content" android:layout_alignparentbottom="true" android:layout_alignparentleft="true" android:layout_alignright="@+id/url_text" android:layout_below="@+id/btn_text" android:src="@drawable/ic_launcher" /></relativelayout> |

2、封转的一些类
url的封装:
|
1
2
3
4
5
6
7
8
9
10
11
12
13
14
15
16
17
18
19
20
21
22
23
24
25
26
27
28
29
30
31
32
33
34
35
36
37
38
39
40
41
42
43
44
45
46
47
48
49
50
51
52
53
54
55
56
57
58
59
60
61
62
63
|
package com.example.lession08_code.utis;import java.io.inputstream;import java.net.httpurlconnection;import java.net.url;import android.graphics.bitmap;import android.graphics.bitmapfactory;public class httputils { public static string sendget(string path){ string content=null; try{ //设置访问的url url url=new url(path); //打开请求 httpurlconnection httpurlconnection=(httpurlconnection) url.openconnection(); //设置请求的信息 httpurlconnection.setrequestmethod("get"); //设置请求是否超时 httpurlconnection.setconnecttimeout(5000); //判断服务器是否响应成功 if(httpurlconnection.getresponsecode()==200){ //获取响应的输入流对象 inputstream is=httpurlconnection.getinputstream(); byte data[]=streamtools.istodata(is); //把转换成字符串 content=new string(data); //内容编码方式 if(content.contains("gb2312")){ content=new string(data,"gb2312"); } } //断开连接 httpurlconnection.disconnect(); }catch(exception e){ e.printstacktrace(); } return content; } public static bitmap sendgets(string path){ bitmap bitmap=null; try{ //设置访问的url url url=new url(path); //打开请求 httpurlconnection httpurlconnection=(httpurlconnection) url.openconnection(); //设置请求的信息 httpurlconnection.setrequestmethod("get"); //设置请求是否超时 httpurlconnection.setconnecttimeout(5000); //判断服务器是否响应成功 if(httpurlconnection.getresponsecode()==200){ //获取响应的输入流对象 inputstream is=httpurlconnection.getinputstream(); //直接把is的流转换成bitmap对象 bitmap=bitmapfactory.decodestream(is); } //断开连接 httpurlconnection.disconnect(); }catch(exception e){ e.printstacktrace(); } return bitmap; }} |
判断网络是否连接的封装类
|
1
2
3
4
5
6
7
8
9
10
11
12
13
14
15
16
17
18
19
20
21
22
23
24
25
26
27
28
29
30
31
32
33
34
35
36
37
38
39
40
41
42
43
44
45
46
47
48
49
50
51
52
53
54
55
56
57
58
59
60
|
package com.example.lession08_code.utis;import android.app.alertdialog;import android.content.componentname;import android.content.context;import android.content.dialoginterface;import android.content.intent;import android.net.connectivitymanager;import android.net.networkinfo;import android.widget.toast;public class networkutils { private context context; // 网路链接管理对象 public connectivitymanager connectivitymanager; public networkutils(context context) { this.context = context; // 获取网络链接的对象 connectivitymanager = (connectivitymanager) context .getsystemservice(context.connectivity_service); } public boolean setactivenetwork() { boolean flag=false; // 获取可用的网络链接对象 networkinfo networkinfo = connectivitymanager.getactivenetworkinfo(); if (networkinfo == null) { new alertdialog.builder(context) .settitle("网络不可用") .setmessage("可以设置网络?") .setpositivebutton("确认", new dialoginterface.onclicklistener() { @override public void onclick(dialoginterface dialog, int which) { toast.maketext(context, "点击确认", toast.length_long).show(); // 声明意图 intent intent = new intent(); intent.setaction(intent.action_main); intent.addcategory("android.intent.category.launcher"); intent.setcomponent(new componentname( "com.android.settings", "com.android.settings.settings")); intent.setflags(0x10200000); // 执行意图 context.startactivity(intent); } }) .setnegativebutton("取消", new dialoginterface.onclicklistener() { @override public void onclick(dialoginterface dialog, int which) { } }).show();// 必须.show(); } if(networkinfo!=null){ flag=true; } return flag; }} |
输出流的封装类
|
1
2
3
4
5
6
7
8
9
10
11
12
13
14
15
16
17
18
19
20
|
package com.example.lession08_code.utis;import java.io.bytearrayoutputstream;import java.io.ioexception;import java.io.inputstream;public class streamtools { public static byte[] istodata(inputstream is) throws ioexception{ //字节输出流 bytearrayoutputstream bops=new bytearrayoutputstream(); //读取数据的缓冲区 byte buffer[]=new byte[1024]; //读取记录的长度 int len=0; while((len=is.read(buffer))!=-1){ bops.write(buffer, 0, len); } //把读取的内容转换成byte数组 byte data[]=bops.tobytearray(); return data; }} |
注意:在这里还需要加权限问题
|
1
2
|
<uses-permission android:name="android.permission.access_network_state"/><uses-permission android:name="android.permission.internet"/> |

希望本文所述对大家android程序设计有所帮助。


