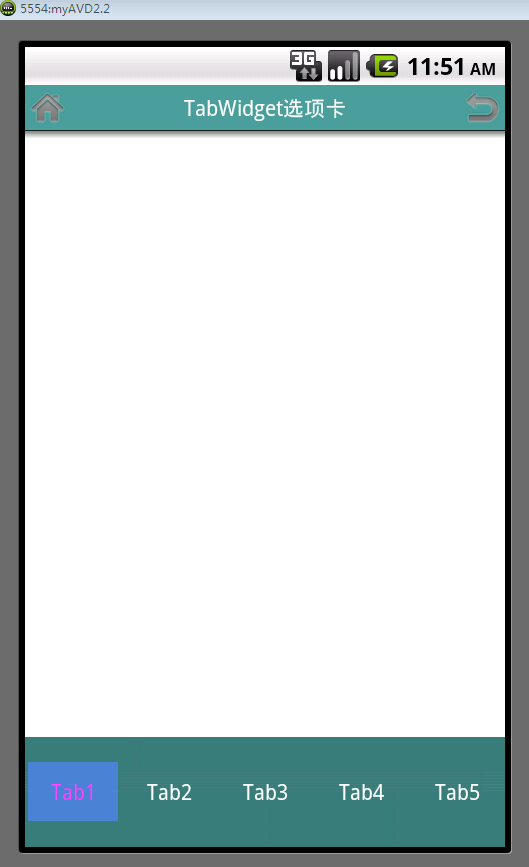
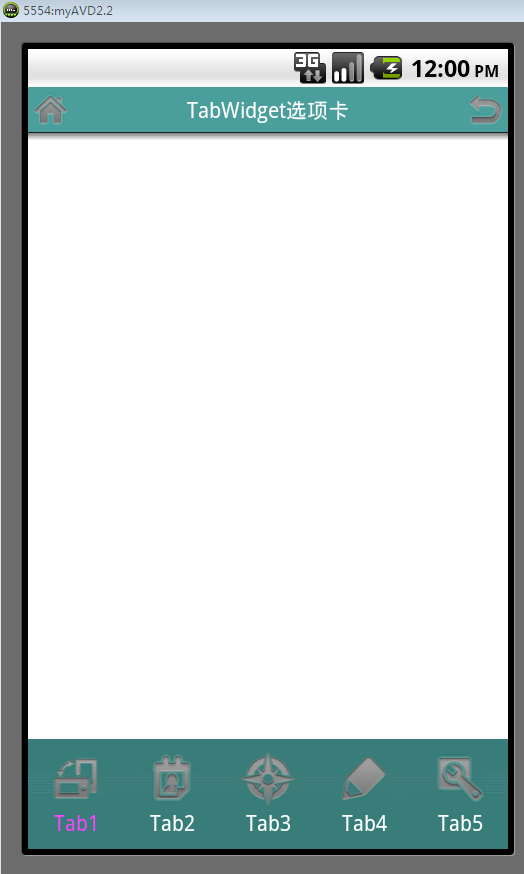
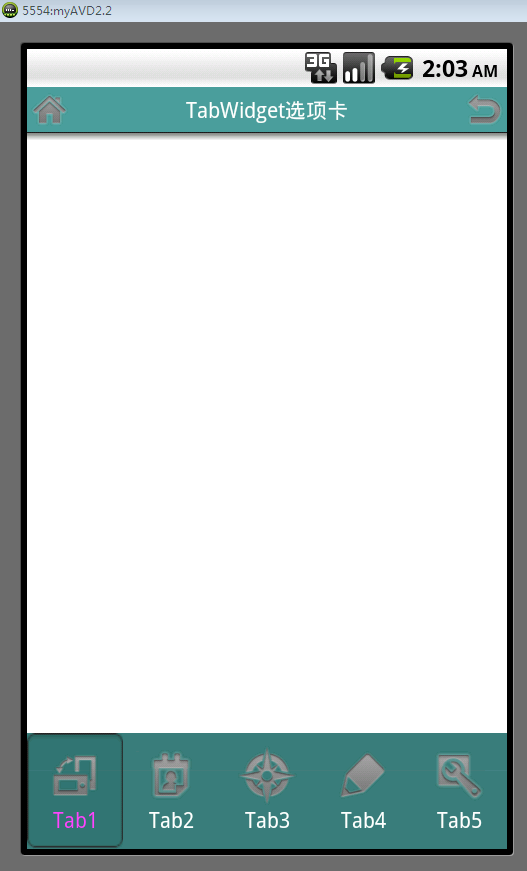
本文实例讲述了android编程之tabwidget选项卡用法。分享给大家供大家参考,具体如下:
1 概览
tabwidget与tabhost。tab组件一般包括tabhost和tabwidget、framelayout,且tabwidget、framelayout属于tabhost。
是否继承tabactivity的问题
实现步骤。两种实现方式,一种是将每个tab的布局嵌在tabhost中的framelayout中,每个tab的内容布局与显示都在framelayout中进行,缺点是布局会显得很臃肿;一种是每个tab从framelayout中独立出来,以activity呈现,这样使得每个tab有单独的布局。
2 效果图


widget在顶部的情形:

3 主要布局
3.1 tabmain布局
方式一:
|
1
2
3
4
5
6
7
8
9
10
11
12
13
14
15
16
17
18
19
20
21
22
23
24
25
26
27
28
29
30
31
32
33
34
35
36
37
38
39
40
41
42
43
44
45
46
47
48
49
50
51
52
53
54
55
56
57
58
59
60
61
62
63
64
65
66
67
68
69
70
71
72
73
74
75
76
77
78
79
|
<?xml version="1.0" encoding="utf-8"?><tabhost xmlns:android="http://schemas.android.com/apk/res/android" android:id="@+id/tabhost" android:layout_width="match_parent" android:layout_height="match_parent" android:orientation="vertical" > <relativelayout android:layout_width="fill_parent" android:layout_height="fill_parent" android:orientation="vertical" > <tabwidget android:id="@android:id/tabs" android:layout_width="fill_parent" android:layout_height="60dip" android:layout_alignparentbottom="true" android:background="#424242" > </tabwidget> <framelayout android:id="@android:id/tabcontent" android:layout_width="fill_parent" android:layout_height="fill_parent" > <linearlayout android:id="@+id/theme" android:layout_width="fill_parent" android:layout_height="fill_parent" android:orientation="vertical" > <textview android:id="@+id/theme_title" android:layout_width="wrap_content" android:layout_height="wrap_content" android:text="tab1" /> </linearlayout> <linearlayout android:id="@+id/wallpaper" android:layout_width="fill_parent" android:layout_height="fill_parent" android:orientation="vertical" > <textview android:id="@+id/wallpaper_title" android:layout_width="wrap_content" android:layout_height="wrap_content" android:text="tab2" /> </linearlayout> <linearlayout android:id="@+id/iconbg" android:layout_width="fill_parent" android:layout_height="fill_parent" android:orientation="vertical" > <textview android:id="@+id/iconbg_title" android:layout_width="wrap_content" android:layout_height="wrap_content" android:text="tab3" /> </linearlayout> <linearlayout android:id="@+id/screenlock" android:layout_width="fill_parent" android:layout_height="fill_parent" android:orientation="vertical" > <textview android:id="@+id/screenlock_title" android:layout_width="wrap_content" android:layout_height="wrap_content" android:text="tab4" /> </linearlayout> <linearlayout android:id="@+id/effect" android:layout_width="fill_parent" android:layout_height="fill_parent" android:orientation="vertical" > <textview android:id="@+id/effect_title" android:layout_width="wrap_content" android:layout_height="wrap_content" android:text="tab5" /> </linearlayout> </framelayout> </relativelayout></tabhost> |
方式二:
|
1
2
3
4
5
6
7
8
9
10
11
12
13
14
15
16
17
18
19
20
21
22
23
24
|
<?xml version="1.0" encoding="utf-8"?> <tabhost xmlns:android="http://schemas.android.com/apk/res/android" android:id="@android:id/tabhost" android:layout_width="fill_parent" android:layout_height="fill_parent" android:background="@color/wcity_normal_bg" > <linearlayout android:layout_width="fill_parent" android:layout_height="fill_parent" android:orientation="vertical" > <framelayout android:id="@android:id/tabcontent" android:layout_width="fill_parent" android:layout_height="fill_parent" android:layout_weight="1" > </framelayout> <tabwidget android:id="@android:id/tabs" android:layout_width="fill_parent" android:layout_height="wrap_content" android:background="@drawable/tab" /> </linearlayout></tabhost> |
3.2 tabitem布局
这一部分中方式一与方式二没有什么区别,只有表示形式的区别。比如,根据需求,tab可以
只以文字呈现,
可以只以图片呈现,
可以同时有图片和文字
其中有文字和图片的布局如下:
|
1
2
3
4
5
6
7
8
9
10
11
12
13
14
15
16
17
18
19
20
21
22
23
|
<?xml version="1.0" encoding="utf-8"?><linearlayout xmlns:android="http://schemas.android.com/apk/res/android" android:layout_width="fill_parent" android:layout_height="fill_parent" android:gravity="center_horizontal|center_vertical" android:orientation="vertical" > <linearlayout android:id="@+id/tabitem android:layout_width="wrap_content" android:layout_height="wrap_content" android:background="@drawable/bg_ispressed" android:gravity="center_horizontal|center_vertical" android:orientation="vertical" > <imageview android:id="@+id/icon" android:layout_width="wrap_content" android:layout_height="wrap_content" /> <textview android:id="@+id/name" android:layout_width="wrap_content" android:layout_height="wrap_content" /> </linearlayout></linearlayout> |
3.3点击状态
tab键点击后状态的问题,如果点击后,没有状态提示对用户是不友好的。点击状态的实现就是对tabitem布局的android:background进行设置。例如:
上述tabitem中linearlayout的android:background设置的属性:@drawable/bg_ispressed
其中bg_ispressed文件如下:
|
1
2
3
4
|
<?xml version="1.0" encoding="utf-8"?> <selector xmlns:android="http://schemas.android.com/apk/res/android"> <item android:drawable="@drawable/tab_selected_bg" android:state_pressed="false" android:state_selected="true"/> </selector> |
tab_selected_bg即是点击后变换的图片效果。
3.4 关于tab位置的问题
tab标签显示在顶部还是底部也是经常会遇到的问题。
通常tabmain布局中tabwidget在framelayout上面默认就是显示在顶部了,如果改成在底部显示,首先会想到的是直接调换顺序,将tabwidget放在framelayout后面。
情形一:
问题来了,tab栏直接消失掉(我试过),后来解决方法是:framelayout中添加属性:android:layout_weight="1"。这种情形可以解决的条件是,tabwidget和framelayout被嵌套在linearlayout布局中,如果是其他则行不通。
情形二:
tabwidget与framelayout顺序任意,在tabwidget中添加属性
当然,这种情形适合tabwidget和framelayout被嵌套在relativelayout布局中,同样的,如果是其他则行不通。
注:以上两种情形也不是绝对的,只实践过以上两种情形,至于其他布局就不清楚了,具体问题具体分析吧。
4 继承tabactivity?
4.1 继承tabactivity与不继承的问题
继承不继承tabactivity,看自己习惯了,都能正确实现,没什么区别,至于在代码方面唯一的区别在于:
不继承tabactivity而继承activity的需要在代码中加入:
4.2 主要代码
直接继承自activity的代码
|
1
2
3
4
5
6
7
8
9
10
11
12
13
14
15
16
17
18
19
20
21
22
23
24
25
26
27
28
29
30
31
32
33
34
35
36
37
38
39
40
41
42
43
44
|
import java.util.arraylist;import java.util.list;import android.app.activity;import android.content.context;import android.os.bundle;import android.view.layoutinflater;import android.view.view;import android.widget.imageview;import android.widget.linearlayout;import android.widget.tabhost;import android.widget.textview;public class tabdesignactivity extends activity{ private context mcontex = this; private tabhost mtabhost; private string tab1 = "tab1"; private string tab2 = "tab2"; private string tab3 = "tab3"; private string tab4 = "tab4"; private string tab5 = "tab5"; private list<linearlayout> menuitemlist; @override protected void oncreate(bundle savedinstancestate) { // todo auto-generated method stub super.oncreate(savedinstancestate); setcontentview(r.layout.tab_main); menuitemlist = new arraylist<linearlayout>(); mtabhost = (tabhost) findviewbyid(r.id.tabhost); mtabhost.setup(); mtabhost.addtab(mtabhost.newtabspec("tab1").setindicator(getmenuitem(r.drawable.tab1_ispressed, tab1)).setcontent(r.id.tab1)); mtabhost.addtab(mtabhost.newtabspec("tab2").setindicator(getmenuitem(r.drawable.tab2_ispressed, tab2)).setcontent(r.id.tab2)); mtabhost.addtab(mtabhost.newtabspec("tab3").setindicator(getmenuitem(r.drawable.tab3_ispressed, tab3)).setcontent(r.id.tab3)); mtabhost.addtab(mtabhost.newtabspec("tab4").setindicator(getmenuitem(r.drawable.tab4_ispressed, tab4)).setcontent(r.id.tab4)); mtabhost.addtab(mtabhost.newtabspec("tab5").setindicator(getmenuitem(r.drawable.tab5_ispressed, tab5)).setcontent(r.id.tab5)); } public view getmenuitem(int imgid, string textid){ linearlayout ll = (linearlayout)layoutinflater.from(mcontex).inflate(r.layout.tab_item, null); imageview imgview = (imageview)ll.findviewbyid(r.id.icon); imgview.setbackgroundresource(imgid); textview textview = (textview)ll.findviewbyid(r.id.name); textview.settext(textid); menuitemlist.add(ll); return ll; }} |
继承自tabactivity的实现
|
1
2
3
4
5
6
7
8
9
10
11
12
13
14
15
16
17
18
19
20
21
22
23
24
25
26
27
28
29
30
31
32
33
34
35
36
37
38
39
40
41
42
43
44
45
46
47
48
49
50
51
52
53
54
55
56
57
58
59
60
61
62
63
64
65
66
67
68
69
70
71
72
73
74
75
76
77
78
79
80
81
82
83
84
85
86
87
88
89
|
/** * @author aaron */package com.aaron.activity;import java.util.arraylist;import java.util.list;import android.annotation.suppresslint;import android.app.tabactivity;import android.content.context;import android.content.intent;import android.os.bundle;import android.view.layoutinflater;import android.widget.imageview;import android.widget.linearlayout;import android.widget.tabhost;import android.widget.textview;import android.widget.tabhost.tabspec;import com.aaron.util.r;/** * @author aaron * */public class tabwidget extends tabactivity {// 声明tabhost对象 private tabhost mtabhost; private layoutinflater minflater; private list<textview> mtext; private list<imageview> mimage; private list<tabspec> mtabspec; private list<linearlayout> linearlayout; private list<intent> intent; private context mcontext; private static final string[] tabtitle = { "tab1", "tab2", "tab3", "tab4","tab5"}; private static final int[] tabimage = { r.drawable.main1, r.drawable.main2, r.drawable.main3, r.drawable.main4,r.drawable.main5}; /** called when the activity is first created. */ @override public void oncreate(bundle savedinstancestate) { super.oncreate(savedinstancestate); setcontentview(r.layout.tab_main); mcontext = this; minflater = layoutinflater.from(this); mtabhost = (tabhost) findviewbyid(android.r.id.tabhost); mtabspec = new arraylist<tabspec>(); linearlayout = new arraylist<linearlayout>(); mtext = new arraylist<textview>(); intent = new arraylist<intent>(); //**************************************************************** //若是引用有图片的布局 mimage = new arraylist<imageview>(); //**************************************************************** creattab(); } @suppresslint("newapi") public void creattab() { for (int i = 0; i < tabtitle.length; i++) { mtabspec.add(mtabhost.newtabspec(tabtitle[i])); //**************************************************************** //选择使用哪种布局 //**************************************************************** linearlayout.add((linearlayout) minflater.inflate(r.layout.tabwidget2, null)); mtext.add((textview) linearlayout.get(i).findviewbyid(r.id.tab_text_name)); mtext.get(i).settext(tabtitle[i]); //**************************************************************** //若是引用有图片的布局依次添加进图片 mimage.add((imageview) linearlayout.get(i).findviewbyid(r.id.tab_image_name)); mimage.get(i).setimageresource(tabimage[i]); //**************************************************************** // 依次加入每个tab的activity switch (i) { case 0: intent.add(new intent().setclass(tabwidget.this, udoactivity.class)); break; case 1: intent.add(new intent().setclass(tabwidget.this, udoactivity.class)); break; case 2: intent.add(new intent().setclass(tabwidget.this, udoactivity.class)); break; case 3: intent.add(new intent().setclass(tabwidget.this, udoactivity.class)); break; case 4: intent.add(new intent().setclass(tabwidget.this, udoactivity.class)); break; } mtabspec.get(i).setindicator(linearlayout.get(i)); mtabspec.get(i).setcontent(intent.get(i)); mtabhost.addtab(mtabspec.get(i)); }} |
4.3 关键代码详解
1)mtabhost.newtabspec("tab1")用来new一个tab,同时标记这个tab的tag。
2)setcontent()用来处理点击这个tab后的动作,可以是这个activity下的一个组件,如setcontent(r.id.tab1),也可以是一个intent,比如:setcontent(newintent(this, subtab.class))。
3)setindicator()用来标记这个tab的名字,可以是setindicator("tab1"),也可以包含其他的属性,如图片:setindicator( "名称",getresources().getdrawable(android.r.tab1))。
4)tabs.addtab(spec)将这个tab添加进tabhost。
5)getmenuitem(r.drawable.tab_ispressed,tab1)设置其中一tab被按下的状态改变,r.drawable.tab_ispressed布局如下:
|
1
2
3
4
5
|
<?xml version="1.0" encoding="utf-8"?><selector xmlns:android="http://schemas.android.com/apk/res/android"> <item android:drawable="@drawable/tab1_menu_effect_selected" android:state_pressed="false" android:state_selected="true"/> <item android:drawable="@drawable/tab1_menu_effect"/></selector> |
希望本文所述对大家android程序设计有所帮助。


