本文实例为大家分享了js canvas随机粒子特效的具体代码,供大家参考,具体内容如下
前言
canvas实现前端的特效美术
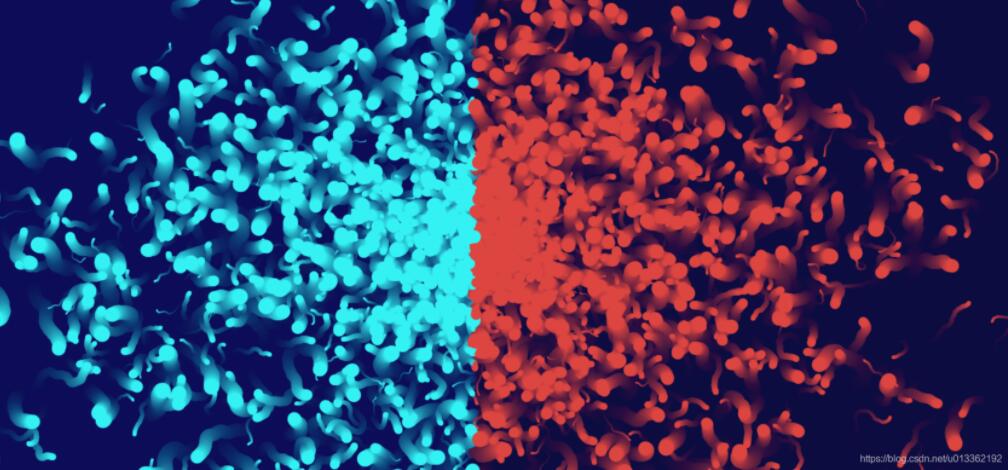
结果展示
代码
html
|
1
2
3
4
5
6
7
8
9
10
11
12
|
<!DOCTYPE html><html lang="en"><head> <meta charset="UTF-8"> <meta http-equiv="X-UA-Compatible" content="IE=edge"> <meta name="viewport" content="width=device-width, initial-scale=1.0"> <title>Document</title></head><body> <script src="./main.js"></script></body></html> |
main.js
|
1
2
3
4
5
6
7
8
9
10
11
12
13
14
15
16
17
18
19
20
21
22
23
24
25
26
27
28
29
30
31
32
33
34
35
36
37
38
39
40
41
42
43
44
45
46
47
48
49
50
51
52
53
54
55
56
57
58
59
60
61
62
63
64
65
66
67
68
69
70
71
72
73
74
75
76
77
78
79
80
81
82
83
84
85
86
87
88
89
90
91
92
93
94
95
96
97
98
99
100
101
102
103
104
105
106
107
108
109
110
111
112
113
114
115
116
117
118
119
120
121
122
123
124
125
126
127
128
129
130
131
132
133
134
135
136
137
138
139
140
141
142
143
144
145
146
147
148
149
150
151
|
/* *粒子化类构造 *类功能: *1.初始化。创建画布,规定粒子属性等; *2.创建图像并且进行绘制 *3.区域颜色定义 *4.粒子移动和偏射角度*/// 生成粒子let Particle = function(context, options){ let random = Math.random(); this.context = context; // 在画布里的x坐标 this.x = options.x; // 在画布里的y坐标 this.y = options.y; // 取随机数的1/2,对角度进行随机放大 this.s = 0.5 + Math.random(); // this.s = 1 + Math.random(); // 粒子运动的变化角度 this.a = 0; // 宽度 this.w = window.innerWidth; // 高度 this.h = window.innerHeight; // 半径 this.radius = options.radius || 0.5 + Math.random() * 10; // 颜色 this.color = options.color || "#E5483F"; // console.log(this.color); // 指定3秒后调用; // 如果粒子的半径大于0.5,加入新的粒子。 setTimeout(function(){ if(this.radius > 0.5){ particles.push( new Particle(context, { x: this.x, y: this.y, color: this.radius / 2 > 1 ? "#d6433b" : "#FFFFFF", radius: this.radius / 2.2 }) ); } }.call(Particle), 3000);};// 渲染图像Particle.prototype.render = function() { //从(0,0)开始新的路径; this.context.beginPath(); // 创建曲线弧 this.context.arc(this.x, this.y, this.radius, 0, 2 * Math.PI); // 绘图的线条宽度 this.context.lineWidth = 2; //颜色填充 this.context.fillStyle = this.color; // 填充当前图像的路径 this.context.fill(); // 返回初始点,并且绘制线条到初始位置 this.context.closePath();};Particle.prototype.swapColor = function() { // 排除白色 if (this.color != "#FFFFFF") { // 判断左右界面,并且赋颜色的值 if (this.x < this.w / 2) { // 左半边 this.color = "#36fcfa"; } else { // 右半边 this.color = "#E5483F"; } } };Particle.prototype.move = function() { // 颜色定义 this.swapColor(); // 横坐标按照cos角度进行变换,并且对其进行随机数放大; // 偏射角度以便两个半界分开 this.x += Math.cos(this.a) * this.s; this.y += Math.sin(this.a) * this.s; // this.y += Math.cos(this.a) * this.s; // this.x += Math.sin(this.a) * this.s; // 在变化后,对随机角度进行再重取; this.a += Math.random() * 0.8 - 0.4; // 判断全为0,粒子横坐标无移动; if (this.x < 0 || this.x > this.w - this.radius) { return false; } // 粒子纵坐标无移动; if (this.y < 0 || this.y > this.h - this.radius) { return false; } // 重新绘制图像 this.render(); return true; };let canvas = document.createElement('canvas');canvas.width = window.innerWidth - 20;canvas.height = window.innerHeight - 30;document.body.insertBefore(canvas, null);let context = canvas.getContext('2d');const conf = { frequency: 50, x: canvas.width, y: canvas.height};let particles = [], frequency = conf.frequency;setInterval(function(){ popolate();}.bind(null), frequency);function popolate(){ particles.push( new Particle(context, { x: conf.x / 2, y: conf.y / 2 }) ); return particles.length;}function clear() { context.globalAlpha = 0.04; context.fillStyle = '#000042'; context.fillRect(0,0,canvas.width, canvas.height); context.globalAlpha = 1;}function update(){ particles = particles.filter(p => p.move()); clear(); requestAnimationFrame(arguments.callee);}update(); |
以上就是本文的全部内容,希望对大家的学习有所帮助,也希望大家多多支持服务器之家。
原文链接:https://blog.csdn.net/u013362192/article/details/115222568


