写在前面
最近项目要实现相机扫描二维码功能,具体要求:1、扫描框 2、扫描动画 3、相册识别二维码 4、声音反馈。
记得之前用过三方库做过类似功能,但是也是知其然不知其所以然,然后今天自己用原生api简单封装了一个二维码扫描控件。
项目结构介绍
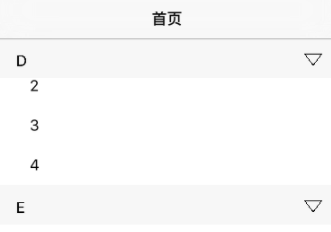
控件封装后主要结构如图:

如图中代码目录,vender里面放的是uiview+frame分类,resource里面放的是图片声音资源,tzimagepickercontroller是第三方相册,用来获取相册中的二维码识别的。主要的就是以qr开头的文件,我们具体说一说。
qrcode.h
这个文件主要放的是各个文件的头文件,方便在各处调用
|
1
2
3
4
|
#import "qrcodescanmanager.h"#import #import "qrlightmanager.h"#import "qrcodescanview.h"#import "qrcodehelper.h" |
qrlightmanager
这个类是用来开启关闭闪光灯的
|
1
2
3
4
5
6
7
8
|
/** 打开手电筒 */+ (void)openflashlight;/** 关闭手电筒 */+ (void)closeflashlight; |
|
1
2
3
4
5
6
7
8
9
10
11
12
13
14
15
16
17
18
19
20
21
|
#pragma mark 打开手电筒+ (void)openflashlight { avcapturedevice *capturedevice = [avcapturedevice defaultdevicewithmediatype:avmediatypevideo]; nserror *error = nil; if ([capturedevice hastorch]) { bool locked = [capturedevice lockforconfiguration:&error]; if (locked) { capturedevice.torchmode = avcapturetorchmodeon; [capturedevice unlockforconfiguration]; } }}#pragma mark 关闭手电筒+ (void)closeflashlight { avcapturedevice *device = [avcapturedevice defaultdevicewithmediatype:avmediatypevideo]; if ([device hastorch]) { [device lockforconfiguration:nil]; [device settorchmode:avcapturetorchmodeoff]; [device unlockforconfiguration]; }} |
qrcodescanview
这个类是将这个界面单独封装出来,便于自定义

在.h文件中有个枚举用来标识二维码扫描四周角标的位置:
|
1
2
3
4
5
|
typedef enum : nsuinteger { cornerloactiondefault,//默认与边框同中心点 cornerloactioninside,//在边框线内部 cornerloactionoutside,//在边框线外部} cornerloaction; |
自定义view各个属性:
|
1
2
3
4
5
6
7
|
@property (nonatomic, strong) uicolor *bordercolor;/** 边框颜色*/@property (nonatomic, assign) cornerloaction cornerlocation;/** 边角位置 默认default*/@property (nonatomic, strong) uicolor *cornercolor;/** 边角颜色 默认正保蓝#32d2dc*/@property (nonatomic, assign) cgfloat cornerwidth;/** 边角宽度 默认2.f*/@property (nonatomic, assign) cgfloat backgroundalpha;/** 扫描区周边颜色的alpha 默认0.5*/@property (nonatomic, assign) cgfloat timeinterval;/** 扫描间隔 默认0.02*/@property (nonatomic, strong) uibutton *lightbtn;/** 闪光灯*/ |
暴露外部调用的方法:
|
1
2
3
4
5
6
7
8
9
10
11
12
|
/** 添加定时器 */- (void)addtimer;/** 移除定时器 */- (void)removetimer;/** 根据灯光判断 */- (void)lightbtnchangewithbrightnessvalue:(cgfloat)brightnessvalue; |
初始化默认值:
|
1
2
3
4
5
6
7
8
9
10
11
|
- (void)initilize { self.backgroundcolor = [[uicolor blackcolor] colorwithalphacomponent:0.5]; self.bordercolor = [uicolor whitecolor]; _cornerlocation = cornerloactiondefault; _cornercolor = [uicolor colorwithred:50/255.0f green:210/255.0f blue:220/255.0f alpha:1.0]; _cornerwidth = 2.0; self.timeinterval = 0.02; _backgroundalpha = 0.5; [self addsubview:self.lightbtn];} |
重写view的drawrect方法,在这个方法里面绘制scanview的边框和边角
|
1
2
3
4
5
6
7
8
9
10
11
12
13
14
15
16
17
18
19
20
21
22
23
24
25
26
27
28
29
30
31
32
33
34
35
36
37
38
39
40
41
|
//空白区域设置 [[[uicolor blackcolor] colorwithalphacomponent:self.backgroundalpha] setfill]; uirectfill(rect); //获取上下文,并设置混合模式 -> kcgblendmodedestinationout cgcontextref context = uigraphicsgetcurrentcontext(); cgcontextsetblendmode(context, kcgblendmodedestinationout); //设置空白区 uibezierpath *bezierpath = [uibezierpath bezierpathwithrect:cgrectmake(borderx + 0.5 * borderlinew, bordery+ 0.5 * borderlinew, borderw - borderlinew, borderh - borderlinew)]; [bezierpath fill]; //执行混合模式 cgcontextsetblendmode(context, kcgblendmodenormal); //边框设置 uibezierpath *borderpath = [uibezierpath bezierpathwithrect:cgrectmake(borderx, bordery, borderw, borderh)]; borderpath.linecapstyle = kcglinecapbutt; borderpath.linewidth = borderlinew; [self.bordercolor set]; [borderpath stroke]; cgfloat cornerlength = 20; //左上角小图标 uibezierpath *lefttoppath = [uibezierpath bezierpath]; lefttoppath.linewidth = self.cornerwidth; [self.cornercolor set]; cgfloat insideexcess = fabs(0.5 * (self.cornerwidth - borderlinew)); cgfloat outsideexcess = 0.5 * (borderlinew + self.cornerwidth); if (self.cornerlocation == cornerloactioninside) { [lefttoppath movetopoint:cgpointmake(borderx + insideexcess, bordery + cornerlength + insideexcess)]; [lefttoppath addlinetopoint:cgpointmake(borderx + insideexcess, bordery + insideexcess)]; [lefttoppath addlinetopoint:cgpointmake(borderx + cornerlength + insideexcess, bordery + insideexcess)]; } else if (self.cornerlocation == cornerloactionoutside) { [lefttoppath movetopoint:cgpointmake(borderx - outsideexcess, bordery + cornerlength - outsideexcess)]; [lefttoppath addlinetopoint:cgpointmake(borderx - outsideexcess, bordery - outsideexcess)]; [lefttoppath addlinetopoint:cgpointmake(borderx + cornerlength - outsideexcess, bordery - outsideexcess)]; } else { [lefttoppath movetopoint:cgpointmake(borderx, bordery + cornerlength)]; [lefttoppath addlinetopoint:cgpointmake(borderx, bordery)]; [lefttoppath addlinetopoint:cgpointmake(borderx + cornerlength, bordery)]; } [lefttoppath stroke]; |
增加定时器以及开始动画:
|
1
2
3
4
5
6
7
8
9
10
11
12
13
14
15
16
17
18
19
20
21
22
23
24
25
26
27
28
29
30
31
32
|
- (void)addtimer { [self addsubview:self.scanningline]; self.timer = [nstimer timerwithtimeinterval:self.timeinterval target:self selector:@selector(beginanimaiton) userinfo:nil repeats:yes]; [[nsrunloop mainrunloop] addtimer:_timer formode:nsrunloopcommonmodes];}#pragma mark 动画- (void)beginanimaiton { static bool isorignpostion = yes; if (isorignpostion) { _scanningline.y = 0; isorignpostion = no; [uiview animatewithduration:self.timeinterval animations:^{ self->_scanningline.y += 2; } completion:nil]; } else { if (_scanningline.frame.origin.y >= 0) { cgfloat scancontent_maxy = self.frame.size.width; if (_scanningline.y >= scancontent_maxy - 10) { _scanningline.y = 0; isorignpostion = yes; } else { [uiview animatewithduration:0.02 animations:^{ self->_scanningline.y += 2; } completion:nil]; } } else { isorignpostion = !isorignpostion; } }} |
闪光灯按钮点击事件,开启关闭闪光灯:
|
1
2
3
4
5
6
7
8
|
- (void)lightbtnclick:(uibutton *)btn { btn.selected = !btn.selected; if (btn.selected) { [qrlightmanager openflashlight]; } else { [qrlightmanager closeflashlight]; }} |
qrcodescanmanager
这个单例用来控制所有的关于二维码扫描的事件
初始开启session 会话
|
1
2
3
4
5
6
7
8
9
10
11
12
13
14
15
16
17
18
19
20
21
22
23
24
25
26
27
28
29
30
31
32
33
34
35
36
37
38
39
40
41
42
43
44
45
46
47
48
49
50
51
52
53
54
55
56
57
58
|
//设置二维码读取率 数据类型 当前控制器- (void)setupsessionpreset:(nsstring *)sessionpreset metadataobjecttypes:(nsarray *)metadataobjecttypes currentcontroller:(uiviewcontroller *)currentcontroller { if (sessionpreset == nil || metadataobjecttypes == nil || currentcontroller == nil) { nsexception *excp = [nsexception exceptionwithname:@"excp" reason:@"setupsessionpreset:metadataobjecttypes:currentcontroller: 方法中的 sessionpreset 参数不能为空" userinfo:nil]; [excp raise]; } //1、获取摄像设备 avcapturedevice *device = [avcapturedevice defaultdevicewithmediatype:avmediatypevideo]; //2、创建设备输入流 avcapturedeviceinput *deviceinput = [avcapturedeviceinput deviceinputwithdevice:device error:nil]; //3、创建数据输出流 avcapturemetadataoutput *metadataoutput = [[avcapturemetadataoutput alloc] init]; [metadataoutput setmetadataobjectsdelegate:self queue:dispatch_get_main_queue()]; //3(1)、创建设备输出流 self.videodataoutput = [[avcapturevideodataoutput alloc] init]; [_videodataoutput setsamplebufferdelegate:self queue:dispatch_get_main_queue()]; // 设置扫描范围(每一个取值0~1,以屏幕右上角为坐标原点) // 注:微信二维码的扫描范围是整个屏幕,这里并没有做处理(可不用设置); 如需限制扫描范围,打开下一句注释代码并进行相应调试 // metadataoutput.rectofinterest = cgrectmake(0.05, 0.2, 0.7, 0.6); //4、创建会话对象 _session = [[avcapturesession alloc] init]; //会话采集率:avcapturesessionpresethigh _session.sessionpreset = sessionpreset; //5、添加设备输出流到会话对象 [_session addoutput:metadataoutput]; //5(1)添加设备输出流到会话对象;与3(1)构成识别光纤强弱 [_session addoutput:_videodataoutput]; //6、添加设备输入流到会话对象 [_session addinput:deviceinput]; //7、设置数据输出类型,需要将数据输出添加到会话后,才能指定元数据类型,否则会报错 // 设置扫码支持的编码格式(如下设置条形码和二维码兼容) // @[avmetadataobjecttypeqrcode, avmetadataobjecttypeean13code, avmetadataobjecttypeean8code, avmetadataobjecttypecode128code] metadataoutput.metadataobjecttypes = metadataobjecttypes; //8、实例化预览图层,传递_session是为了告诉图层将来显示什么内容 _videopreviewlayer = [avcapturevideopreviewlayer layerwithsession:_session]; //保持纵横比;填充层边界 _videopreviewlayer.videogravity = avlayervideogravityresizeaspectfill; cgfloat x = 0; cgfloat y = 0; cgfloat w = [uiscreen mainscreen].bounds.size.width; cgfloat h = [uiscreen mainscreen].bounds.size.height; _videopreviewlayer.frame = cgrectmake(x, y, w, h); [currentcontroller.view.layer insertsublayer:_videopreviewlayer atindex:0]; //9、启动会话 [_session startrunning]; } |
block:
|
1
2
3
4
5
6
|
typedef void(^getbrightnessblock)(cgfloat brightness);//用来向外部传递捕获到的亮度值以便于识别何时开启闪光灯,typedef void(^scanblock)(nsarray *metadataobjects);//捕获到的结果集合//亮度回调- (void)brightnesschange:(getbrightnessblock)getbrightnessblock;//扫描结果- (void)scanresult:(scanblock)scanblock; |
|
1
2
3
4
5
6
|
- (void)startrunning { [_session startrunning];}- (void)stoprunning { [_session stoprunning];} |
|
1
2
3
4
5
6
7
8
9
10
11
12
13
14
|
需要遵循:/** 重置根据光线强弱值打开手电筒 delegate方法 */- (void)resetsamplebufferdelegate;/** 取消根据光线强弱值打开手电筒的delegate方法 */- (void)cancelsamplebufferdelegate;- (void)resetsamplebufferdelegate { [_videodataoutput setsamplebufferdelegate:self queue:dispatch_get_main_queue()];}- (void)cancelsamplebufferdelegate { [_videodataoutput setsamplebufferdelegate:nil queue:dispatch_get_main_queue()];} |
|
1
2
3
4
5
6
7
8
9
10
11
12
|
#pragma mark 播放扫描提示音- (void)playsoundname:(nsstring *)name { nsstring *audiofile = [[nsbundle mainbundle] pathforresource:name oftype:nil]; nsurl *fileurl = [nsurl fileurlwithpath:audiofile]; systemsoundid soundid = 0; audioservicescreatesystemsoundid((__bridge cfurlref)(fileurl), &soundid); audioservicesaddsystemsoundcompletion(soundid, null, null, soundcompletecallback, null); audioservicesplaysystemsound(soundid); // 播放音效}void soundcompletecallback(systemsoundid soundid, void *clientdata){ } |
注:这里只是截取部分重要代码,具体功能我会将代码放到github上,代码里注释也写的很明白
使用功能
开启、结束定时器
开启、关闭session会话
启用、移除samplebuffer代理
|
1
2
3
4
5
6
7
8
9
10
11
12
|
- (void)viewwillappear:(bool)animated { [super viewwillappear:animated]; [self.scanview addtimer]; [_scanmanager startrunning]; [_scanmanager resetsamplebufferdelegate];}- (void)viewwilldisappear:(bool)animated { [super viewwilldisappear:animated]; [self.scanview removetimer]; [_scanmanager stoprunning]; [_scanmanager cancelsamplebufferdelegate];} |
初始化scanmanager
|
1
2
3
4
5
6
7
8
9
10
11
12
13
14
15
16
17
18
19
20
21
22
23
24
25
26
|
- (void)setupscanmanager { self.scanmanager = [qrcodescanmanager sharedmanager]; nsarray *arr = @[avmetadataobjecttypeqrcode, avmetadataobjecttypeean13code, avmetadataobjecttypeean8code, avmetadataobjecttypecode128code]; [_scanmanager setupsessionpreset:avcapturesessionpreset1920x1080 metadataobjecttypes:arr currentcontroller:self]; __weak __typeof(self)weakself = self; //光扫描结果回调 [_scanmanager scanresult:^(nsarray *metadataobjects) { if (metadataobjects != nil && metadataobjects.count > 0) { [weakself.scanmanager playsoundname:@"sound.caf"]; //obj 为扫描结果 avmetadatamachinereadablecodeobject *obj = metadataobjects[0]; nsstring *url = [obj stringvalue]; nslog(@"---url = :%@", url); } else { nslog(@"暂未识别出扫描的二维码"); } }]; //光纤变化回调 [_scanmanager brightnesschange:^(cgfloat brightness) { [weakself.scanview lightbtnchangewithbrightnessvalue:brightness]; }]; } |
从相册识别二维码:
|
1
2
3
4
5
6
7
8
9
10
11
12
13
14
15
16
17
18
19
20
21
22
23
24
25
26
27
28
29
|
//借助第三方相册- (void)albumbtnclick { tzimagepickercontroller *pickercontroller = [[tzimagepickercontroller alloc] initwithmaximagescount:1 delegate:self]; __weak __typeof(self)weakself = self; [pickercontroller setdidfinishpickingphotoshandle:^(nsarray *photos, nsarray *assets, bool isselectoriginalphoto) { uiimage *image = photos[0]; // cidetector(cidetector可用于人脸识别)进行图片解析,从而使我们可以便捷的从相册中获取到二维码 // 声明一个 cidetector,并设定识别类型 cidetectortypeqrcode // 识别精度 cidetector *detector = [cidetector detectoroftype:cidetectortypeqrcode context:nil options:@{cidetectoraccuracy:cidetectoraccuracyhigh}]; //取得识别结果 nsarray *features = [detector featuresinimage:[ciimage imagewithcgimage:image.cgimage]]; nsstring *resultstr; if (features.count == 0) { nslog(@"暂未识别出二维码"); } else { for (int index = 0; index < [features count]; index++) { ciqrcodefeature *feature = [features objectatindex:index]; resultstr = feature.messagestring; } nslog(@"---url:%@", resultstr); } }]; [self presentviewcontroller:pickercontroller animated:yes completion:nil];} |
以上就是本文的全部内容,希望对大家的学习有所帮助,也希望大家多多支持服务器之家。
原文链接:http://www.cocoachina.com/ios/20180907/24820.html


