最近观看 android 开发视频,里面使用的集成开发工具为 eclipse 。使用 eclipse 可以很快捷的编写 web 项目,而我使用的 androi studio 因为专业就把建立其他工程的功能给阉割了。所以,不能忍受只能听老师讲而不能实际操作时望洋兴叹般的尴尬,我选择了使用 intellij idea 来替代 eclipse 模拟网络请求。下面结合一个简单网络请求的实现,来介绍 intellij idea 的使用。
首先当然是下载 intellij idea 集成工具,这个 google/baidu 一下,很容易就能获得。
接下来配置 tomcat 服务器,以 mac 电脑为例,参考:mac上tomcat服务器安装配置 。
然后打开 intellij idea ,选择右边的 java enterprise 项目类型,选择刚装的 tomcat 服务器,勾选 web application 选项。
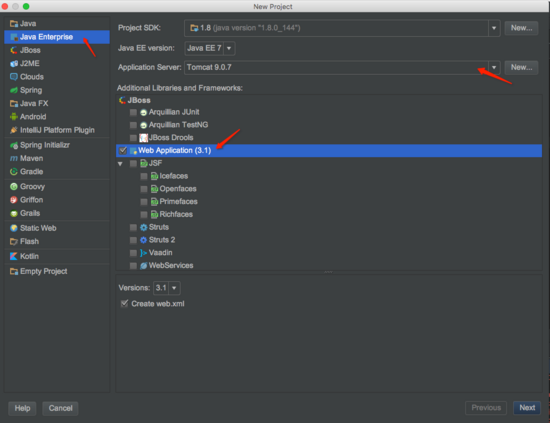
新建工程
点选 next,输入自定义工程名称 demo:
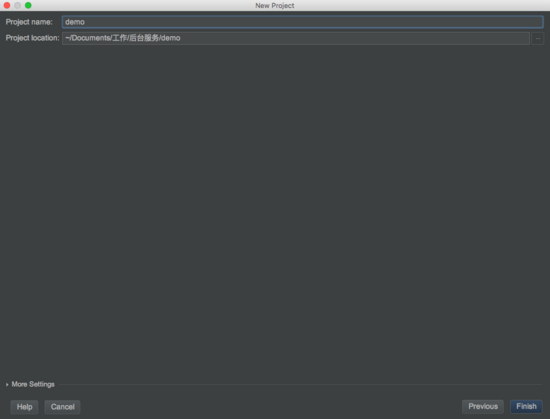
工程
然后我们就能看到新建工程的全貌:

工程
至此,一个 web 应用工程的框架已经做好。但是要顺利部署到 tomcat 服务器,还需要我们添加处理服务的对象 servlet。点击 src 文件夹,添加 servlet:
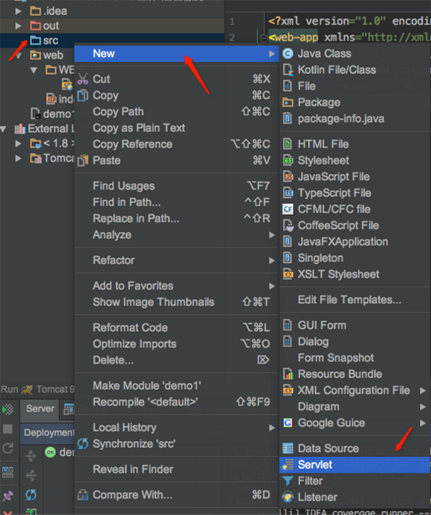
servlet
servlet 类中能看到默认生成的 doget 和 dopost 方法:
|
1
2
3
4
5
6
7
8
9
10
11
12
13
14
15
16
17
18
19
20
21
22
23
24
|
protected void dopost(httpservletrequest request, httpservletresponse response) throws servletexception, ioexception { response.setcharacterencoding("utf-8"); response.setcontenttype("text/html"); response.getwriter().print("收到 post 请求"); string username = request.getparameter("username"); string pwd = request.getparameter("password"); if("admin".equals(username) && "abc123".equals(pwd)) { response.sendredirect("/2.html"); } } protected void doget(httpservletrequest request, httpservletresponse response) throws servletexception, ioexception { response.setcharacterencoding("utf-8");//设置 response.setcontenttype("text/html"); string username = request.getparameter("username"); string pwd = request.getparameter("password"); if("admin".equals(username) && "abc123".equals(pwd)) { response.sendredirect("/2.html"); } } |
要想使用新建的 servlet 类,还需要在 web.xml 中进行配置:
|
1
2
3
4
5
6
7
8
9
10
|
<web-app ...> <servlet> <servlet-name>servlet</servlet-name> <servlet-class>demo.servlet</servlet-class> </servlet> <servlet-mapping> <servlet-name>servlet</servlet-name> <url-pattern>/demo</url-pattern> </servlet-mapping></web-app> |
其中 servlet-mapping 标签设置对外访问的路径。
然后在 web 目录下添加前端页面文件,比如命名 1.html 作为起始页面,2.html 作为跳转的结果页面。
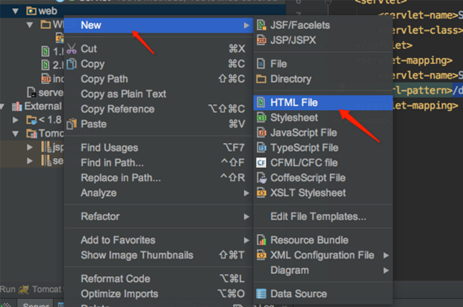
页面
在 1.html 中编辑页面布局,设置 head 标签,在 body 标签中添加 form表单。
|
1
2
3
4
5
6
7
8
9
10
11
12
13
14
15
16
17
18
19
20
21
22
23
24
25
26
27
28
29
30
31
32
33
34
35
36
37
38
39
40
41
42
43
44
45
46
47
48
49
50
51
52
53
54
55
56
57
58
59
60
61
62
63
64
65
66
|
<!doctype html><html lang="en"><head> <meta http-equiv="content-type" content="text/html; charset=utf-8" > <title>myfirst</title> <script type="text/javascript"> </script></head><body><h1>登录页面(get)</h1><form action="/demo" method="get"> <table> <tr> <td> 用户名: </td> <td> <input type="text" name="username"> </td> </tr> <tr> <td> 密码: </td> <td> <input type="text" name="password" type="hidden"> </td> </tr> <tr> <td colspan="2" style="align-items: center"> <input type="submit" value="登录"> </td> </tr> </table></form><h1>登录页面(post)</h1><form action="/demo" method="post"> <table> <tr> <td> 用户名: </td> <td> <input type="text" name="username"> </td> </tr> <tr> <td> 密码: </td> <td> <input type="text" name="password" type="hidden"> </td> </tr> <tr> <td colspan="2"> <input type="submit" value="登录"> </td> </tr> </table></form></body></html> |
2.html中编辑页面:
|
1
2
3
4
5
6
7
8
9
10
11
12
|
<!doctype html><html lang="en"><head> <meta charset="utf-8"> <title>title</title></head><body> <h1 style="color: red"> 登录成功!!! </h1></body></html> |
最后点击 debug 进行运行,部署到自己的 tomcat 服务器上:

debug
最后在浏览器输入网址: http://localhost:8080/1.html ,就能访问我们部署的网站了。
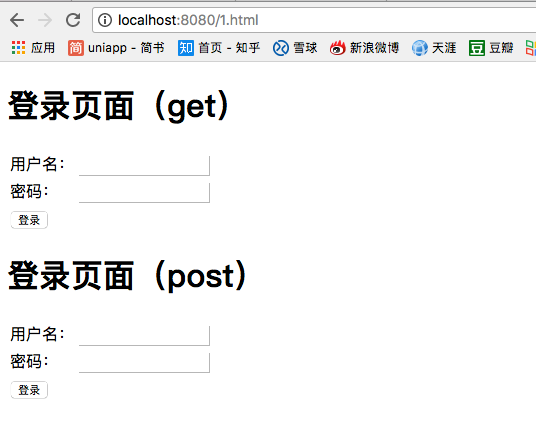
网站
打开 chrome 的开发者工具,能够看到发送请求的详细情况:
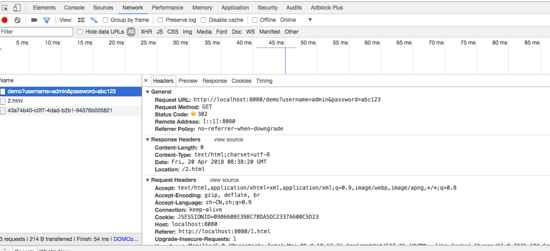
发送请求
完工!
流程很简单,以后就可以使用 idea 来学习后端开发的基本知识了,比如可以在后端获取提交的文件,对成功的请求进行跳转,请求失败时要告知客户端等等,都可以进行模拟,更多知识点等你来发现了。
以上就是本文的全部内容,希望对大家的学习有所帮助,也希望大家多多支持服务器之家。
原文链接:https://www.jianshu.com/p/1784640be85d


