本文实例为大家分享了vue实现登录类型切换的具体代码,供大家参考,具体内容如下
运行效果

代码
|
1
2
3
4
5
6
7
8
9
10
11
12
13
14
15
16
17
18
19
20
21
22
23
24
25
26
27
28
29
30
31
32
33
34
|
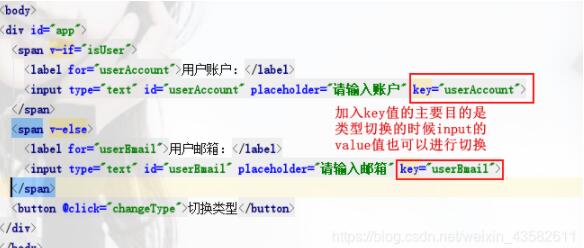
<!DOCTYPE html><html lang="en"><head> <meta charset="UTF-8"> <title>登录类型切换</title> <script src="../js/vuejs-2.5.16.js"></script></head><body><div id="app"> <span v-if="isUser"> <label for="userAccount">用户账户:</label> <input type="text" id="userAccount" placeholder="请输入账户" key="userAccount"> </span> <span v-else> <label for="userEmail">用户邮箱:</label> <input type="text" id="userEmail" placeholder="请输入邮箱" key="userEmail"> </span> <button @click="changeType">切换类型</button></div></body><script> const app = new Vue({ el: '#app', data: { isUser: true }, methods:{ changeType(){ return this.isUser = ! this.isUser } } })</script></html> |
代码片段解析

以上就是本文的全部内容,希望对大家的学习有所帮助,也希望大家多多支持服务器之家。
原文链接:https://blog.csdn.net/weixin_43582611/article/details/103418439


