本文实例为大家分享了微信公众平台实现获取用户OpenID的方法,供大家参考,具体内容如下
Index.aspx.cs代码:
|
1
2
3
4
5
6
7
8
9
10
11
12
13
14
15
16
17
18
19
20
21
22
23
24
25
26
27
28
29
30
31
32
33
34
35
36
37
38
39
40
41
42
43
44
45
46
47
48
49
50
51
52
53
54
55
56
57
58
59
60
61
62
63
64
65
66
67
68
69
70
71
72
73
74
75
76
77
78
79
80
81
82
83
84
85
86
87
88
89
90
91
|
public partial class Index : System.Web.UI.Page{ //用户id public string openid = ""; //公众号信息部分 public string appid = ConfigurationManager.AppSettings["AppId"]; public string appsecret = ConfigurationManager.AppSettings["AppSecret"]; public string redirect_uri =HttpUtility.UrlEncode("//www.zzvips.com"); public string scope = "【删除这个并填入请求类型,例如:snsapi_userinfo】"; #region 显示页面 public string accesstoken; public string nickname; public string sex; public string headimgurl; public string province; public string country; public string language; public string city; public string privilege = ""; #endregion protected void Page_Load(object sender, EventArgs e) { /* *微信认证获取openid部分: *临时认证code */ //微信认证部分:第二步 获得code string code = Request["code"]; if (string.IsNullOrEmpty(code)) { //如果code没获取成功,重新拉取一遍 OpenAccess(); } //微信认证部分:第三步 获得openid string url = string.Format("https://api.weixin.qq.com/sns/oauth2/access_token?appid={0}&secret={1}&code={2}&grant_type=authorization_code", appid, appsecret, code); string result = HttpClientHelper.GetResponse(url); LogHelper.WriteFile(result); JObject outputObj = JObject.Parse(result); //微信认证部分:第四步 获得更多信息 accesstoken = outputObj["access_token"].ToString(); openid = outputObj["openid"].ToString(); url = string.Format("https://api.weixin.qq.com/sns/userinfo?access_token={0}&openid={1}&lang=zh_CN",accesstoken,openid); string result1 = HttpClientHelper.GetResponse(url); LogHelper.WriteFile(result1); JObject outputObj1 = JObject.Parse(result1);//将json转为数组 //以下是第四步获得的信息: nickname = outputObj1["nickname"].ToString(); //昵称 sex = outputObj1["sex"].ToString(); //性别什么的 headimgurl = outputObj1["headimgurl"].ToString(); //头像url province = outputObj1["province"].ToString(); ; country = outputObj1["country"].ToString(); ; language = outputObj1["language"].ToString(); ; city = outputObj1["city"].ToString(); ; //将获得的用户信息填入到session中 Session["openid"] = outputObj1["openid"]; //转向回入口 //OpenAccess(); } /* * 接入入口 * 开放到微信菜单中调用 * @param $dir_url 来源url * @since 1.0 * @return void */ public void OpenAccess() { //判断session不存在 if (Session["openid"] == null) { //认证第一步:重定向跳转至认证网址 string url = string.Format("https://open.weixin.qq.com/connect/oauth2/authorize?appid={0}&redirect_uri={1}&&response_type=code&scope=snsapi_userinfo&m=oauth2#wechat_redirect", appid, redirect_uri); Response.Redirect(url); } //判断session存在 else { //跳转到前端页面.aspx Response.Redirect(Request.Url.ToString()); } }} |
Index.aspx内容:
|
1
2
3
4
5
6
7
8
9
10
11
12
13
14
15
16
17
18
19
20
21
22
23
24
25
26
27
28
29
30
31
32
33
34
35
36
37
38
39
40
41
42
43
44
45
46
47
48
49
50
51
52
53
54
55
56
57
58
59
60
61
62
63
64
65
66
|
<%@ Page Language="C#" AutoEventWireup="true" CodeBehind="Index.aspx.cs" Inherits="TEST.Index" %><!DOCTYPE html><html xmlns="http://www.w3.org/1999/xhtml"><head runat="server"> <title></title> <meta name="viewport" content="width=device-width, initial-scale=1" /> <style type="text/css"> td { word-wrap: break-word; } </style> <script type="text/javascript"> </script></head><body> <form id="form1" runat="server"> <div id="wu" runat="server"> <table style="width: 100%;"> <tr> <td style="width: 150px;"> <p> openid:<%=openid%></p> </td> <td> <p> nickname:<%=nickname%></p> </td> <td> <p> sex:<%=sex%></p> </td> </tr> <tr> <td> <p> language:<%=language%></p> </td> <td> <p> city:<%=city%></p> </td> <td> <p> country:<%=country%></p> </td> </tr> <tr> <td> <p> headimgurl:<img width="50px;" src="<%=headimgurl %>" id="codetool">
HttpClientHelper.cs代码:
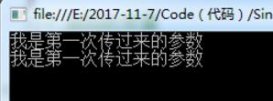
结果如图:
以上就是本文的全部内容,希望对大家的学习有所帮助,也希望大家多多支持服务器之家。 延伸 · 阅读
精彩推荐
|


