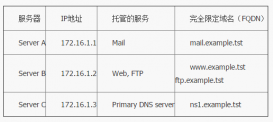
这是一台squid代理服务器(一台式机,安装的是redhat 5.4 64位操作系统),每天下午4点一台服务器通过ftp上传主机数据库巡检报告到这台代理PC机的一个用户家目录下的xunjian目录下,这台PC再通过发送邮件的方式将巡检报告发给组内成员,进行巡检
此为背景,之前的selinux设置的为Permissive,不料同事中午睡觉的时候,脚这么一碰,将这台代理PC重启了,重启后,连续2天的巡检报告都没有通过邮件收到,赶紧解决吧
1、手动的执行ftp上传动作,报如下错误:553 Could not create file.
sshuser@station90.example.com:~/xunjian/0108> ftp 192.168.1.123
Connected to 192.168.1.123.
220 (vsFTPd 2.0.5)
Name (192.168.1.123:oracle): oracle
331 Please specify the password.
Password:
230 Login successful.
Remote system type is UNIX.
Using binary mode to transfer files.
ftp>binary
200 Switching to Binary mode.
ftp> put xunjian_0108.zip
local: xunjian_0108.zip remote: xunjian_0108.zip
229 Entering Extended Passive Mode (|||10717|)
553 Could not create file.
2、代理PC的oracle家目录,肯定是有读写权限的,因为是代理PC重启导致的,突然想到selinux若开启的话,是不允许用户的家目录进行ftp的,需要将ftp_home_dir这个sebool打开,如下所示:
[root@squid ~]# getenforce
Enforcing
[root@squid ~]# getsebool -a | grep ftp_home_dir
ftp_home_dir --> off
[root@squid ~]# setsebool ftp_home_dir on
3、这时候去上传,就可以成功了,如下所示
sshuser@station90.example.com:~/xunjian/0108> ftp 192.168.1.123
Connected to 192.168.1.123.
220 (vsFTPd 2.0.5)
Name (192.168.1.123:oracle): oracle
331 Please specify the password.
Password:
230 Login successful.
Remote system type is UNIX.
Using binary mode to transfer files.
ftp> bi
200 Switching to Binary mode.
ftp> put xunjian_0108.zip
local: xunjian_0108.zip remote: xunjian_0108.zip
229 Entering Extended Passive Mode (|||19974|)
150 Ok to send data.
100% |***********************************************************************| 577 KB 2.31 MB/s 00:00 ETA
226 File receive OK.
591290 bytes sent in 00:00 (2.18 MB/s)
4、另外一种方式,就是将selinux设置为Permissive
[root@squid ~]# getenforce
Enforcing
[root@squid ~]# setenforce 0
[root@squid ~]# getenforce
Permissive
5、同时在/etc/rc.local中添加这么一行,那么下次系统重启后,就不会发生这样的情况了
[root@squid ~]# which setenforce
/usr/sbin/setenforce
[root@squid ~]# cat /etc/rc.local | tail -n 1
/usr/sbin/setenforce 0
好啦,这样就顺利解决问题了,希望对一些朋友有所帮助
selinux导致ftp上传失败 工作中的真实案例
2019-12-11 16:17Linux教程网 Linux
这是一台squid代理服务器(一台式机,安装的是redhat 5.4 64位操作系统),每天下午4点一台服务器通过ftp上传主机数据库巡检报告到这台代理PC机的一个用户家目录下的xunjian目录下,这台PC再通过发送邮件的方式将巡检报告发给组内成员
延伸 · 阅读
- 2022-03-08CentOS 6.5平台实现快速部署FTP的方法
- 2022-03-08CentOS 6.5 环境实现本地局域网搭建YUM的方法【基于
- 2022-03-07android传送照片到FTP服务器的实现代码
- 2022-03-04SpringBoot项目集成FTP的方法步骤
- 2022-03-02linux中ftp服务器搭建需要注意的地方
- 2022-02-22C#基于FTP协议的简易软件自动升级程序
- Linux

在Linux系统上安装配置DNS服务器的教程
这篇文章主要介绍了在Linux上安装配置DNS服务器的教程,文中示例基于CentOS系统,需要的朋友可以参考下...
- Linux

Linux命令学习总结:详解reboot命令
这篇文章主要介绍了Linux命令学习总结:详解reboot命令,这个指令使用起来非常简单,有兴趣的可以了解一下。...
- Linux

linux下时间同步的两种方法分享
在需要集中记录服务器日志的环境中,时间同步那是相当的重要的。本文为大家介绍两种同步linux时间的方法,供大家参考 ...
- Linux

Linux 将支持基于 Li-Fi 的新型网络技术
据 phoronix 报道,Li-Fi 技术供应商 PureLiFi 近来正在向 Linux 内核社区积极贡献代码,以推动将其开源的 Li-Fi 驱动程序并入 Linux 内核主线。...
- Linux

Linux下查看使用的是哪种shell的方法汇总
这篇文章主要介绍了Linux下查看使用的是哪种shell的方法汇总,本文总结了9种查看当前系统使用的是哪种shell的方法,需要的朋友可以参考下 ...
- Linux

致命的7个Linux命令
如果你是一个 Linux 新手,在好奇心的驱使下,可能会去尝试从各个渠道获得的命令。以下是 7 个致命的 Linux 命令,轻则使你的数据造成丢失,重则使你的...
- Linux

Linux基础:如何找出你的系统所支持的最大内存
这篇文章主要介绍了Linux基础:如何找出你的系统所支持的最大内存,需要的朋友可以参考下...
- Linux

linux下gettimeofday函数windows替换方法(详解)
下面小编就为大家带来一篇linux下gettimeofday函数windows替换方法(详解)。小编觉得挺不错的,现在就分享给大家,也给大家做个参考。一起跟随小编过来看看...


