需求说明
在对图像进行处理时,经常会有这类需求:客户想要提取出图像中某条直线、圆线或者ROI区域内的感兴趣数据,进行重点关注。该需求在图像检测领域尤其常见。ROI区域一般搭配Rect即可完成提取,直线和圆线数据的提取没有现成的函数,需要自行实现。
直线的提取见:
而圆线的提取则是本文要将的内容,对圆线而言,将线上某点作为起点,沿顺时针或逆时针方向依次提取感兴趣数据,可放置在容器中。那么如何快速提取呢?本文提供了一种比较简单的思路,应用窗口模板,在窗口中快速找到下一可前进点的位置,步进然后再找下个点,形成路径追踪,进而实现整圈圆线数据的提取。
具体流程
1)初始化。设置路径追踪窗口尺寸size为3,创建path作为行进路径,p点作为起点,c用来存放目标数据点。
cv::Mat c;
int size = 3;
cv::Mat path = mask.clone();
Point p = Point(center.x + radius, center.y);
2)将起点放置在c中,将path中的起点值置0,表示该点已经走过。
c.push_back(src.at<uchar>(p.y, p.x));
path.at<uchar>(p.y, p.x) = 0;
3)用WinDataNum函数判断当前点的窗口内有几个可前进点,若无则说明路径封死或者完成路径,wn值表示可前进点的个数。
int wn = WinDataNum(path, p, size);
4)窗口内遍历,查看是否有可前进路径,若找到,则将当前点信息刷新为此点,并将标记符find设为true,find的意义是快速中断遍历,用来提速。
int t = size / 2;
bool find = false;
for (int i = p.y - t; i <= p.y + t; ++i)
{
	uchar *g = path.ptr<uchar>(i);
	for (int j = p.x - t; j <= p.x + t; ++j)
	{
		if (g[j] == 255)
		{
			p.x = j;
			p.y = i;
			find = true;
			break;
		}
	}
	if (find)
		break;
}
5)若找到了点,即find为true,则将该点的数据存放在c中,path中置0,并以该点为中心搜索窗口内可前进路径。
if (find)
{
	c.push_back(src.at<uchar>(p.y, p.x));
	path.at<uchar>(p.y, p.x) = 0;
	wn = WinDataNum(path, p, size);
}
else
	break;
6)若wn为0了,则说明路径封死或者完成路径了,跳出循环,函数执行完毕。
while (wn)
{
	int t = size / 2;
	bool find = false;
	for (int i = p.y - t; i <= p.y + t; ++i)
	{
		uchar *g = path.ptr<uchar>(i);
		for (int j = p.x - t; j <= p.x + t; ++j)
		{
			if (g[j] == 255)
			{
				p.x = j;
				p.y = i;
				find = true;
				break;
			}
		}
		if (find)
			break;
	}
	if (find)
	{
		c.push_back(src.at<uchar>(p.y, p.x));
		path.at<uchar>(p.y, p.x) = 0;
		wn = WinDataNum(path, p, size);
	}
	else
		break;

}
功能函数
// 获取圆圈上的数据,逆时针存储,起点在中心同行最右侧数据
cv::Mat getCircleData(cv::Mat src, cv::Mat mask, cv::Point center, int radius)
{
	cv::Mat c;
	int size = 3;
	cv::Mat path = mask.clone();
	Point p = Point(center.x + radius, center.y);
	c.push_back(src.at<uchar>(p.y, p.x));
	path.at<uchar>(p.y, p.x) = 0;
	int wn = WinDataNum(path, p, size);
	while (wn)
	{
		int t = size / 2;
		bool find = false;
		for (int i = p.y - t; i <= p.y + t; ++i)
		{
			uchar *g = path.ptr<uchar>(i);
			for (int j = p.x - t; j <= p.x + t; ++j)
			{
				if (g[j] == 255)
				{
					p.x = j;
					p.y = i;
					find = true;
					break;
				}
			}
			if (find)
				break;
		}
		if (find)
		{
			c.push_back(src.at<uchar>(p.y, p.x));
			path.at<uchar>(p.y, p.x) = 0;
			wn = WinDataNum(path, p, size);
		}
		else
			break;

	}
	return c;
}
// 获取窗口内的有效数据个数
int WinDataNum(cv::Mat path, cv::Point p, int size)
{
	int number = 0;
	int t = size / 2;
	for (int i = p.y - t; i <= p.y + t; ++i)
	{
		uchar *g = path.ptr<uchar>(i);
		for (int j = p.x - t; j <= p.x + t; ++j)
		{
			if (g[j] == 255)
				number++;
		}
	}
	return number;
}
C++测试代码
#include <iostream>
#include <opencv2/opencv.hpp>
#include <string>

using namespace std;
using namespace cv;

cv::Mat getCircleData(cv::Mat src, cv::Mat mask, cv::Point center, int radius);
int WinDataNum(cv::Mat path, cv::Point p, int size);

int main()
{
	cv::Mat src = imread("test.jpg", 0);
	cv::Mat mask = cv::Mat::zeros(src.size(), CV_8UC1);
	cv::Point center = cv::Point(src.cols / 2, src.rows / 2);
	int radius = min(src.cols, src.rows) / 2 - 10;
	circle(mask, center, radius, Scalar(255), 1, 8);
	cv::Mat c = getCircleData(src, mask, center, radius);
	src.setTo(0, mask == 0);
	imshow("src", src);
	imshow("mask", mask);
	waitKey(0);

	return 0;
}

// 获取圆圈上的数据,逆时针存储,起点在中心同行最右侧数据
cv::Mat getCircleData(cv::Mat src, cv::Mat mask, cv::Point center, int radius)
{
	cv::Mat c;
	int size = 3;
	cv::Mat path = mask.clone();
	Point p = Point(center.x + radius, center.y);
	c.push_back(src.at<uchar>(p.y, p.x));
	path.at<uchar>(p.y, p.x) = 0;
	int wn = WinDataNum(path, p, size);
	while (wn)
	{
		int t = size / 2;
		bool find = false;
		for (int i = p.y - t; i <= p.y + t; ++i)
		{
			uchar *g = path.ptr<uchar>(i);
			for (int j = p.x - t; j <= p.x + t; ++j)
			{
				if (g[j] == 255)
				{
					p.x = j;
					p.y = i;
					find = true;
					break;
				}
			}
			if (find)
				break;
		}
		if (find)
		{
			c.push_back(src.at<uchar>(p.y, p.x));
			path.at<uchar>(p.y, p.x) = 0;
			wn = WinDataNum(path, p, size);
		}
		else
			break;

	}
	return c;
}

// 获取窗口内的有效数据个数
int WinDataNum(cv::Mat path, cv::Point p, int size)
{
	int number = 0;
	int t = size / 2;
	for (int i = p.y - t; i <= p.y + t; ++i)
	{
		uchar *g = path.ptr<uchar>(i);
		for (int j = p.x - t; j <= p.x + t; ++j)
		{
			if (g[j] == 255)
				number++;
		}
	}
	return number;
}
测试效果

图1 原图
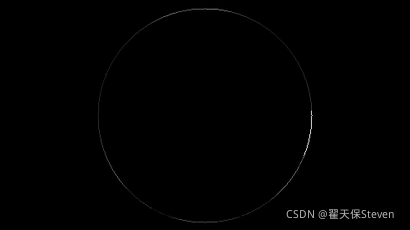
图2 掩膜内图像
如图1图2所示,掩膜内的图像数据就是我们要提取的目标。
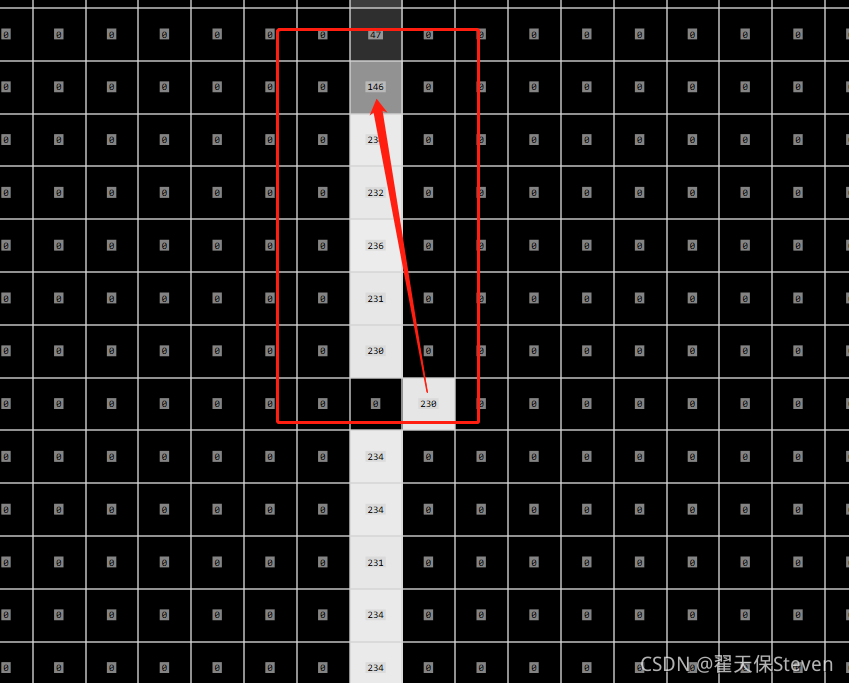
图3 放大后数据搜索路径
图3放大后可以看出,起点是230,之后的数据是230、231、236、232、234、146等等,再看c容器中的数据。
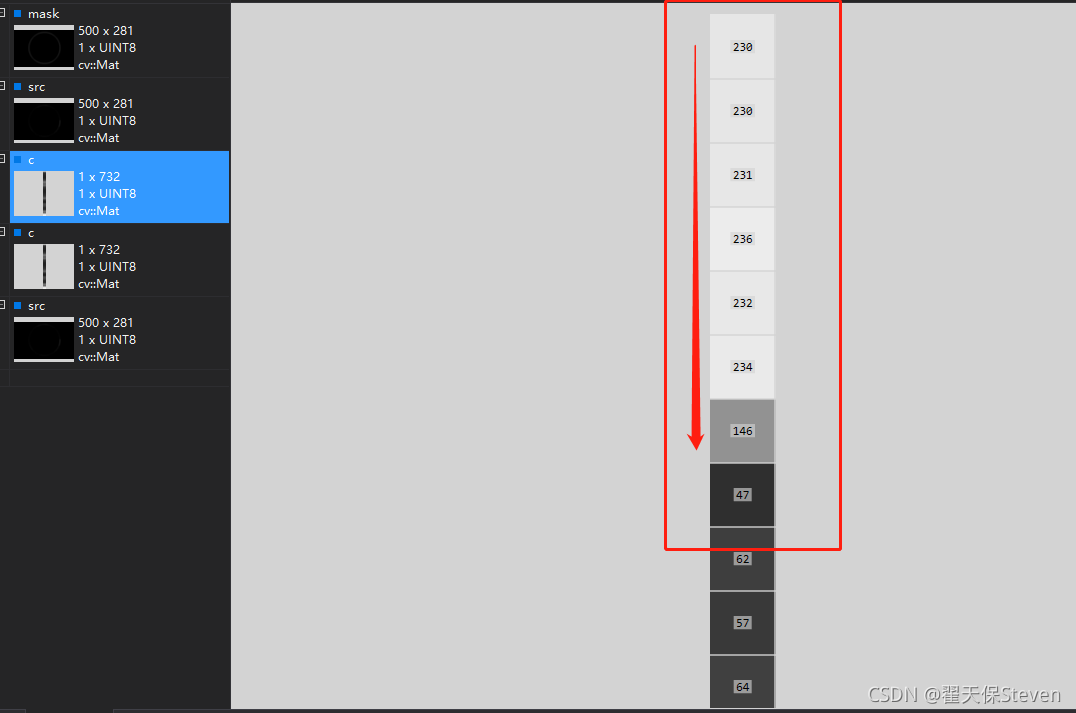
图4 容器内数据
对比完开头,再看结尾,如图3所示,是234、234、231、234、234,然后就是起点230,查看容器。
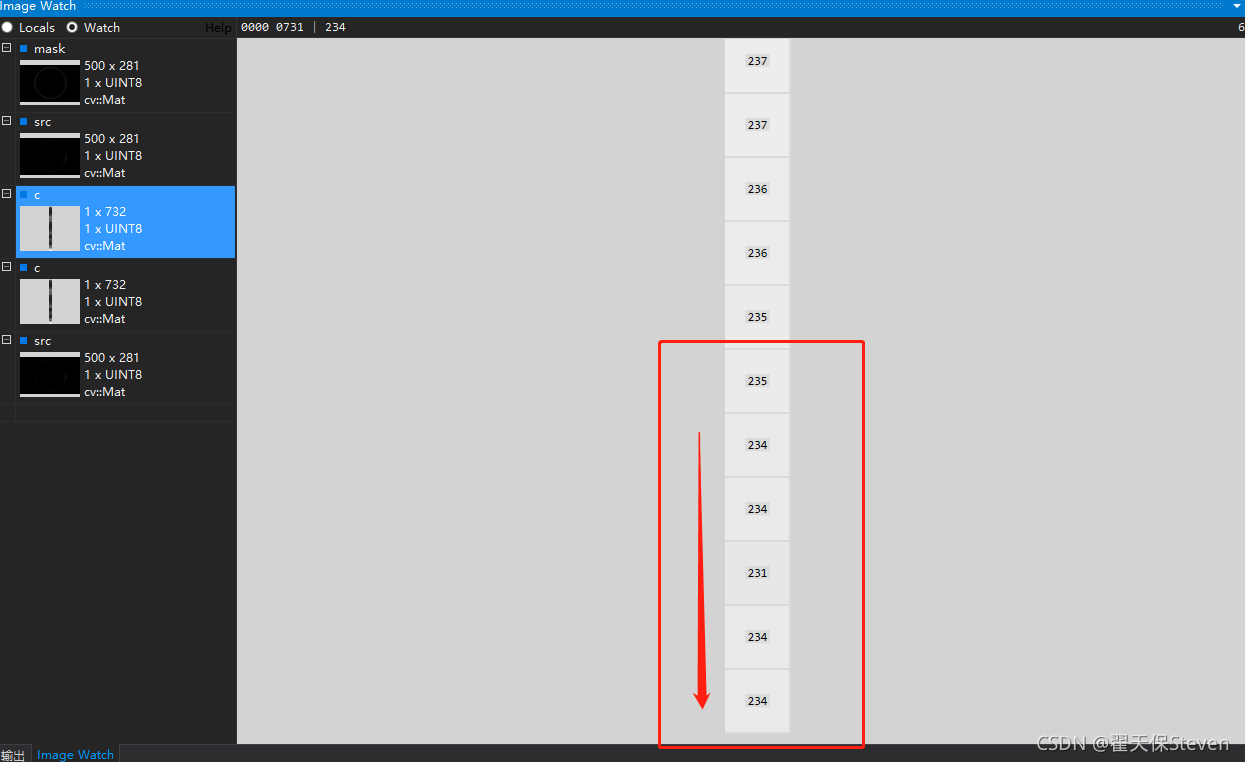
图5 容器内数据
这样有的小伙伴可能觉得中间会不会有数据错误呢,很简单,打开VS复制代码后,搭配ImageWatch插件,debug调试打断点观察path矩阵,看看它的255数据是不是按预想的路径消失,如果是则说明扔的数据也没有问题。
总结
本文提供的只是一个简单思路,有一定局限性。比如该方法在圆线宽为1时效果最佳,若线宽大了就不能用窗口简单判断了;另外,起点在右侧时是逆时针获取数据,起点在左侧时是顺时针获取数据,如果想统一标准的话,最好加上起点的位置判断,然后决定是否将c的数据翻转。至于运行速度方面,3000*3000的图像矩阵中运行基本为0ms,毕竟只是提取了一条圆线而已。
到此这篇关于OpenCV提取图像中圆线上的数据具体流程的文章就介绍到这了,更多相关OpenCV提取图像数据内容请搜索服务器之家以前的文章或继续浏览下面的相关文章希望大家以后多多支持服务器之家!
原文链接:https://zhaitianbao.blog.csdn.net/article/details/121613124


