大家好,今天给大家带来一个仿360手机卫士悬浮窗效果的教程,在开始之前请允许我先说几句不相干的话。
不知不觉我发现自己接触Android已有近三个年头了,期间各种的成长少不了各位高手的帮助,总是有很多高手喜欢把自己的经验写在网上,供大家来学习,我也是从中受惠了很多,在此我深表感谢。可是我发现我却从来没有将自己平时的一些心得拿出来与大家分享,共同学习,太没有奉献精神了。于是我痛定思痛,决定从今天开始写博客,希望可以指点在我后面的开发者,更快地进入Android开发者的行列当中。
好了,废话就说这么多,下面开始进入今天的主题吧。
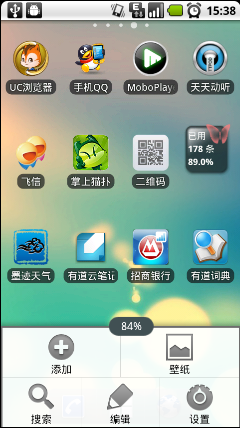
360手机卫士我相信大家都知道,好多人手机上都会装这一款软件,那么我们对它的一个桌面悬浮窗效果想必都不会陌生。请看下图:


首先是一个小的悬浮窗显示的是当前使用了百分之多少的内存,点击一下小悬浮窗,就会弹出一个大的悬浮窗,可以一键加速。好,我们现在就来模拟实现一下类似的效果。
先谈一下基本的实现原理,这种桌面悬浮窗的效果很类似与Widget,但是它比Widget要灵活的多。主要是通过WindowManager这个类来实现的,调用这个类的addView方法用于添加一个悬浮窗,updateViewLayout方法用于更新悬浮窗的参数,removeView用于移除悬浮窗。其中悬浮窗的参数有必要详细说明一下。
WindowManager.LayoutParams这个类用于提供悬浮窗所需的参数,其中有几个经常会用到的变量:
type值用于确定悬浮窗的类型,一般设为2002,表示在所有应用程序之上,但在状态栏之下。
flags值用于确定悬浮窗的行为,比如说不可聚焦,非模态对话框等等,属性非常多,大家可以查看文档。
gravity值用于确定悬浮窗的对齐方式,一般设为左上角对齐,这样当拖动悬浮窗的时候方便计算坐标。
x值用于确定悬浮窗的位置,如果要横向移动悬浮窗,就需要改变这个值。
y值用于确定悬浮窗的位置,如果要纵向移动悬浮窗,就需要改变这个值。
width值用于指定悬浮窗的宽度。
height值用于指定悬浮窗的高度。
创建悬浮窗这种窗体需要向用户申请权限才可以的,因此还需要在AndroidManifest.xml中加入
<uses-permission android:name="android.permission.SYSTEM_ALERT_WINDOW" />
原理介绍完了,下面我们开始用代码实现。首先在Eclipse中新建一个Android项目,项目名就叫做360FloatWindowDemo。然后写一下布局文件,布局文件非常简单,只有一个按钮,打开或新建activity_main.xml,
加入如下代码:
|
1
2
3
4
5
6
7
8
9
10
11
12
|
<RelativeLayout xmlns:android="http://schemas.android.com/apk/res/android" xmlns:tools="http://schemas.android.com/tools" android:layout_width="fill_parent" android:layout_height="fill_parent" tools:context=".MainActivity" > <Button android:id="@+id/start_float_window" android:layout_width="fill_parent" android:layout_height="wrap_content" android:text="Start Float Window" > </Button> </RelativeLayout> |
然后再新建一个名为float_window_small.xml的布局文件,用于做为小悬浮窗的布局,
在其中加入如下代码:
|
1
2
3
4
5
6
7
8
9
10
11
12
13
14
15
16
|
<?xml version="1.0" encoding="UTF-8"?> <LinearLayout xmlns:android="http://schemas.android.com/apk/res/android" android:id="@+id/small_window_layout" android:layout_width="60dip" android:layout_height="25dip" android:background="@drawable/bg_small" > <TextView android:id="@+id/percent" android:layout_width="fill_parent" android:layout_height="fill_parent" android:gravity="center" android:textColor="#ffffff" /> </LinearLayout> |
再新建一个名为float_window_big.xml的布局文件,用于做为大悬浮窗的布局,
在其中加入如下代码:
|
1
2
3
4
5
6
7
8
9
10
11
12
13
14
15
16
17
18
19
20
21
22
23
24
25
|
<?xml version="1.0" encoding="UTF-8"?> <LinearLayout xmlns:android="http://schemas.android.com/apk/res/android" android:id="@+id/big_window_layout" android:layout_width="200dip" android:layout_height="100dip" android:background="@drawable/bg_big" android:orientation="vertical" > <Button android:id="@+id/close" android:layout_width="100dip" android:layout_height="40dip" android:layout_gravity="center_horizontal" android:layout_marginTop="12dip" android:text="关闭悬浮窗" /> <Button android:id="@+id/back" android:layout_width="100dip" android:layout_height="40dip" android:layout_gravity="center_horizontal" android:text="返回" /> </LinearLayout> |
两个悬浮窗布局文件中用到的图片资源,大家可以随便找点图片来代替,同时我会给出源码,大家也可以从源码中取出。
然后打开或创建MainActivity,这是项目的主界面
在里面加入如下代码:
|
1
2
3
4
5
6
7
8
9
10
11
12
13
14
15
16
|
public class MainActivity extends Activity { @Override protected void onCreate(Bundle savedInstanceState) { super.onCreate(savedInstanceState); setContentView(R.layout.activity_main); Button startFloatWindow = (Button) findViewById(R.id.start_float_window); startFloatWindow.setOnClickListener(new OnClickListener() { @Override public void onClick(View arg0) { Intent intent = new Intent(MainActivity.this, FloatWindowService.class); startService(intent); finish(); } }); } } |
这里可以看到,MainActivity的代码非窗简单,就是对开启悬浮窗的按钮注册了一个点击事件,用于打开一个服务,然后关闭当前Activity。创建悬浮窗的逻辑都交给服务去做了。好,现在我们来创建这个服务。新建一个名为FloatWindowService的类,这个类继承自Service
在里面加入如下代码:
|
1
2
3
4
5
6
7
8
9
10
11
12
13
14
15
16
17
18
19
20
21
22
23
24
25
26
27
28
29
30
31
32
33
34
35
36
37
38
39
40
41
42
43
44
45
46
47
48
49
50
51
52
53
54
55
56
57
58
59
60
61
62
63
64
65
66
67
68
69
70
71
72
73
74
75
76
77
78
79
80
81
82
83
84
85
86
87
88
89
90
91
92
93
94
95
96
97
98
|
public class FloatWindowService extends Service { /** * 用于在线程中创建或移除悬浮窗。 */ private Handler handler = new Handler(); /** * 定时器,定时进行检测当前应该创建还是移除悬浮窗。 */ private Timer timer; @Override public IBinder onBind(Intent intent) { return null; } @Override public int onStartCommand(Intent intent, int flags, int startId) { // 开启定时器,每隔0.5秒刷新一次 if (timer == null) { timer = new Timer(); timer.scheduleAtFixedRate(new RefreshTask(), 0, 500); } return super.onStartCommand(intent, flags, startId); } @Override public void onDestroy() { super.onDestroy(); // Service被终止的同时也停止定时器继续运行 timer.cancel(); timer = null; } class RefreshTask extends TimerTask { @Override public void run() { // 当前界面是桌面,且没有悬浮窗显示,则创建悬浮窗。 if (isHome() && !MyWindowManager.isWindowShowing()) { handler.post(new Runnable() { @Override public void run() { MyWindowManager.createSmallWindow(getApplicationContext()); } }); } // 当前界面不是桌面,且有悬浮窗显示,则移除悬浮窗。 else if (!isHome() && MyWindowManager.isWindowShowing()) { handler.post(new Runnable() { @Override public void run() { MyWindowManager.removeSmallWindow(getApplicationContext()); MyWindowManager.removeBigWindow(getApplicationContext()); } }); } // 当前界面是桌面,且有悬浮窗显示,则更新内存数据。 else if (isHome() && MyWindowManager.isWindowShowing()) { handler.post(new Runnable() { @Override public void run() { MyWindowManager.updateUsedPercent(getApplicationContext()); } }); } } } /** * 判断当前界面是否是桌面 */ private boolean isHome() { ActivityManager mActivityManager = (ActivityManager) getSystemService(Context.ACTIVITY_SERVICE); List<RunningTaskInfo> rti = mActivityManager.getRunningTasks(1); return getHomes().contains(rti.get(0).topActivity.getPackageName()); } /** * 获得属于桌面的应用的应用包名称 * * @return 返回包含所有包名的字符串列表 */ private List<String> getHomes() { List<String> names = new ArrayList<String>(); PackageManager packageManager = this.getPackageManager(); Intent intent = new Intent(Intent.ACTION_MAIN); intent.addCategory(Intent.CATEGORY_HOME); List<ResolveInfo> resolveInfo = packageManager.queryIntentActivities(intent, PackageManager.MATCH_DEFAULT_ONLY); for (ResolveInfo ri : resolveInfo) { names.add(ri.activityInfo.packageName); } return names; } } |
FloatWindowService的onStartCommand方法中开启了一个定时器,每隔500毫秒就会执行RefreshTask。在RefreshTask当中,要进行判断,如果手机当前是在桌面的话,就应该显示悬浮窗,如果手机打开了某一个应用程序,就应该移除悬浮窗,如果手机在桌面的话,还应该更新内存使用百分比的数据。而当FloatWindowService被销毁的时候,应该将定时器停止,否则它还会一直运行。
从上面的代码我们也可以看出,创建和移除悬浮窗,以及更新悬浮窗内的数据,都是由MyWindowManager这个类来管理的,比起直接把这些代码写在Activity或Service当中,使用一个专门的工具类来管理要好的多。不过要想创建悬浮窗,还是先要把悬浮窗的View写出来。
新建一个名叫FloatWindowSmallView的类,继承自LinearLayout。新建一个名叫FloatWindowBigView的类,也继承自LinearLayout。
在FloatWindowSmallView中加入如下代码:
|
1
2
3
4
5
6
7
8
9
10
11
12
13
14
15
16
17
18
19
20
21
22
23
24
25
26
27
28
29
30
31
32
33
34
35
36
37
38
39
40
41
42
43
44
45
46
47
48
49
50
51
52
53
54
55
56
57
58
59
60
61
62
63
64
65
66
67
68
69
70
71
72
73
74
75
76
77
78
79
80
81
82
83
84
85
86
87
88
89
90
91
92
93
94
95
96
97
98
99
100
101
102
103
104
105
106
107
108
109
110
111
112
113
114
115
116
117
118
119
120
121
122
123
124
125
126
127
128
129
130
131
132
133
134
135
136
137
138
139
140
141
142
143
144
|
public class FloatWindowSmallView extends LinearLayout { /** * 记录小悬浮窗的宽度 */ public static int viewWidth; /** * 记录小悬浮窗的高度 */ public static int viewHeight; /** * 记录系统状态栏的高度 */ private static int statusBarHeight; /** * 用于更新小悬浮窗的位置 */ private WindowManager windowManager; /** * 小悬浮窗的参数 */ private WindowManager.LayoutParams mParams; /** * 记录当前手指位置在屏幕上的横坐标值 */ private float xInScreen; /** * 记录当前手指位置在屏幕上的纵坐标值 */ private float yInScreen; /** * 记录手指按下时在屏幕上的横坐标的值 */ private float xDownInScreen; /** * 记录手指按下时在屏幕上的纵坐标的值 */ private float yDownInScreen; /** * 记录手指按下时在小悬浮窗的View上的横坐标的值 */ private float xInView; /** * 记录手指按下时在小悬浮窗的View上的纵坐标的值 */ private float yInView; public FloatWindowSmallView(Context context) { super(context); windowManager = (WindowManager) context.getSystemService(Context.WINDOW_SERVICE); LayoutInflater.from(context).inflate(R.layout.float_window_small, this); View view = findViewById(R.id.small_window_layout); viewWidth = view.getLayoutParams().width; viewHeight = view.getLayoutParams().height; TextView percentView = (TextView) findViewById(R.id.percent); percentView.setText(MyWindowManager.getUsedPercentValue(context)); } @Override public boolean onTouchEvent(MotionEvent event) { switch (event.getAction()) { case MotionEvent.ACTION_DOWN: // 手指按下时记录必要数据,纵坐标的值都需要减去状态栏高度 xInView = event.getX(); yInView = event.getY(); xDownInScreen = event.getRawX(); yDownInScreen = event.getRawY() - getStatusBarHeight(); xInScreen = event.getRawX(); yInScreen = event.getRawY() - getStatusBarHeight(); break; case MotionEvent.ACTION_MOVE: xInScreen = event.getRawX(); yInScreen = event.getRawY() - getStatusBarHeight(); // 手指移动的时候更新小悬浮窗的位置 updateViewPosition(); break; case MotionEvent.ACTION_UP: // 如果手指离开屏幕时,xDownInScreen和xInScreen相等,且yDownInScreen和yInScreen相等,则视为触发了单击事件。 if (xDownInScreen == xInScreen && yDownInScreen == yInScreen) { openBigWindow(); } break; default: break; } return true; } /** * 将小悬浮窗的参数传入,用于更新小悬浮窗的位置。 * * @param params * 小悬浮窗的参数 */ public void setParams(WindowManager.LayoutParams params) { mParams = params; } /** * 更新小悬浮窗在屏幕中的位置。 */ private void updateViewPosition() { mParams.x = (int) (xInScreen - xInView); mParams.y = (int) (yInScreen - yInView); windowManager.updateViewLayout(this, mParams); } /** * 打开大悬浮窗,同时关闭小悬浮窗。 */ private void openBigWindow() { MyWindowManager.createBigWindow(getContext()); MyWindowManager.removeSmallWindow(getContext()); } /** * 用于获取状态栏的高度。 * * @return 返回状态栏高度的像素值。 */ private int getStatusBarHeight() { if (statusBarHeight == 0) { try { Class<?> c = Class.forName("com.android.internal.R$dimen"); Object o = c.newInstance(); Field field = c.getField("status_bar_height"); int x = (Integer) field.get(o); statusBarHeight = getResources().getDimensionPixelSize(x); } catch (Exception e) { e.printStackTrace(); } } return statusBarHeight; } |
其中,对这个View的onTouchEvent事件进行了重写,用于实现拖动和点击的效果。如果发现用户触发了ACTION_DOWN事件,会记录按下时的坐标等数据。如果发现用户触发了ACTION_MOVE事件,则根据当前移动的坐标更新悬浮窗在屏幕中的位置。如果发现用户触发了ACTION_UP事件,会和ACTION_DOWN中记下的坐标对比,如果发现是相同的,则视为用户对悬浮窗进行了点击。点击小悬浮窗则打开大悬浮窗,然后我们来实现大悬浮窗的View。
在FloatWindowBigView中加入如下代码:
|
1
2
3
4
5
6
7
8
9
10
11
12
13
14
15
16
17
18
19
20
21
22
23
24
25
26
27
28
29
30
31
32
33
34
35
36
37
38
39
40
|
public class FloatWindowBigView extends LinearLayout { /** * 记录大悬浮窗的宽度 */ public static int viewWidth; /** * 记录大悬浮窗的高度 */ public static int viewHeight; public FloatWindowBigView(final Context context) { super(context); LayoutInflater.from(context).inflate(R.layout.float_window_big, this); View view = findViewById(R.id.big_window_layout); viewWidth = view.getLayoutParams().width; viewHeight = view.getLayoutParams().height; Button close = (Button) findViewById(R.id.close); Button back = (Button) findViewById(R.id.back); close.setOnClickListener(new OnClickListener() { @Override public void onClick(View v) { // 点击关闭悬浮窗的时候,移除所有悬浮窗,并停止Service MyWindowManager.removeBigWindow(context); MyWindowManager.removeSmallWindow(context); Intent intent = new Intent(getContext(), FloatWindowService.class); context.stopService(intent); } }); back.setOnClickListener(new OnClickListener() { @Override public void onClick(View v) { // 点击返回的时候,移除大悬浮窗,创建小悬浮窗 MyWindowManager.removeBigWindow(context); MyWindowManager.createSmallWindow(context); } }); } } |
比起FloatWindowSmallView,FloatWindowBigView要简单的多,其中只有两个按钮,点击close按钮,将悬浮窗全部移除,并将Service终止。单击back按钮则移除大悬浮窗,重新创建小悬浮窗。
现在两个悬浮窗的View都已经写好了,我们来创建MyWindowManager,
代码如下:
|
1
2
3
4
5
6
7
8
9
10
11
12
13
14
15
16
17
18
19
20
21
22
23
24
25
26
27
28
29
30
31
32
33
34
35
36
37
38
39
40
41
42
43
44
45
46
47
48
49
50
51
52
53
54
55
56
57
58
59
60
61
62
63
64
65
66
67
68
69
70
71
72
73
74
75
76
77
78
79
80
81
82
83
84
85
86
87
88
89
90
91
92
93
94
95
96
97
98
99
100
101
102
103
104
105
106
107
108
109
110
111
112
113
114
115
116
117
118
119
120
121
122
123
124
125
126
127
128
129
130
131
132
133
134
135
136
137
138
139
140
141
142
143
144
145
146
147
148
149
150
151
152
153
154
155
156
157
158
159
160
161
162
163
164
165
166
167
168
169
170
171
172
173
174
175
176
177
178
179
180
181
182
183
184
185
186
187
188
189
190
191
192
193
194
195
196
197
198
199
200
201
202
203
204
|
public class MyWindowManager { /** * 小悬浮窗View的实例 */ private static FloatWindowSmallView smallWindow; /** * 大悬浮窗View的实例 */ private static FloatWindowBigView bigWindow; /** * 小悬浮窗View的参数 */ private static LayoutParams smallWindowParams; /** * 大悬浮窗View的参数 */ private static LayoutParams bigWindowParams; /** * 用于控制在屏幕上添加或移除悬浮窗 */ private static WindowManager mWindowManager; /** * 用于获取手机可用内存 */ private static ActivityManager mActivityManager; /** * 创建一个小悬浮窗。初始位置为屏幕的右部中间位置。 * * @param context * 必须为应用程序的Context. */ public static void createSmallWindow(Context context) { WindowManager windowManager = getWindowManager(context); int screenWidth = windowManager.getDefaultDisplay().getWidth(); int screenHeight = windowManager.getDefaultDisplay().getHeight(); if (smallWindow == null) { smallWindow = new FloatWindowSmallView(context); if (smallWindowParams == null) { smallWindowParams = new LayoutParams(); smallWindowParams.type = LayoutParams.TYPE_PHONE; smallWindowParams.format = PixelFormat.RGBA_8888; smallWindowParams.flags = LayoutParams.FLAG_NOT_TOUCH_MODAL | LayoutParams.FLAG_NOT_FOCUSABLE; smallWindowParams.gravity = Gravity.LEFT | Gravity.TOP; smallWindowParams.width = FloatWindowSmallView.viewWidth; smallWindowParams.height = FloatWindowSmallView.viewHeight; smallWindowParams.x = screenWidth; smallWindowParams.y = screenHeight / 2; } smallWindow.setParams(smallWindowParams); windowManager.addView(smallWindow, smallWindowParams); } } /** * 将小悬浮窗从屏幕上移除。 * * @param context * 必须为应用程序的Context. */ public static void removeSmallWindow(Context context) { if (smallWindow != null) { WindowManager windowManager = getWindowManager(context); windowManager.removeView(smallWindow); smallWindow = null; } } /** * 创建一个大悬浮窗。位置为屏幕正中间。 * * @param context * 必须为应用程序的Context. */ public static void createBigWindow(Context context) { WindowManager windowManager = getWindowManager(context); int screenWidth = windowManager.getDefaultDisplay().getWidth(); int screenHeight = windowManager.getDefaultDisplay().getHeight(); if (bigWindow == null) { bigWindow = new FloatWindowBigView(context); if (bigWindowParams == null) { bigWindowParams = new LayoutParams(); bigWindowParams.x = screenWidth / 2 - FloatWindowBigView.viewWidth / 2; bigWindowParams.y = screenHeight / 2 - FloatWindowBigView.viewHeight / 2; bigWindowParams.type = LayoutParams.TYPE_PHONE; bigWindowParams.format = PixelFormat.RGBA_8888; bigWindowParams.gravity = Gravity.LEFT | Gravity.TOP; bigWindowParams.width = FloatWindowBigView.viewWidth; bigWindowParams.height = FloatWindowBigView.viewHeight; } windowManager.addView(bigWindow, bigWindowParams); } } /** * 将大悬浮窗从屏幕上移除。 * * @param context * 必须为应用程序的Context. */ public static void removeBigWindow(Context context) { if (bigWindow != null) { WindowManager windowManager = getWindowManager(context); windowManager.removeView(bigWindow); bigWindow = null; } } /** * 更新小悬浮窗的TextView上的数据,显示内存使用的百分比。 * * @param context * 可传入应用程序上下文。 */ public static void updateUsedPercent(Context context) { if (smallWindow != null) { TextView percentView = (TextView) smallWindow.findViewById(R.id.percent); percentView.setText(getUsedPercentValue(context)); } } /** * 是否有悬浮窗(包括小悬浮窗和大悬浮窗)显示在屏幕上。 * * @return 有悬浮窗显示在桌面上返回true,没有的话返回false。 */ public static boolean isWindowShowing() { return smallWindow != null || bigWindow != null; } /** * 如果WindowManager还未创建,则创建一个新的WindowManager返回。否则返回当前已创建的WindowManager。 * * @param context * 必须为应用程序的Context. * @return WindowManager的实例,用于控制在屏幕上添加或移除悬浮窗。 */ private static WindowManager getWindowManager(Context context) { if (mWindowManager == null) { mWindowManager = (WindowManager) context.getSystemService(Context.WINDOW_SERVICE); } return mWindowManager; } /** * 如果ActivityManager还未创建,则创建一个新的ActivityManager返回。否则返回当前已创建的ActivityManager。 * * @param context * 可传入应用程序上下文。 * @return ActivityManager的实例,用于获取手机可用内存。 */ private static ActivityManager getActivityManager(Context context) { if (mActivityManager == null) { mActivityManager = (ActivityManager) context.getSystemService(Context.ACTIVITY_SERVICE); } return mActivityManager; } /** * 计算已使用内存的百分比,并返回。 * * @param context * 可传入应用程序上下文。 * @return 已使用内存的百分比,以字符串形式返回。 */ public static String getUsedPercentValue(Context context) { String dir = "/proc/meminfo"; try { FileReader fr = new FileReader(dir); BufferedReader br = new BufferedReader(fr, 2048); String memoryLine = br.readLine(); String subMemoryLine = memoryLine.substring(memoryLine.indexOf("MemTotal:")); br.close(); long totalMemorySize = Integer.parseInt(subMemoryLine.replaceAll("\\D+", "")); long availableSize = getAvailableMemory(context) / 1024; int percent = (int) ((totalMemorySize - availableSize) / (float) totalMemorySize * 100); return percent + "%"; } catch (IOException e) { e.printStackTrace(); } return "悬浮窗"; } /** * 获取当前可用内存,返回数据以字节为单位。 * * @param context * 可传入应用程序上下文。 * @return 当前可用内存。 */ private static long getAvailableMemory(Context context) { ActivityManager.MemoryInfo mi = new ActivityManager.MemoryInfo(); getActivityManager(context).getMemoryInfo(mi); return mi.availMem; } } |
这个类负责了控制大悬浮窗,小悬浮窗的创建和移除,系统内存使用百分比的计算等操作。
到这里基本所有的代码都已经写完了,然后我们来看一下AndroidManifest.xml文件吧,
里面代码如下:
|
1
2
3
4
5
6
7
8
9
10
11
12
13
14
15
16
17
18
19
20
21
22
23
24
25
26
27
28
29
30
31
|
<?xml version="1.0" encoding="utf-8"?> <manifest xmlns:android="http://schemas.android.com/apk/res/android" package="com.demo.floatwindowdemo" android:versionCode="1" android:versionName="1.0" > <uses-permission android:name="android.permission.SYSTEM_ALERT_WINDOW" /> <uses-sdk android:minSdkVersion="8" android:targetSdkVersion="8" /> <application android:allowBackup="true" android:icon="@drawable/ic_launcher" android:label="@string/app_name" android:theme="@style/AppTheme" > <activity android:name="com.demo.floatwindowdemo.MainActivity" android:label="@string/app_name" > <intent-filter> <action android:name="android.intent.action.MAIN" /> <category android:name="android.intent.category.LAUNCHER" /> </intent-filter> </activity> <service android:name=".FloatWindowService"></service> </application> </manifest> |
比较简单,记得把Activity和Service在里面注册好,还有一个权限声明需要添加的android.permission.SYSTEM_ALERT_WINDOW,表示需要用户授权允许创建系统提示窗口,也就是我们的桌面悬浮窗。
好了,现在让我们运行一下项目吧,效果如下图,主界面只有一个简单的按钮,点击按钮后,Activity被关闭,小悬浮窗显示在桌面上。其中显示着当前内存使用的百分比。


小悬浮窗是可以自由拖动的,如果打开了其它的应用程序,小悬浮窗会自动隐藏,回到桌面后小悬浮窗又会显示出来。


如果点击了小悬浮窗会弹出大悬浮窗来,这里我们大悬浮窗做的比较简单,就只有两个按钮。大悬浮窗展示的时候手机的所有其它程序是不可点的,因为焦点都在悬浮窗上了。点击返回按钮会重新展示小悬浮窗,点击关闭悬浮窗按钮,Service也会一起停掉。

360手机卫士的一键加速功能我们就不做了,就像独孤九剑一样,重要的是剑意而不是剑招,我相信大家学会了创建悬浮窗的基本原理后可以做出比360更有创意的东西。
如果大家还有什么疑问,请在下面留言。
补充:有朋友跟我反应,上面的代码在Android 3.0以上的系统运行会崩溃,我看了一下,确实如此,主要是3.0之后想要获取正在运行的任务,需要加上权限声明。在AndroidManifest.xml中加入
<uses-permission android:name="android.permission.GET_TASKS" />
即可解决此问题。
原文链接:https://blog.csdn.net/guolin_blog/article/details/8689140


