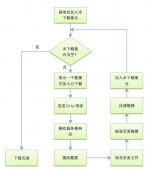
本文将演示怎么通过c#开发部署一个windows服务,该服务提供各客户端的信息通讯,适用于局域网。采用tcp协议,单一服务器连接模式为一对多;多台服务器的情况下,当客户端连接数超过预设值时可自动进行负载转移,当然也可手动切换服务器,这种场景在实际项目中应用广泛。
简单的消息则通过服务器转发,文件类的消息则让客户端自己建立连接进行传输。后续功能将慢慢完善。
自定义协议:

1.新建windows服务项目

2.修改配置文件添加
|
1
2
3
4
|
<appsettings> <add key="maxqueuecount" value="10"/> <add key="failoverserver" value="192.168.250.113,192.168.250.141"/></appsettings> |
说明:maxqueuecount为最大连接数,failoverserver故障转移备用服务器(多个服务器,隔开)
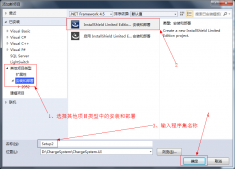
3.打开chatservice右键添加安装程序,此时会自动添加projectinstaller.cs文件,文件中会默认添加serviceprocessinstaller1和serviceinstaller1两个组件

修改serviceinstaller1和serviceprocessinstaller1的属性信息如图


starttype属性说明:
automatic 指示服务在系统启动时将由(或已由)操作系统启动。如果某个自动启动的服务依赖于某个手动启动的服务,则手动启动的服务也会在系统启动时自动启动。
disabled 指示禁用该服务,以便它无法由用户或应用程序启动。
manual 指示服务只由用户(使用“服务控制管理器”)或应用程序手动启动。
account属性说明:
localservice 充当本地计算机上非特权用户的帐户,该帐户将匿名凭据提供给所有远程服务器。
localsystem 服务控制管理员使用的帐户,它具有本地计算机上的许多权限并作为网络上的计算机。
networkservice 提供广泛的本地特权的帐户,该帐户将计算机的凭据提供给所有远程服务器。
user 由网络上特定的用户定义的帐户。如果为 serviceprocessinstaller.account 成员指定 user,则会使系统在安装服务时提示输入有效的用户名和密码,除非您为 serviceprocessinstaller 实例的 username 和 password 这两个属性设置值。
4.完成以后打开chatservice代码,重写onstart和onstop方法(即服务的启动和停止方法)。若要重写其它方法请在servicebase中查看。
5.在项目中添加服务注册和卸载脚本文件
|
1
2
3
4
5
6
7
8
9
10
11
12
13
14
|
install.bat@echo offpath %systemroot%\microsoft.net\framework\v4.0.30319;%path%installutil %~dp0\windowschat.exe%systemroot%\system32\sc failure "chatservice" reset= 30 actions= restart/1000pause@echo onuninstall.bat@echo offpath %systemroot%\microsoft.net\framework\v4.0.30319;%path%installutil -u %~dp0\windowschat.exepause@echo on |
说明:%~dp0 表示bat文件所在的目录
文件属性选择 始终复制-内容,这样才能生成到输出文件夹中

6.回到上面的重写onstart和onstop方法
创建一个sockethelper类
|
1
2
3
4
5
6
7
8
9
10
11
12
13
14
15
16
17
18
19
20
21
22
23
24
25
26
27
28
29
30
31
32
33
34
35
36
37
38
39
40
41
42
43
44
45
46
47
48
49
50
51
52
53
54
55
56
57
58
59
60
61
62
63
64
65
66
67
68
69
70
71
72
73
74
75
76
77
78
79
80
81
82
83
84
85
86
87
88
89
90
91
92
93
94
95
96
97
98
99
100
101
102
103
104
105
106
107
108
109
110
111
112
113
114
115
116
117
118
119
120
121
122
123
124
125
126
127
128
129
130
131
132
133
134
135
136
137
138
139
140
141
142
143
144
145
146
147
148
149
150
151
152
153
154
155
156
157
158
159
160
161
162
163
164
165
166
167
168
169
170
171
172
173
174
175
176
177
178
179
180
181
182
183
184
185
186
187
188
189
190
191
|
namespace windowschat{ public delegate void writeinfo(string info); public class sockethelper { #region 构造函数 public sockethelper() { } public sockethelper(writeinfo method) { this.method = method; } #endregion public static socket localsocket = null; private object lockobj = new object(); public static list<socket> clients = new list<socket>(); private writeinfo method = null; /// <summary> /// 创建socket /// </summary> /// <param name="port">端口默认 11011</param> /// <param name="backlog">the maximum length of the pending connections queue.</param> /// <returns></returns> public socket create(int port = 11011, int backlog = 100) { if (localsocket == null) { ipendpoint ipendpoint = new ipendpoint(ipaddress.any, port);//本机预使用的ip和端口 localsocket = new socket(addressfamily.internetwork, sockettype.stream, protocoltype.tcp); localsocket.bind(ipendpoint); localsocket.listen(backlog); } return localsocket; } /// <summary> /// 查找客户端连接 /// </summary> /// <param name="id">标识</param> /// <returns></returns> private socket findlinked(string id) { foreach (var item in clients) { if (item.remoteendpoint.tostring() == id) return item; } return null; } /// <summary> /// 接受远程连接 /// </summary> public void accept() { if (localsocket != null) { while (true) { socket client = localsocket.accept(); thread thread = new thread(new parameterizedthreadstart(revice)); thread.start(client); writelog("客户端:" + client.remoteendpoint.tostring() + " 接入"); lock (lockobj) { clients.add(client); } broadcast("add|" + client.remoteendpoint.tostring()); } } } /// <summary> /// 日志 /// </summary> /// <param name="info">信息</param> private void writelog(string info) { using (filestream fs = new filestream("c:\\chatservice.txt", filemode.append, fileaccess.write, fileshare.readwrite)) { using (streamwriter sw = new streamwriter(fs, encoding.utf8)) { sw.writeline(info); } } if (method != null) { method(info); } } /// <summary> /// 广播 /// </summary> /// <param name="info">信息</param> public void broadcast(string info) { foreach (var item in clients) { try { item.send(encoding.utf8.getbytes(info)); } catch (exception ex) { writelog(item.remoteendpoint.tostring() + ex.message); continue; } } } /// <summary> /// 介绍信息 /// </summary> /// <param name="client"></param> public void revice(object client) { socket param = client as socket; var remotename = param.remoteendpoint.tostring(); if (param != null) { int res = 0; while (true) { byte[] buffer = new byte[10240]; int size = param.receivebuffersize; try { res = param.receive(buffer); } catch (socketexception ex) { if (ex.socketerrorcode == socketerror.connectionreset) { clients.remove(param); writelog("客户端:" + remotename + "断开连接1"); broadcast("remove|" + remotename); param.close(); return; } } if (res == 0) { clients.remove(param); writelog("客户端:" + remotename + "断开连接2"); broadcast("remove|" + remotename); param.close(); return; } var clientmsg = encoding.utf8.getstring(buffer, 0, res); writelog(string.format("收到客户端{0}命令:{1}", remotename, clientmsg)); if (clientmsg == "getall") { stringbuilder sb = new stringbuilder(); foreach (var item in clients) { sb.appendformat("{0}|", item.remoteendpoint.tostring()); } param.send(encoding.utf8.getbytes("all|" + sb.tostring())); } else if (clientmsg == "offline") { if (clients.contains(param)) { clients.remove(param); writelog("客户端:" + remotename + "断开连接2"); broadcast("remove|" + remotename); param.close(); return; } } else if (clientmsg.startswith("transt|")) { var msgs = clientmsg.split('|'); var tosocket = findlinked(msgs[1]); if (tosocket != null) { writelog(remotename + "发给" + msgs[1] + "的消息" + msgs[2]); tosocket.send(encoding.utf8.getbytes("transf|" + remotename + "|" + msgs[2])); } } } } } }} |
重写onstart和onstop方法
|
1
2
3
4
5
6
7
8
9
10
11
12
13
14
15
16
17
18
19
20
21
22
23
24
25
26
27
|
public partial class chatservice : servicebase{ sockethelper helper; thread mainthread; public chatservice() { initializecomponent(); } protected override void onstart(string[] args) { if (helper == null) { helper = new sockethelper(); } helper.create(); mainthread = new thread(new threadstart(helper.accept)); mainthread.isbackground = true; mainthread.start(); } protected override void onstop() { helper.broadcast("shutdown"); }} |
至此一个简易的windows服务的聊天服务端开发完成,后续会在这基础上进行扩展。
运行install.bat(以管理员身份运行)如图

7.运行 services.msc查找到chatservice服务,能正常启动停止说明部署成功!

当然你也可以将installutil.exe拷贝到执行文件所在目录,比如c:\bin\
则部署脚本为
cd c:\bin\
installutil windowschat.exe
卸载脚本
installutil -u windowschat.exe
以上就是本文的全部内容,希望对大家的学习有所帮助,也希望大家多多支持服务器之家。


