1minio简介
MinIO 是一款高性能、分布式的对象存储系统. 它是一款软件产品, 可以100%的运行在标准硬件。即X86等低成本机器也能够很好的运行MinIO。

MinIO与传统的存储和其他的对象存储不同的是:它一开始就针对性能要求更高的私有云标准进行软件架构设计。因为MinIO一开始就只为对象存储而设计。所以他采用了更易用的方式进行设计,它能实现对象存储所需要的全部功能,在性能上也更加强劲,它不会为了更多的业务功能而妥协,失去MinIO的易用性、高效性。 这样的结果所带来的好处是:它能够更简单的实现局有弹性伸缩能力的原生对象存储服务。

MinIO在传统对象存储用例(例如辅助存储,灾难恢复和归档)方面表现出色。同时,它在机器学习、大数据、私有云、混合云等方面的存储技术上也独树一帜。当然,也不排除数据分析、高性能应用负载、原生云的支持。
minio社区版本开源免费,在没有预算使用oss的时候可以考虑使用。
2 docker搭建minio
minio是支持云原生的,所以直接讲使用docker来搭建,当然也可以使用k8s,直接下载官方的chart使用即可。

2.1 单节点
单节点可以直接使用docker run启动即可
|
1
2
3
4
|
docker run \ -p 9000:9000 \ -p 9001:9001 \ minio/minio server /data --console-address ":9001" |
也可以使用docker-compose来运行。
编写docker-compose.yaml
|
1
2
3
4
5
6
7
8
9
10
11
12
13
14
15
16
17
|
version: '3'services: minio: image: minio/minio hostname: "minio" ports: - 9000:9000 - 9001:9001 environment: MINIO_ACCESS_KEY: admin #控制台登录账号 MINIO_SECRET_KEY: 12345678 #控制台登录密码 volumes: - ./data:/data #存储路径 - ./config:/root/.minio/ #配置文件 command: server --console-address ':9001' /data privileged: true restart: always |
创建挂载的文件目录,运行docker-compos启动。
|
1
|
docker-compser up -d |
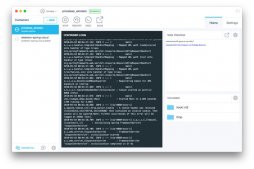
输入ip:9001 输入admin/12345678进入控制台

控制台:

创建bucket,就可以上传文件了。

输入名称保存。

可以配置,相关策略,这里就不说明了。

可以上传下载操对象文件。

2.2 多节点部署
多节点部署使用docker-compse来模拟。创建4个节点,每个节点挂载两份数据。
编写docker-compose.yaml
|
1
2
3
4
5
6
7
8
9
10
11
12
13
14
15
16
17
18
19
20
21
22
23
24
25
26
27
28
29
30
31
32
33
34
35
36
37
38
39
40
41
42
43
44
45
46
47
48
49
50
51
52
53
54
55
56
57
58
59
60
61
62
63
64
65
66
67
68
69
70
71
72
73
74
75
76
77
78
79
80
81
82
83
84
85
86
87
88
89
90
91
92
93
94
95
|
version: '3'# starts 4 docker containers running minio server instances.# using nginx reverse proxy, load balancing, you can access# it through port 9000.services: minio1: image: minio/minio hostname: minio1 volumes: - ./data1-1:/data1 - ./data1-2:/data2 expose: - "9000" - "9001" environment: MINIO_ROOT_USER: minio MINIO_ROOT_PASSWORD: minio123 command: server --console-address ":9001" http://minio{1...4}/data{1...2} healthcheck: test: ["CMD", "curl", "-f", "http://localhost:9000/minio/health/live"] interval: 30s timeout: 20s retries: 3 minio2: image: minio/minio hostname: minio2 volumes: - ./data2-1:/data1 - ./data2-2:/data2 expose: - "9000" - "9001" environment: MINIO_ROOT_USER: minio MINIO_ROOT_PASSWORD: minio123 command: server --console-address ":9001" http://minio{1...4}/data{1...2} healthcheck: test: ["CMD", "curl", "-f", "http://localhost:9000/minio/health/live"] interval: 30s timeout: 20s retries: 3 minio3: image: minio/minio hostname: minio3 volumes: - ./data3-1:/data1 - ./data3-2:/data2 expose: - "9000" - "9001" environment: MINIO_ROOT_USER: minio MINIO_ROOT_PASSWORD: minio123 command: server --console-address ":9001" http://minio{1...4}/data{1...2} healthcheck: test: ["CMD", "curl", "-f", "http://localhost:9000/minio/health/live"] interval: 30s timeout: 20s retries: 3 minio4: image: minio/minio hostname: minio4 volumes: - ./data4-1:/data1 - ./data4-2:/data2 expose: - "9000" - "9001" environment: MINIO_ROOT_USER: minio MINIO_ROOT_PASSWORD: minio123 command: server --console-address ":9001" http://minio{1...4}/data{1...2} healthcheck: test: ["CMD", "curl", "-f", "http://localhost:9000/minio/health/live"] interval: 30s timeout: 20s retries: 3 nginx: image: nginx:1.19.2-alpine hostname: nginx volumes: - ./nginx.conf:/etc/nginx/nginx.conf:ro ports: - "9000:9000" - "9001:9001" depends_on: - minio1 - minio2 - minio3 - minio4 |
创建挂载的对应的data目录和nginx目录。
使用nginx负载均衡4个节点,创建nginx.conf。
|
1
2
3
4
5
6
7
8
9
10
11
12
13
14
15
16
17
18
19
20
21
22
23
24
25
26
27
28
29
30
31
32
33
34
35
36
37
38
39
40
41
42
43
44
45
46
47
48
49
50
51
52
53
54
55
56
57
58
59
60
61
62
63
64
65
66
67
68
69
70
71
72
73
74
75
76
77
78
79
80
81
82
83
84
85
86
87
88
89
90
91
92
93
94
95
96
97
98
99
100
101
102
103
104
|
user nginx;worker_processes auto;error_log /var/log/nginx/error.log warn;pid /var/run/nginx.pid;events { worker_connections 4096;}http { include /etc/nginx/mime.types; default_type application/octet-stream; log_format main '$remote_addr - $remote_user [$time_local] "$request" ' '$status $body_bytes_sent "$http_referer" ' '"$http_user_agent" "$http_x_forwarded_for"'; access_log /var/log/nginx/access.log main; sendfile on; keepalive_timeout 65; # include /etc/nginx/conf.d/*.conf; upstream minio { server minio1:9000; server minio2:9000; server minio3:9000; server minio4:9000; } upstream console { ip_hash; server minio1:9001; server minio2:9001; server minio3:9001; server minio4:9001; } server { listen 9000; listen [::]:9000; server_name localhost; # To allow special characters in headers ignore_invalid_headers off; # Allow any size file to be uploaded. # Set to a value such as 1000m; to restrict file size to a specific value client_max_body_size 0; # To disable buffering proxy_buffering off; location / { proxy_set_header Host $http_host; proxy_set_header X-Real-IP $remote_addr; proxy_set_header X-Forwarded-For $proxy_add_x_forwarded_for; proxy_set_header X-Forwarded-Proto $scheme; proxy_connect_timeout 300; # Default is HTTP/1, keepalive is only enabled in HTTP/1.1 proxy_http_version 1.1; proxy_set_header Connection ""; chunked_transfer_encoding off; proxy_pass http://minio; } } server { listen 9001; listen [::]:9001; server_name localhost; # To allow special characters in headers ignore_invalid_headers off; # Allow any size file to be uploaded. # Set to a value such as 1000m; to restrict file size to a specific value client_max_body_size 0; # To disable buffering proxy_buffering off; location / { proxy_set_header Host $http_host; proxy_set_header X-Real-IP $remote_addr; proxy_set_header X-Forwarded-For $proxy_add_x_forwarded_for; proxy_set_header X-Forwarded-Proto $scheme; proxy_set_header X-NginX-Proxy true; # This is necessary to pass the correct IP to be hashed real_ip_header X-Real-IP; proxy_connect_timeout 300; # To support websocket proxy_http_version 1.1; proxy_set_header Upgrade $http_upgrade; proxy_set_header Connection "upgrade"; chunked_transfer_encoding off; proxy_pass http://console; } }} |
运行。
|
1
|
docker-compser up -d |
然后进入控制台,操作和单节点一样。
3 java sdk使用minio
sdk使用minio要先获取AccessKey和SecretKey。
在控制台生成。


项目pom文件引入。
|
1
2
3
4
5
|
<dependency> <groupId>io.minio</groupId> <artifactId>minio</artifactId> <version>8.3.0</version></dependency> |
编写上传、下载、删除的接口。
|
1
2
3
4
5
6
7
8
9
10
11
12
13
14
15
16
17
18
19
20
21
22
23
24
25
26
27
28
29
30
31
32
33
34
35
36
37
38
|
package com.test.minio;import javax.servlet.http.HttpServletResponse;import java.io.InputStream;/** * 存储文件 * * @author jiangyulu */public interface FileService { /** * 上传文件 * * @param inputStream inputStream * @param fdsFileName fdsFileName * @param img img * @return UUID */ String upload(InputStream inputStream, String fdsFileName, boolean img); /** * 下载文件 * * @param fdsFileName 文件在fds中的名称 * @param fileName 重新指定的文件名 * @param response response */ void download(String fdsFileName, String fileName, HttpServletResponse response); /** * 删除 * * @param fdsFileName fdsFileName */ void delete(String fdsFileName);} |
写实现类。
|
1
2
3
4
5
6
7
8
9
10
11
12
13
14
15
16
17
18
19
20
21
22
23
24
25
26
27
28
29
30
31
32
33
34
35
36
37
38
39
40
41
42
43
44
45
46
47
48
49
50
51
52
53
54
55
56
57
58
59
60
61
62
63
64
65
66
67
68
69
70
71
72
73
74
75
76
77
78
79
80
81
82
83
84
85
86
87
88
89
90
91
92
93
94
95
96
97
98
99
100
101
102
103
104
105
106
107
108
109
110
111
112
113
114
115
116
117
118
119
120
121
122
|
package com.test.minio.impl;import com.test.minio.FileService;import io.minio.*;import lombok.extern.slf4j.Slf4j;import org.apache.commons.io.IOUtils;import org.springframework.beans.factory.annotation.Autowired;import org.springframework.beans.factory.annotation.Value;import org.springframework.stereotype.Service;import javax.servlet.http.HttpServletResponse;import java.io.IOException;import java.io.InputStream;import java.net.URLEncoder;import java.util.UUID;/** * @author jaingyulu */@Slf4j@Service("minio")public class MinioFileServiceImpl implements FileService { @Value("{$minio.endpoint}") private String endpoint; @Value("{$minio.accessKeyId}") private String accessKeyId; @Value("{$minio.accessKeySecret}") private String accessKeySecret; @Value("{$minio.bucketName}") private String bucketName; @Override public String upload(InputStream inputStream, String fdsFileName, boolean img) { try { MinioClient minioClient = MinioClient.builder() .endpoint(endpoint) .credentials(accessKeyId, accessKeySecret) .build(); boolean found = minioClient.bucketExists(BucketExistsArgs.builder().bucket(bucketName).build()); if (found) { log.info("Bucket already exists."); } else { minioClient.makeBucket(MakeBucketArgs.builder().bucket(bucketName).build()); } if (!img) { minioClient.putObject( PutObjectArgs.builder() .bucket(bucketName) .object(fdsFileName) .stream(inputStream, inputStream.available(), -1) .build()); } else { minioClient.putObject( PutObjectArgs.builder() .bucket(bucketName) .object(fdsFileName) .stream(inputStream, inputStream.available(), -1) .contentType("image/jpg") .build()); } inputStream.close(); } catch (Exception e) { e.printStackTrace(); } return UUID.randomUUID().toString(); } @Override public void download(String fdsFileName, String fileName, HttpServletResponse response) { InputStream in = null; try { MinioClient minioClient = MinioClient.builder() .endpoint(endpoint) .credentials(accessKeyId, accessKeySecret) .build(); StatObjectResponse objectStat = minioClient.statObject(StatObjectArgs.builder().bucket(bucketName).object(fdsFileName).build()); response.setContentType(objectStat.contentType()); //response.setContentType(MediaType.APPLICATION_OCTET_STREAM_VALUE); response.setHeader("Content-Disposition", "attachment;filename=" + URLEncoder.encode(fileName, "UTF-8")); in = minioClient.getObject(GetObjectArgs.builder().bucket(bucketName).object(fdsFileName).build()); IOUtils.copy(in, response.getOutputStream()); } catch (Exception e) { log.error(e.getMessage()); } finally { if (in != null) { try { in.close(); } catch (IOException e) { log.error(e.getMessage()); } } } } @Override public void delete(String fdsFileName) { try { MinioClient minioClient = MinioClient.builder() .endpoint(endpoint) .credentials(accessKeyId, accessKeySecret) .build(); minioClient.removeObject(RemoveObjectArgs.builder().bucket(bucketName).object(fdsFileName).build()); } catch (Exception e) { e.printStackTrace(); } }} |
以上完成了minio文件操作的基本功能,其他功能可以查看官方的文档。8.3.0版本sdk比起7.x的变化还是比较大的。
到此这篇关于docker搭建minio及java sdk使用的文章就介绍到这了,更多相关docker搭建minio内容请搜索服务器之家以前的文章或继续浏览下面的相关文章希望大家以后多多支持服务器之家!
原文链接:https://blog.csdn.net/a19870822cp/article/details/120306905


