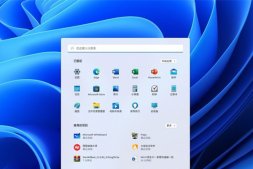
Windows 11正式版来了,想要先体验一下看看是不是自己的菜,才决定是否用它替换旧系统,那用VMware Workstation虚拟机来体验一下,这是个不错的方法。

图1 VMware Workstation
可是目前在VMware Workstation(后简称VM)中安装会遇到“此电脑无法运行Windows 11”的错误提示,怎么回事呢?那是因为用户把虚拟机的内存配置的太低,也没有给虚拟机加密,更没有添加上TPM虚拟硬件,所以无法直接安装Windows 11了。

图2 虚拟机安装Windows 11 出错
没事,跟着小编来,一步一步创建一个可以正常安装Windows 11的虚拟机环境。新手按照教程一步一步来,很快就能创建一个虚拟机,而想看怎么设置才能安装Windows 11的老鸟们往下翻跳过创建虚拟机步骤即可。
VMware Workstation安装Windows 11 具体步骤。
步骤一 创建虚拟机
要使用VM来体验Windows 11,首先要做的就是在VM里创建一个虚拟机,具体的创建虚拟机步骤,你只需要跟着下边的图一步一步走就好,只需要留意一下,内存设置需要大于4G。
至于如何下载Windows 11官方安装镜像文件,可以参考小编的另一篇文章。链接在这里:https://pcedu.pconline.com.cn/1461/14619444.html

图3 新建虚拟机

图4 下一步

图5 选择安装程序光盘,加载Windows 11安装镜像文件

图6 默认即可,选Windows 10 X64

图7 选择虚拟机保存位置

图8 选择UEFI勾选安全引导

图9 2/2 即可

图10 必须大于4G内存

图11 使用桥接网络或网络地址转换都可

图12 推荐即可

图13 推荐即可

图14 创建新虚拟磁盘

图15 设置新虚拟磁盘大小

图16 选择虚拟磁盘文件保存位置

图17 完成虚拟机创建
到此,一个新的虚拟机创建完毕,如果是安装Windows 10的话,直接开启虚拟机然后安装系统即可,但是安装Windows 11的话,还需要进行以下设置。
步骤二 设置可安装运行Windows 11的虚拟机环境
接下来我们就得为刚刚创建的虚拟机进行设置,以便让它能够安装运行Windows 11。这里我们需要把虚拟机进行加密及添加虚拟TPM安全芯片。
加密虚拟机步骤:选择刚刚创建的的虚拟机,右键菜单→设置→选项→访问控制→加密→设置密码→加密。

图18 虚拟机设置

图19 访问控制
添加虚拟TPM安全芯片步骤:虚拟机设置→硬件→添加→添加可信平台模块。

图20 添加新硬件

图21 添加可信平台模块步
骤三正常安装Windows 11
设置完毕后,就是开启虚拟机,按照正常的步骤安装Windows 11即可。

图22 正常安装Windows 11

图23 正常安装Windows 11

图24 正常安装Windows 11
总结
怎么样,你用VM体验上Windows 11了没。虽然Windows 11用起来跟Windows 10没多大区别,但是一些不一样的操作步骤还是需要时间去适应的,先体验一下再来做决定会是个不错的决定哦。


