如何设置一个自定义注释
整洁的代码和注释风格总是给人一种眼前一亮、赏心悦目的感觉,同时详细的注释也是程序员所必须的职业素养之一
今天主要分享一下如何在vs code中设置自定义 注释
第一步:
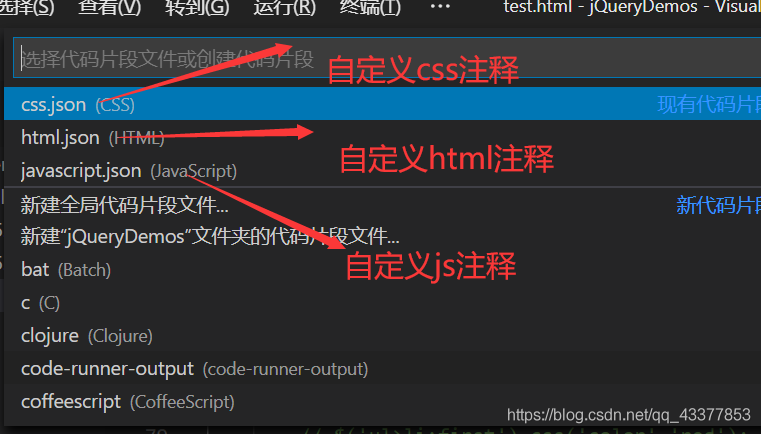
使用ctrl + shift + p 调出如下窗口,并且输入snippets

第二步:进入json文件编辑
这里以自定义js注释为例:

进入到 json 文件中后,添加如下代码,大家可以自定义设计,保存退出 我这里是一个类注释 一个方法注释
|
1
2
3
4
5
6
7
8
9
10
11
12
13
14
15
16
17
18
19
20
|
"print to js class": { "prefix": "zhushiclass", "body": [ "/*", " *@description: $0", " *@classauthor: tian qin", " *@date: ${current_year}-${current_month}-${current_date} ${current_hour}:${current_minute}:${current_second}", "*/" ], }, "print to js method": { "prefix": "zhushimethod", "body": [ "/*", " *@description: $0", " *@methodauthor: helihui", " *@date: ${current_year}-${current_month}-${current_date} ${current_hour}:${current_minute}:${current_second}", "*/" ], }, |
第三步:
保存退出后,我们可以在js文件中看到智能提示

点击之后会自动生成注释 ,同时date会自动生成

注意一下,这里html注释稍有不同
因为html注释格式为 < - - ! - - >
|
1
2
3
4
5
6
7
8
|
"print to html method": { "prefix": "zhushihtml", "body": [ "<!-- ", "**@description: $0", "-->" ], }, |
最后想分享一下红色警戒的源码 注释的格式 ,在红色警戒的源码公开之后,他的注释简直堪称经典
我整理了一下这段注释,致敬经典!
|
1
2
3
4
5
6
7
8
9
10
11
12
13
14
15
16
17
18
19
20
|
"print to js api": { "prefix": "hongsejingjie", "body": [ "/***************************************************************************************************", " * aircraftclass :: $0 *", " * @description: $0 *", " * @description: $0 *", " * @description: $0 *", " * *", " * input:$0 *", " * *", " * output:$0 *", " * *", " * warnings:$0 *", " * history: *", " * @methodauthor: helihui *", " * @date: ${current_year}-${current_month}-${current_date} ${current_hour} *", "*==================================================================================================*/" ], }, |


由于这是我自己整理出来的,所以效果不是很好,所以大家请见谅,也希望大家能够继续完善

总结
到此这篇关于vscode 添加自定义注释(附带红色警戒经典注释风格)的文章就介绍到这了,更多相关vscode 添加自定义注释内容请搜索服务器之家以前的文章或继续浏览下面的相关文章希望大家以后多多支持服务器之家!
原文链接:https://blog.csdn.net/qq_43377853/article/details/108194823


