vue移动端input上传视频、音频,供大家参考,具体内容如下
html部分
|
1
2
3
4
5
6
7
8
9
10
11
12
13
14
15
16
|
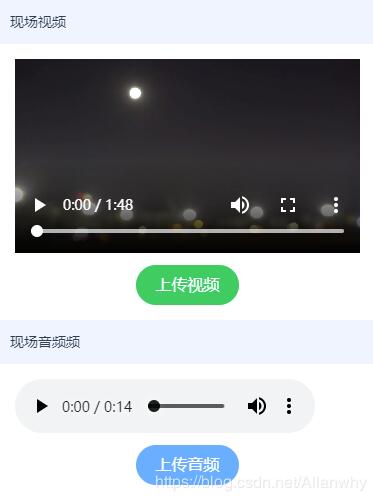
<div class="title">现场视频</div> <div class="upLoad"> <label for="pop_video" id="labelr"> <video id="videoId" controls width="100%"></video> <input style="display:none;" id="pop_video" type="file" accept="video/*" capture="camcorder" v-on:change="getVideo(event, '2')" name="fileTrans" ref="file" value=""> <div class="inputVideo">上传视频</div> </label> </div> <div class="title">现场音频频</div> <div class="upLoad"> <label for="pop_audio" id="labelr"> <audio id="audioId" controls width="100%"></audio> <input style="display:none;" id="pop_audio" type="file" accept="audio/*" capture="camcorder" v-on:change="getAudio(event, '2')" name="fileTrans" ref="file" value=""> <div class="inputAudio">上传音频</div> </label></div> |
js部分
|
1
2
3
4
5
6
7
8
9
10
11
12
13
14
15
16
17
18
19
20
21
22
23
24
25
26
27
28
29
30
31
32
33
34
35
36
37
38
39
40
41
42
43
44
45
46
47
48
49
50
51
52
53
54
55
56
57
58
59
60
61
62
63
64
65
|
getVideo (ev, typer) { let taht = this //获取上传文件标签 let filesId = document.getElementById('pop_video'); //获取音频标签 let videoId = document.getElementById('videoId') //把当前files[0]传给getFileURL方法, getFileURL方法对其做一处理 let url = this.getFileURL(filesId.files[0]) if (url) { //给video标签设置src videoId.src = url } let formData = new FormData(); formData.append("file", filesId.files[0]); upload(this.token, formData).then(res => { console.log(res) if (res.data.code === 0) { this.videoURL = res.data.data.url } }) console.log(url) }, getAudio (ev, typer) { let taht = this //获取上传文件标签 let filesId = document.getElementById('pop_audio'); //获取音频标签 let audioId = document.getElementById('audioId') //把当前files[0]传给getFileURL方法, getFileURL方法对其做一处理 let url = this.getFileURL(filesId.files[0]) if (url) { //给video标签设置src audioId.src = url } let formData = new FormData(); formData.append("file", filesId.files[0]); upload(this.token, formData).then(res => { console.log(res) if (res.data.code === 0) { this.audioURL = res.data.data.url } }) console.log(url) }, getFileURL (file) { let getUrl = null if (window.createObjectURL != undefined) { //basic getUrl = window.createObjectURL(file) } else if (window.URL != undefined) {//window.URL 标准定义 //mozilla(firefox) //获取一个http格式的url路径,这个时候就可以设置<img>中的显示 getUrl = window.URL.createObjectURL(file) } else if (window.webkitURL != undefined) {//window.webkitURL是webkit的内核 //webkit or chrome getUrl = window.webkitURL.createObjectURL(file) } return getUrl //video 标签的 duration属性,获取当前视频的长度 // let duration = videoId.duration // if (Math.floor(duration) > 60) { // that.layer.msg('视频不能大于60秒') // } }, |
css部分
|
1
2
3
4
5
6
7
8
9
10
11
12
13
14
15
16
17
18
19
20
21
22
23
24
25
26
27
28
29
30
|
#inspect .upLoad { background-color:#fff; /* height: 1.5rem; */ text-align: left; padding: 0.3rem;}#inspect .inputVideo { background-color: #00cc66; color: #fff; font-size: 0.32rem; width: 30%; height: 0.8rem; line-height: 0.8rem; border-radius: 0.4rem; text-align: center; margin: 0 auto; }#inspect .inputAudio { background-color: #5cadff; color: #fff; font-size: 0.32rem; width: 30%; height: 0.8rem; line-height: 0.8rem; border-radius: 0.4rem; text-align: center; margin: 0 auto; } |
效果图

以上就是本文的全部内容,希望对大家的学习有所帮助,也希望大家多多支持服务器之家。
原文链接:https://blog.csdn.net/Allanwhy/article/details/98873523


