本文主要涉及python爬虫知识点:
web是如何交互的
requests库的get、post函数的应用
response对象的相关函数,属性
python文件的打开,保存
代码中给出了注释,并且可以直接运行哦
如何安装requests库(安装好python的朋友可以直接参考,没有的,建议先装一哈python环境)
windows用户,Linux用户几乎一样:
打开cmd输入以下命令即可,如果python的环境在C盘的目录,会提示权限不够,只需以管理员方式运行cmd窗口
|
1
|
pip install -i https://pypi.tuna.tsinghua.edu.cn/simple requests |
Linux用户类似(ubantu为例): 权限不够的话在命令前加入sudo即可
|
1
|
sudo pip install -i https://pypi.tuna.tsinghua.edu.cn/simple requests |
python爬虫入门基础代码实例如下
1.Requests爬取BD页面并打印页面信息
|
1
2
3
4
5
6
|
# 第一个爬虫示例,爬取百度页面import requests #导入爬虫的库,不然调用不了爬虫的函数response = requests.get("http://www.baidu.com") #生成一个response对象response.encoding = response.apparent_encoding #设置编码格式print("状态码:"+ str( response.status_code ) ) #打印状态码print(response.text)#输出爬取的信息 |
2.Requests常用方法之get方法实例,下面还有传参实例
|
1
2
3
4
5
|
# 第二个get方法实例import requests #先导入爬虫的库,不然调用不了爬虫的函数response = requests.get("http://httpbin.org/get") #get方法print( response.status_code ) #状态码print( response.text ) |
3. Requests常用方法之post方法实例,下面还有传参实例
|
1
2
3
4
5
|
# 第三个 post方法实例import requests #先导入爬虫的库,不然调用不了爬虫的函数response = requests.post("http://httpbin.org/post") #post方法访问print( response.status_code ) #状态码print( response.text ) |
4. Requests put方法实例
|
1
2
3
4
5
|
# 第四个 put方法实例import requests #先导入爬虫的库,不然调用不了爬虫的函数response = requests.put("http://httpbin.org/put") # put方法访问print( response.status_code ) #状态码print( response.text ) |
5.Requests常用方法之get方法传参实例(1)
如果需要传多个参数只需要用&符号连接即可如下
|
1
2
3
4
5
|
# 第五个 get传参方法实例import requests #先导入爬虫的库,不然调用不了爬虫的函数response = requests.get("http://httpbin.org/get?name=hezhi&age=20") # get传参print( response.status_code ) #状态码print( response.text ) |
6.Requests常用方法之get方法传参实例(2)
params用字典可以传多个
|
1
2
3
4
5
6
7
8
9
|
# 第六个 get传参方法实例import requests #先导入爬虫的库,不然调用不了爬虫的函数data = { "name":"hezhi", "age":20}response = requests.get( "http://httpbin.org/get" , params=data ) # get传参print( response.status_code ) #状态码print( response.text ) |
7.Requests常用方法之post方法传参实例(2) 和上一个有没有很像
|
1
2
3
4
5
6
7
8
9
|
# 第七个 post传参方法实例import requests #先导入爬虫的库,不然调用不了爬虫的函数data = { "name":"hezhi", "age":20}response = requests.post( "http://httpbin.org/post" , params=data ) # post传参print( response.status_code ) #状态码print( response.text ) |
8.关于绕过反爬机制,以知呼为例
|
1
2
3
4
5
6
7
8
9
10
11
|
# 第好几个方法实例import requests #先导入爬虫的库,不然调用不了爬虫的函数response = requests.get( "http://www.zhihu.com") #第一次访问知乎,不设置头部信息print( "第一次,不设头部信息,状态码:"+response.status_code )# 没写headers,不能正常爬取,状态码不是 200#下面是可以正常爬取的区别,更改了User-Agent字段headers = { "User-Agent":"Mozilla/5.0 (Windows NT 10.0; Win64; x64) AppleWebKit/537.36 (KHTML, like Gecko) Chrome/80.0.3987.122 Safari/537.36"}#设置头部信息,伪装浏览器response = requests.get( "http://www.zhihu.com" , headers=headers ) #get方法访问,传入headers参数,print( response.status_code ) # 200!访问成功的状态码print( response.text ) |
9.爬取信息并保存到本地
因为目录关系,在D盘建立了一个叫做爬虫的文件夹,然后保存信息
注意文件保存时的encoding设置
|
1
2
3
4
5
6
7
8
9
10
11
12
13
14
15
|
# 爬取一个html并保存import requestsurl = "http://www.baidu.com"response = requests.get( url )response.encoding = "utf-8" #设置接收编码格式print("\nr的类型" + str( type(response) ) )print("\n状态码是:" + str( response.status_code ) )print("\n头部信息:" + str( response.headers ) )print( "\n响应内容:" )print( response.text )#保存文件file = open("D:\\爬虫\\baidu.html","w",encoding="utf") #打开一个文件,w是文件不存在则新建一个文件,这里不用wb是因为不用保存成二进制file.write( response.text )file.close() |
10.爬取图片,保存到本地
|
1
2
3
4
5
6
|
#保存百度图片到本地import requests #先导入爬虫的库,不然调用不了爬虫的函数response = requests.get("https://www.baidu.com/img/baidu_jgylogo3.gif") #get方法的到图片响应file = open("D:\\爬虫\\baidu_logo.gif","wb") #打开一个文件,wb表示以二进制格式打开一个文件只用于写入file.write(response.content) #写入文件file.close()#关闭操作,运行完毕后去你的目录看一眼有没有保存成功 |
下面是一个完整的python爬虫实例,功能是爬取百度贴吧上的图片并下载到本地;
python爬虫主要操作步骤:
获取网页html文本内容;
分析html中图片的html标签特征,用正则解析出所有的图片url链接列表;
根据图片的url链接列表将图片下载到本地文件夹中。
1. urllib+re实现
|
1
2
3
4
5
6
7
8
9
10
11
12
13
14
15
16
17
18
19
20
21
22
23
24
25
26
27
28
29
30
31
32
33
34
35
36
37
38
39
40
41
42
43
44
45
|
#!/usr/bin/python# coding:utf-8# 实现一个简单的爬虫,爬取百度贴吧图片import urllibimport re# 根据url获取网页html内容def getHtmlContent(url): page = urllib.urlopen(url) return page.read()# 从html中解析出所有jpg图片的url# 百度贴吧html中jpg图片的url格式为:<img ... src="XXX.jpg" width=...>def getJPGs(html): # 解析jpg图片url的正则 jpgReg = re.compile(r'<img.+?src="(.+?\.jpg)" width') # 注:这里最后加一个'width'是为了提高匹配精确度 # 解析出jpg的url列表 jpgs = re.findall(jpgReg,html) return jpgs# 用图片url下载图片并保存成制定文件名def downloadJPG(imgUrl,fileName): urllib.urlretrieve(imgUrl,fileName) # 批量下载图片,默认保存到当前目录下def batchDownloadJPGs(imgUrls,path = './'): # 用于给图片命名 count = 1 for url in imgUrls: downloadJPG(url,''.join([path,'{0}.jpg'.format(count)])) count = count + 1# 封装:从百度贴吧网页下载图片def download(url): html = getHtmlContent(url) jpgs = getJPGs(html) batchDownloadJPGs(jpgs) def main(): url = 'http://tieba.baidu.com/p/2256306796' download(url) if __name__ == '__main__': main() |
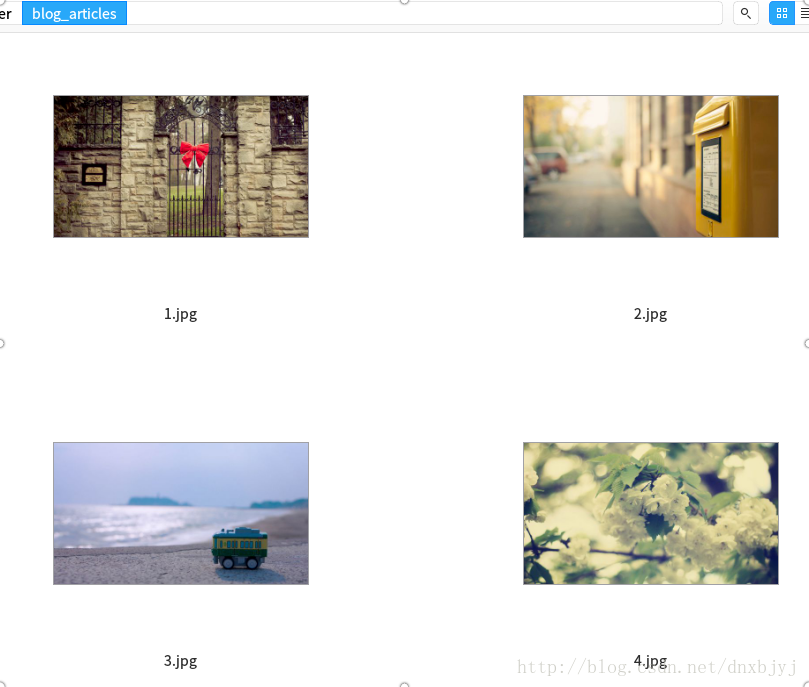
运行上面脚本,过几秒种之后完成下载,可以在当前目录下看到图片已经下载好了:

2. requests + re实现
下面用requests库实现下载,把getHtmlContent和downloadJPG函数都用requests重新实现。
|
1
2
3
4
5
6
7
8
9
10
11
12
13
14
15
16
17
18
19
20
21
22
23
24
25
26
27
28
29
30
31
32
33
34
35
36
37
38
39
40
41
42
43
44
45
46
47
48
49
50
51
|
#!/usr/bin/python# coding:utf-8# 实现一个简单的爬虫,爬取百度贴吧图片import requestsimport re# 根据url获取网页html内容def getHtmlContent(url): page = requests.get(url) return page.text# 从html中解析出所有jpg图片的url# 百度贴吧html中jpg图片的url格式为:<img ... src="XXX.jpg" width=...>def getJPGs(html): # 解析jpg图片url的正则 jpgReg = re.compile(r'<img.+?src="(.+?\.jpg)" width') # 注:这里最后加一个'width'是为了提高匹配精确度 # 解析出jpg的url列表 jpgs = re.findall(jpgReg,html) return jpgs# 用图片url下载图片并保存成制定文件名def downloadJPG(imgUrl,fileName): # 可自动关闭请求和响应的模块 from contextlib import closing with closing(requests.get(imgUrl,stream = True)) as resp: with open(fileName,'wb') as f: for chunk in resp.iter_content(128): f.write(chunk) # 批量下载图片,默认保存到当前目录下def batchDownloadJPGs(imgUrls,path = './'): # 用于给图片命名 count = 1 for url in imgUrls: downloadJPG(url,''.join([path,'{0}.jpg'.format(count)])) print '下载完成第{0}张图片'.format(count) count = count + 1# 封装:从百度贴吧网页下载图片def download(url): html = getHtmlContent(url) jpgs = getJPGs(html) batchDownloadJPGs(jpgs) def main(): url = 'http://tieba.baidu.com/p/2256306796' download(url) if __name__ == '__main__': main() |
上面介绍的10个python爬虫入门基础代码实例和1个简单的python爬虫完整实例虽然都是基础知识但python爬虫的主要操作方法也是这些,掌握这些python爬虫就学会一大半了。更多关于python爬虫的文章请查看下面的相关罗拉


