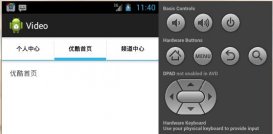
很多时候,利用触摸屏的fling、scroll等gesture(手势)操作来操作会使得应用程序的用户体验大大提升,比如用scroll手势在 浏览器中滚屏,用fling在阅读器中翻页等。在android系统中,手势的识别是通过 gesturedetector.ongesturelistener接口来实现的,不过william翻遍了android的官方文档也没有找到一个相 关的例子,api demo中的touchpaint也仅仅是提到了ontouch事件的处理,没有涉及到手势。
我们先来明确一些概念,首先,android的事件处理机制是基于listener(监听器)来实现的,比我们今天所说的触摸屏相关的事件,就是通 过ontouchlistener。其次,所有view的子类都可以通过setontouchlistener()、 setonkeylistener()等方法来添加对某一类事件的监听器。第三,listener一般会以interface(接口)的方式来提供,其中 包含一个或多个abstract(抽象)方法,我们需要实现这些方法来完成ontouch()、onkey()等等的操作。这样,当我们给某个view设 置了事件listener,并实现了其中的抽象方法以后,程序便可以在特定的事件被dispatch到该view的时候,通过callbakc函数给予适 当的响应。
看一个简单的例子,就用最简单的textview来说明(事实上和adt中生成的skeleton没有什么区别)。
|
1
2
3
4
5
6
7
8
9
10
11
12
13
14
15
16
17
18
19
20
|
public class gesturetest extends activity implements ontouchlistener{ @override protected void oncreate(bundle savedinstancestate) { super.oncreate(savedinstancestate); setcontentview(r.layout.main); // init textview textview tv = (textview) findviewbyid(r.id.page); // set ontouchlistener on textview tv.setontouchlistener(this); // show some text tv.settext(r.string.text); } @override public boolean ontouch(view v, motionevent event) { toast.maketext(this, "ontouch", toast.length_short).show(); return false; } |
我们给textview的实例tv设定了一个ontouchlistener,因为gesturetest类实现了ontouchlistener 接口,所以简单的给一个this作为参数即可。ontouch方法则是实现了ontouchlistener中的抽象方法,我们只要在这里添加逻辑代码即 可在用户触摸屏幕时做出响应,就像我们这里所做的——打出一个提示信息。

这里,我们可以通过motionevent的getaction()方法来获取touch事件的类型,包括 action_down, action_move, action_up, 和action_cancel。action_down是指按下触摸屏,action_move是指按下触摸屏后移动受力点,action_up则是指松 开触摸屏,action_cancel不会由用户直接触发(所以不在今天的讨论范围,请参考viewgroup.onintercepttouchevent(motionevent))。借助对于用户不同操作的判断,结合getrawx()、getrawy()、getx()和gety()等方法来获取坐标后,我们可以实现诸如拖动某一个按钮,拖动滚动条等功能。待机可以看看motionevent类的文档,另外也可以看考touchpaint例子。
回到今天所要说的重点,当我们捕捉到touch操作的时候,如何识别出用户的gesture?这里我们需要gesturedetector.ongesturelistener接口的帮助,于是我们的gesturetest类就变成了这个样子。
|
1
2
3
4
|
public class gesturetest extends activity implements ontouchlistener, ongesturelistener {...} |
随后,在ontouch()方法中,我们调用gesturedetector的ontouchevent()方法,将捕捉到的motionevent交给 gesturedetector 来分析是否有合适的callback函数来处理用户的手势。
|
1
2
3
4
5
|
@override public boolean ontouch(view v, motionevent event) { // ongesturelistener will analyzes the given motion event return mgesturedetector.ontouchevent(event); } |
接下来,我们实现了以下6个抽象方法,其中最有用的当然是onfling()、onscroll()和onlongpress()了。我已经把每一个方法代表的手势的意思写在了注释里,大家看一下就明白了。
|
1
2
3
4
5
6
7
8
9
10
11
12
13
14
15
16
17
18
19
20
21
22
23
24
25
26
27
28
29
30
31
32
33
34
35
36
37
38
39
40
41
42
43
44
|
// 用户轻触触摸屏,由1个motionevent action_down触发 @override public boolean ondown(motionevent e) { // todo auto-generated method stub toast.maketext(this, "ondown", toast.length_short).show(); return false; } // 用户轻触触摸屏,尚未松开或拖动,由一个1个motionevent action_down触发 // 注意和ondown()的区别,强调的是没有松开或者拖动的状态 @override public void onshowpress(motionevent e) { // todo auto-generated method stub } // 用户(轻触触摸屏后)松开,由一个1个motionevent action_up触发 @override public boolean onsingletapup(motionevent e) { // todo auto-generated method stub return false; } // 用户按下触摸屏、快速移动后松开,由1个motionevent action_down, 多个action_move, 1个action_up触发 @override public boolean onfling(motionevent e1, motionevent e2, float velocityx, float velocityy) { // todo auto-generated method stub return false; } // 用户长按触摸屏,由多个motionevent action_down触发 @override public void onlongpress(motionevent e) { // todo auto-generated method stub } // 用户按下触摸屏,并拖动,由1个motionevent action_down, 多个action_move触发 @override public boolean onscroll(motionevent e1, motionevent e2, float distancex, float distancey) { // todo auto-generated method stub return false; } |
我们来试着做一个onfling()事件的处理吧,onfling()方法中每一个参数的意义我写在注释中了,需要注意的是fling事件的处理代 码中,除了第一个触发fling的action_down和最后一个action_move中包含的坐标等信息外,我们还可以根据用户在x轴或者y轴上的 移动速度作为条件。比如下面的代码中我们就在用户移动超过100个像素,且x轴上每秒的移动速度大于200像素时才进行处理。
|
1
2
3
4
5
6
7
8
9
10
11
12
13
14
15
16
17
18
19
20
21
22
23
24
|
@overridepublic boolean onfling(motionevent e1, motionevent e2, float velocityx, float velocityy) { // 参数解释: // e1:第1个action_down motionevent // e2:最后一个action_move motionevent // velocityx:x轴上的移动速度,像素/秒 // velocityy:y轴上的移动速度,像素/秒 // 触发条件 : // x轴的坐标位移大于fling_min_distance,且移动速度大于fling_min_velocity个像素/秒 if (e1.getx() - e2.getx() > fling_min_distance && math.abs(velocityx) > fling_min_velocity) { // fling left toast.maketext(this, "fling left", toast.length_short).show(); } else if (e2.getx() - e1.getx() > fling_min_distance && math.abs(velocityx) > fling_min_velocity) { // fling right toast.maketext(this, "fling right", toast.length_short).show(); } return false;} |
问题是,这个时候如果我们尝试去运行程序,你会发现我们根本得不到想要的结果,跟踪代码的执行的会发现onfling()事件一直就没有被捕捉到。这正是一开始困扰我的问题,这到底是为什么呢?
我在讨论组的gesture detection这个帖子里找到了答案,即我们需要在oncreate中tv.setontouchlistener(this);之后添加如下一句代码。
|
1
|
tv.setlongclickable(true); |
只有这样,view才能够处理不同于tap(轻触)的hold(即action_move,或者多个action_down),我们同样可以通过layout定义中的android:longclickable来做到这一点。
深入
先来总结两种情况:
1、触摸这个activity
2、触摸某一个view
一、先说activity,
a、implements ongesturelistener
b、gesturedetector mgesturedetector = new gesturedetector(this);
c、重写activity的ontouchevent方法
|
1
2
3
4
5
6
|
@override public boolean ontouchevent(motionevent event) { return mgesturedetector.ontouchevent(event);} |
d、就可以捕捉到onfling事件
二、单独view
a、implements ongesturelistener,ontouchlistener
b、
|
1
2
3
4
|
view view = findviewbyid(r.id.view); view.setontouchlistener(this); view.setlongclickable(true); gesturedetector mgesturedetector = new gesturedetector(this); |
c、重写的是implements ontouchlistener的ontouch方法
|
1
2
3
4
5
|
@override public boolean ontouch(view view, motionevent event) { // todo auto-generated method stub return mgesturedetector.ontouchevent(event); } |
d、就可以捕捉到onfling事件
三、实现onfling
|
1
2
3
4
5
6
7
8
9
10
11
12
13
14
15
16
17
18
19
20
21
22
23
|
private float fling_min_distance = 100; private float fling_min_velocity=10; @override public boolean onfling(motionevent e1, motionevent e2, float velocityx, float velocityy) { // todo auto-generated method stub system.out.println("onfling"); if (e1.getx() - e2.getx() > fling_min_distance && math.abs(velocityx) > fling_min_velocity) { // fling left system.out.println("左"); toast.maketext(this, "左", toast.length_short).show(); } else if (e2.getx() - e1.getx() > fling_min_distance && math.abs(velocityx) > fling_min_velocity) { // fling right system.out.println("右"); toast.maketext(this, "右", toast.length_short).show(); } return false; } |


