本文实例讲述了android编程实现为应用添加菜单的方法。分享给大家供大家参考,具体如下:
添加菜单的方法有很多,一般推荐用xml创建菜单。
建立menu步骤:
在res下建立一个menu文件夹,在menu文件里面添加一个xml文件:
|
1
2
3
4
5
6
7
8
9
|
<?xml version="1.0" encoding="utf-8"?><menu xmlns:android="http://schemas.android.com/apk/res/android"> <item android:id="@+id/play" android:title="play" android:visible="true" /> <item android:id="@+id/stop" android:title="stop" android:visible="true"/></menu> |
将菜单加入应用程序:
要如何在应用程序启动时加入定义好的菜单呢?在oncreateoptionsmenu()事件里以menuinflater將定义好的菜单加入用用程序:
|
1
2
3
4
5
6
7
|
@overridepublic boolean oncreateoptionsmenu(menu menu) { // todo auto-generated method stub menuinflater inflater = getmenuinflater(); inflater.inflate(r.menu.options_menu, menu); return true;} |
这时,菜单已经添加到应用程序中了,但还有一个问题,现在的菜单只是显示,并没有处理触发菜单的消息,这时可以使用onoptionsitemselected()事件来自定义消息处理,下面分别是一个停止和播放音乐的菜单实现:
|
1
2
3
4
5
6
7
8
9
10
11
12
13
14
15
16
17
|
@overridepublic boolean onoptionsitemselected(menuitem item) { // todo auto-generated method stub int item_id = item.getitemid(); switch (item_id) { case r.id.play: intent intent = new intent(webtestactivity.this, yypservice.class); startservice(intent); break; case r.id.stop: this.onstop(); break; default: return false; } return true;} |
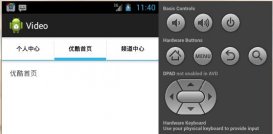
程序效果如下:

希望本文所述对大家android程序设计有所帮助。


