本文实例讲述了android编程之listpreference用法。分享给大家供大家参考,具体如下:
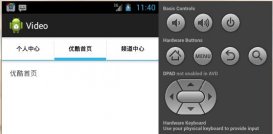
先展示一下效果图,如下所示:


项目代码如下:
|
1
2
3
4
5
6
7
8
9
10
11
12
13
14
15
16
17
18
19
20
21
22
23
24
25
26
27
28
29
30
31
32
33
34
35
36
37
38
39
40
41
|
package com.my.listpreference;import android.os.bundle;import android.preference.listpreference;import android.preference.preference;import android.preference.preference.onpreferencechangelistener;import android.preference.preferenceactivity;public class listpreferencetest extends preferenceactivity implements onpreferencechangelistener{ /** called when the activity is first created. */ listpreference lp;//创建一个listpreference对象 @override public void oncreate(bundle savedinstancestate) { super.oncreate(savedinstancestate); //过滤已经的xml文件资源,并将当前的preference层添加到这个preference层当中 addpreferencesfromresource(r.xml.preference); //初始化这个listpreference对象 lp=(listpreference)findpreference(getstring(r.string.key_str)); //设置获取listpreference中发生的变化 lp.setonpreferencechangelistener(this); /**让listpreference中的摘要内容(即summary)显示为当前listpreference中的实体对应的值 * 这个方法的作用是为了当下一次打开这个程序时会显示上一次的设置的summary(摘要) * 如果没有添加这个方法,当再次打开这个程序时,它将不会显示上一次程序设置的值,而 * 是显示默认值*/ lp.setsummary(lp.getentry()); } //让所选择的项显示出来,获取变化并显示出来 @override public boolean onpreferencechange(preference preference, object newvalue) { // todo auto-generated method stub if(preference instanceof listpreference){ //把preference这个preference强制转化为listpreference类型 listpreference listpreference=(listpreference)preference; //获取listpreference中的实体内容 charsequence[] entries=listpreference.getentries(); //获取listpreference中的实体内容的下标值 int index=listpreference.findindexofvalue((string)newvalue); //把listpreference中的摘要显示为当前listpreference的实体内容中选择的那个项目 listpreference.setsummary(entries[index]); } return true; }} |
res.values.strings.xml中的内容如下:
|
1
2
3
4
5
6
7
8
9
10
11
12
13
14
15
16
17
18
19
20
21
22
23
|
<?xml version="1.0" encoding="utf-8"?><resources> <string name="hello">hello world, listpreferencetest!</string> <string name="app_name">listpreferencetest</string> <string name="key_str">key</string> <string name="title_str">你最喜欢的蔬菜</string> <string name="title_listpreference">选择蔬菜</string> <string-array name="entries_str"> <item >白菜</item> <item >萝卜</item> <item >豆芽</item> <item >芹菜</item> </string-array> <string-array name="entries_values_str"> <item >baicai</item> <item >luobu</item> <item >douya</item> <item >qincai</item> </string-array> <string name="default_str">baicai</string> <string name="dialog_title">请选择你喜欢的蔬菜</string> <string name="summary_str">白菜</string></resources> |
res.xml.preference.xml中的内容如下:
|
1
2
3
4
5
6
7
8
9
10
11
12
13
14
|
<?xml version="1.0" encoding="utf-8"?><preferencescreen xmlns:android="http://schemas.android.com/apk/res/android" > <preferencecategory android:title="@string/title_str"> <listpreference android:key="@string/key_str" android:title="@string/title_listpreference" android:entries="@array/entries_str" android:entryvalues="@array/entries_values_str" android:dialogtitle="@string/dialog_title" android:defaultvalue="@string/default_str" android:summary="@string/summary_str" /> </preferencecategory></preferencescreen> |
上述程序中需要注意的事项:
1.必须要有android:entryvalues="@array/entries_values_str"与android:entries="@array/entries_str"相对应
2.android:defaultvalue="@string/default_str"中的default_str必须为entries_str中的一个选项
3.lp=(listpreference)findpreference(getstring(r.string.key_str));这里的获取的字符串的内容必须为key_str,否则会出来nullpointexception的错误(即初始化不成功的错误)。因为android:key="@string/key_str"相当于android:id=""
希望本文所述对大家android程序设计有所帮助。


