本文实例为大家分享了ios设置圆角的三种方式,供大家参考,具体内容如下
第一种方法:通过设置layer的属性
最简单的一种,但是很影响性能,一般在正常的开发中使用很少.
|
1
2
3
4
5
6
7
|
uiimageview *imageview = [[uiimageview alloc]initwithframe:cgrectmake(100, 100, 100, 100)];//只需要设置layer层的两个属性//设置圆角imageview.layer.cornerradius = imageview.frame.size.width / 2;//将多余的部分切掉imageview.layer.maskstobounds = yes;[self.view addsubview:imageview]; |
第二种方法:使用贝塞尔曲线uibezierpath和core graphics框架画出一个圆角
|
1
2
3
4
5
6
7
8
9
10
11
|
uiimageview *imageview = [[uiimageview alloc]initwithframe:cgrectmake(100, 100, 100, 100)]; imageview.image = [uiimage imagenamed:@"1"]; //开始对imageview进行画图 uigraphicsbeginimagecontextwithoptions(imageview.bounds.size, no, 1.0); //使用贝塞尔曲线画出一个圆形图 [[uibezierpath bezierpathwithroundedrect:imageview.bounds cornerradius:imageview.frame.size.width] addclip]; [imageview drawrect:imageview.bounds]; imageview.image = uigraphicsgetimagefromcurrentimagecontext(); //结束画图 uigraphicsendimagecontext(); [self.view addsubview:imageview]; |
第三种方法:使用cashapelayer和uibezierpath设置圆角
|
1
2
3
4
5
6
7
8
9
10
11
12
13
14
15
16
17
18
19
20
21
|
#import "viewcontroller.h"#import <avfoundation/avfoundation.h>@interface viewcontroller ()@end@implementation viewcontroller- (void)viewdidload { [super viewdidload]; uiimageview *imageview = [[uiimageview alloc] initwithframe:cgrectmake(100, 100, 200, 100)]; imageview.image = [uiimage imagenamed:@"1"]; uibezierpath *maskpath = [uibezierpath bezierpathwithroundedrect:imageview.bounds byroundingcorners:uirectcornerbottomleft | uirectcornertopleft cornerradii:cgsizemake(25, 5)]; cashapelayer *masklayer = [[cashapelayer alloc]init]; masklayer.frame = imageview.bounds; masklayer.path = maskpath.cgpath; imageview.layer.mask = masklayer; [self.view addsubview:imageview];} |
这三种方法中第三种最好,对内存的消耗最少啊,而且渲染快速。
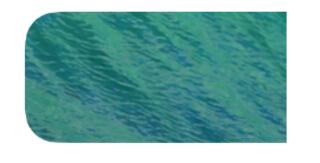
效果图:

以上就是本文的全部内容,希望对大家的学习有所帮助,也希望大家多多支持服务器之家。
原文链接:http://www.cnblogs.com/lurenq/archive/2017/10/19/7691233.html


