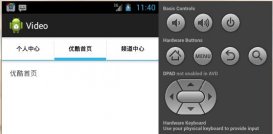
本文实例讲述了android自定义组件实现方法。分享给大家供大家参考。具体如下:
atts.xml:
|
1
2
3
4
5
6
7
8
9
10
11
12
13
14
|
<?xml version="1.0" encoding="utf-8"?><resources> <declare-styleable name="TopBar"> <attr name="titleText" format="string"/> <attr name="titleTextSize" format="dimension"/> <attr name="titleTextColor" format="color"/> <attr name="leftText" format="string"/> <attr name="leftBackground" format="reference|color"/> <attr name="leftTextColor" format="color"/> <attr name="rightText" format="string"/> <attr name="rightBackground" format="reference|color"/> <attr name="rightTextColor" format="color"/> </declare-styleable></resources> |
TopBar.java:
|
1
2
3
4
5
6
7
8
9
10
11
12
13
14
15
16
17
18
19
20
21
22
23
24
25
26
27
28
29
30
31
32
33
34
35
36
37
38
39
40
41
42
43
44
45
46
47
48
49
50
51
52
53
54
55
56
57
58
59
60
61
62
63
64
65
66
67
68
69
70
71
72
73
74
75
76
77
78
79
80
81
82
83
84
85
86
87
88
89
|
package com.cd.administrator.mytopbar;import android.annotation.TargetApi;import android.content.Context;import android.content.res.TypedArray;import android.graphics.drawable.Drawable;import android.os.Build;import android.util.AttributeSet;import android.view.Gravity;import android.view.View;import android.view.ViewGroup;import android.widget.Button;import android.widget.RelativeLayout;import android.widget.TextView;import android.widget.Toast;/** * Created by Administrator on 2015/1/8. */public class TopBar extends RelativeLayout{ private Button leftButton,rightButton; private TextView tvTitle; private int leftTextColor; private Drawable leftBackground; private String leftText; private int rightTextColor; private Drawable rightBackground; private String rightText; private int titleTextColor; private String titleText; private float titleTextSize; private LayoutParams leftParams,rightParams,titleParams; private topBarClickListener listener; public interface topBarClickListener{ public void leftClick(); public void rightClick(); } public void setOnTopBarClickListener(topBarClickListener listener){ this.listener = listener; } @TargetApi(Build.VERSION_CODES.JELLY_BEAN) public TopBar(final Context context, AttributeSet attrs) { super(context, attrs); TypedArray ta = context.obtainStyledAttributes(attrs,R.styleable.TopBar); leftTextColor = ta.getColor(R.styleable.TopBar_leftTextColor,0); leftBackground = ta.getDrawable(R.styleable.TopBar_leftBackground); leftText = ta.getString(R.styleable.TopBar_leftText); rightTextColor = ta.getColor(R.styleable.TopBar_rightTextColor,0); rightBackground = ta.getDrawable(R.styleable.TopBar_rightBackground); rightText = ta.getString(R.styleable.TopBar_rightText); titleTextColor = ta.getColor(R.styleable.TopBar_titleTextColor,0); titleTextSize = ta.getDimension(R.styleable.TopBar_titleTextSize,0); titleText = ta.getString(R.styleable.TopBar_titleText); ta.recycle(); leftButton = new Button(context); rightButton = new Button(context); tvTitle = new TextView(context); leftButton.setTextColor(leftTextColor); leftButton.setBackground(leftBackground); leftButton.setText(leftText); rightButton.setTextColor(rightTextColor); rightButton.setBackground(rightBackground); rightButton.setText(rightText); tvTitle.setTextColor(titleTextColor); tvTitle.setTextSize(titleTextSize); tvTitle.setText(titleText); tvTitle.setGravity(Gravity.CENTER); setBackgroundColor(0xf59563); leftParams = new LayoutParams(ViewGroup.LayoutParams.WRAP_CONTENT, ViewGroup.LayoutParams.WRAP_CONTENT); leftParams.addRule(RelativeLayout.ALIGN_PARENT_LEFT,TRUE); addView(leftButton,leftParams); rightParams = new LayoutParams(ViewGroup.LayoutParams.WRAP_CONTENT, ViewGroup.LayoutParams.WRAP_CONTENT); rightParams.addRule(RelativeLayout.ALIGN_PARENT_RIGHT,TRUE); addView(rightButton,rightParams); titleParams = new LayoutParams(ViewGroup.LayoutParams.WRAP_CONTENT, ViewGroup.LayoutParams.MATCH_PARENT); titleParams.addRule(RelativeLayout.CENTER_IN_PARENT,TRUE); addView(tvTitle,titleParams); leftButton.setOnClickListener(new OnClickListener() { @Override public void onClick(View v) { listener.leftClick(); } }); rightButton.setOnClickListener(new OnClickListener() { @Override public void onClick(View v) { listener.rightClick(); } }); }} |
activity_main.xml:
|
1
2
3
4
5
6
7
8
9
10
11
12
13
14
15
16
17
18
19
20
21
22
23
24
|
<RelativeLayout xmlns:android="http://schemas.android.com/apk/res/android" xmlns:custom="http://schemas.android.com/apk/res-auto" xmlns:tools="http://schemas.android.com/tools" android:layout_width="match_parent" android:layout_height="match_parent" android:paddingLeft="@dimen/activity_horizontal_margin" android:paddingRight="@dimen/activity_horizontal_margin" android:paddingTop="@dimen/activity_vertical_margin" android:paddingBottom="@dimen/activity_vertical_margin" tools:context=".MainActivity"> <com.cd.administrator.mytopbar.TopBar android:id="@+id/topBar" android:layout_width="match_parent" android:layout_height="40dp" custom:leftBackground="@drawable/blue" custom:leftText="Back" custom:leftTextColor="#ffffff" custom:rightBackground="@drawable/blue" custom:rightText="More" custom:rightTextColor="#ffffff" custom:titleTextColor="#121212" custom:titleTextSize="15sp" custom:titleText="自定义标题"> </com.cd.administrator.mytopbar.TopBar></RelativeLayout> |
MainActivity.java:
|
1
2
3
4
5
6
7
8
9
10
11
12
13
14
15
16
17
18
19
20
21
22
23
24
25
26
27
28
29
30
31
32
33
34
35
36
37
38
39
40
41
42
|
package com.cd.administrator.mytopbar;import android.support.v7.app.ActionBarActivity;import android.os.Bundle;import android.view.Menu;import android.view.MenuItem;import android.widget.Toast;public class MainActivity extends ActionBarActivity { @Override protected void onCreate(Bundle savedInstanceState) { super.onCreate(savedInstanceState); setContentView(R.layout.activity_main); TopBar topBar = (TopBar) findViewById(R.id.topBar); topBar.setOnTopBarClickListener(new TopBar.topBarClickListener() { @Override public void leftClick() { Toast.makeText(MainActivity.this, "cd--left", Toast.LENGTH_SHORT).show(); } @Override public void rightClick() { Toast.makeText(MainActivity.this,"cd--right",Toast.LENGTH_SHORT).show(); } }); } @Override public boolean onCreateOptionsMenu(Menu menu) { // Inflate the menu; this adds items to the action bar if it is present. getMenuInflater().inflate(R.menu.menu_main, menu); return true; } @Override public boolean onOptionsItemSelected(MenuItem item) { // Handle action bar item clicks here. The action bar will // automatically handle clicks on the Home/Up button, so long // as you specify a parent activity in AndroidManifest.xml. int id = item.getItemId(); //noinspection SimplifiableIfStatement if (id == R.id.action_settings) { return true; } return super.onOptionsItemSelected(item); }} |
希望本文所述对大家的Android程序设计有所帮助。


