默认情况下docker容器需要跨主机通信两个主机节点都需要在同一个网段下,这时只要两个docker容器的宿主机能相互通信并且该容器使用net网络模式,改实现方式为网桥模式通信;
除此之外我们还可以通过使用第三方工具为不同主机间创建一个覆盖网络,使之能够 跨节点通信 ,这里将使用flanneld实现;
安装etcd
创建 cat /etc/etcd/etcd.conf文件
|
1
2
3
4
5
6
7
8
9
10
|
# [member] etcd_name=infra1 etcd_data_dir="/var/lib/etcd" etcd_listen_peer_urls="http://192.168.2.150:2380" etcd_listen_client_urls="http://192.168.2.150:2379" #[cluster] etcd_initial_advertise_peer_urls="http://192.168.2.150:2380" etcd_initial_cluster_token="etcd-cluster" etcd_advertise_client_urls="http://192.168.2.150:2379" |
创建/etc/systemd/system/etcd.service文件
|
1
2
3
4
5
6
7
8
9
10
11
12
13
14
15
16
17
18
19
20
21
22
23
24
25
26
27
|
[unit]description=etcd serverafter=network.targetafter=network-online.targetwants=network-online.targetdocumentation=https://github.com/coreos[service]type=notifyworkingdirectory=/var/lib/etcd/environmentfile=-/etc/etcd/etcd.confexecstart=/usr/local/bin/etcd \ --name ${etcd_name} \ --initial-advertise-peer-urls ${etcd_initial_advertise_peer_urls} \ --listen-peer-urls ${etcd_listen_peer_urls} \ --listen-client-urls ${etcd_listen_client_urls},http://127.0.0.1:2379 \ --advertise-client-urls ${etcd_advertise_client_urls} \ --initial-cluster-token ${etcd_initial_cluster_token} \ --initial-cluster infra1=http://192.168.2.150:2380,infra2=http://192.168.2.151:2380 \ --initial-cluster-state new \ --data-dir=${etcd_data_dir}restart=on-failurerestartsec=5limitnofile=65536[install]wantedby=multi-user.target |
启动systemctl start etcd
在etcd中创建目录:etcdctl --endpoints=http://192.168.2.150:2379,http://192.168.5.151:2379
|
1
|
mkdir /kube-centos/network |
创建config节点并写入网络配置信息:
|
1
2
|
etcdctl --endpoints=http://172.20.0.113:2379,http://172.20.0.114:2379 mk /kube-centos/network/config '{"network":"192.167.0.0/16","subnetlen":24,"backend":{"type":"vxlan"}}' |
flanneld
创建 /etc/sysconfig/flanneld文件
|
1
2
3
4
5
6
7
8
9
10
|
# flanneld configuration options # etcd url location. point this to the server where etcd runsflannel_etcd_endpoints="http://127.0.0.1:2379"# etcd config key. this is the configuration key that flannel queries# for address range assignment# flannel_etcd_prefix="/kube-centos/network"flannel_etcd_prefix="/coreos.com/network"# any additional options that you want to passflannel_options="-iface=eth0" |
创建/usr/lib/systemd/system/flanneld.service文件
|
1
2
3
4
5
6
7
8
9
10
11
12
13
14
15
16
17
18
19
20
21
|
[unit]description=flanneld overlay address etcd agentafter=network.targetafter=network-online.targetwants=network-online.targetafter=etcd.servicebefore=docker.service[service]type=notifyenvironmentfile=/etc/sysconfig/flanneldenvironmentfile=-/etc/sysconfig/docker-network#execstart=/usr/bin/flanneld-start $flannel_optionsexecstart=/usr/bin/flanneld-start -etcd-endpoints=http://192.168.2.150:2379,http://192.168.2.151:2379 - iface=ens33#execstart=/usr/bin/flanneld-start -etcd-endpoints=http://192.168.2.150:2379,http://192.168.2.151:2379 -etcd- prefix=/kube-centos/networkexecstartpost=/usr/libexec/flannel/mk-docker-opts.sh -k docker_network_options -d /run/flannel/dockerrestart=on-failure[install]wantedby=multi-user.targetrequiredby=docker.service |
启动systemctl start flanneld
flannled启动后会生产/run/flannel/subnet.env文件
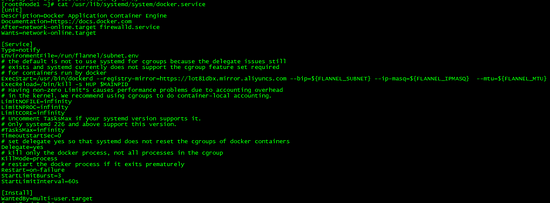
修改docker启动参数配置加上:
|
1
2
|
environmentfile=/run/flannel/subnet.env--bip=${flannel_subnet} --ip-masq=${flannel_ipmasq} --mtu=${flannel_mtu} |
重启docker,此时docker将使用flanneld配置的网段为container分配ip;

在两个节点分别启动容器:docker run -it –rm busybox sh
查看其中一个主机节点的容器ip,ping另一个主机节点ip

查看其中一个主机节点的容器ip,ping另一个主机节点ip

此时已可联通;
注意iptables配置是否正确;
以上就是本文的全部内容,希望对大家的学习有所帮助,也希望大家多多支持服务器之家。
原文链接:http://www.solinx.co/archives/1102


