系统环境准备
开发组件与依赖库安装

安装centos时选择server with gui,右面的可以不勾选,后面统一来装
配置本地yum源
以上包如果缺乏可配置本地yum源进行安装
|
1
2
3
4
5
6
7
8
9
10
11
12
13
14
|
sudo mount /dev/cdrom /mnt/[galen@localhost yum.repos.d]$ sudo vim /etc/yum.repos.d/cdrom.repo[galen@localhost yum.repos.d]$ cat cdrom.repo [c7-media]name=isofilebaseurl=file:///mntenable=1gpgcheck=1gpgkey=file:///etc/pki/rpm-gpg/rpm-gpg-key-centos-7[galen@localhost yum.repos.d]$ sudo mv centos-base.repo centos-base.repo-bak[galen@localhost yum.repos.d]$ sudo mv centos-media.repo centos-media.repo-bak[galen@localhost yum.repos.d]$ sudo mv cdrom.repo centos-media.repo |
配置好yum源后开始安装依赖库,如下
|
1
|
yum install glibc glibc-devel glibc-headers ksh libaio libaio-devel libgcc libstdc++ libstdc++-devel make sysstat unixodbc unixodbc-devel pdksh compat-libcap1 compat-libstdc++ elfutils-libelf-devel gcc-c++ |
关闭防火墙
|
1
2
3
4
|
[galen@localhost ~]$ systemctl stop firewalld.service [galen@localhost ~]$ systemctl disable firewalld.service removed symlink /etc/systemd/system/multi-user.target.wants/firewalld.service.removed symlink /etc/systemd/system/dbus-org.fedoraproject.firewalld1.service. |
关闭selinux
编辑/etc/sysconfig/selinux文件,保存退出后执行 setenforce 0命令
|
1
2
3
|
vim /etc/sysconfig/selinuxselinux=disabled#selinuxtype=targeted #注释掉 |
创建oracle用户、修改系统参数
创oracle建用户和组
|
1
2
3
4
5
6
7
|
[root@localhost galen]# groupadd oinstall[root@localhost galen]# groupadd dba[root@localhost galen]# useradd -g oinstall -g dba oracle[root@localhost galen]# passwd oracle[root@localhost galen]# id oracleuid=1001(oracle) gid=1001(oinstall) groups=1001(oinstall),1002(dba) |
系统参数设置
官方推荐值:
|
1
2
3
4
5
6
7
8
9
10
11
|
fs.aio-max-nr = 1048576 fs.file-max = 6815744 kernel.shmall = 2097152 kernel.shmmax = 536870912 #推荐超过一半的物理内存kernel.shmmni = 4096 kernel.sem = 250 32000 100 128 net.ipv4.ip_local_port_range = 9000 65500 net.core.rmem_default = 262144 net.core.rmem_max = 4194304 net.core.wmem_default = 262144 net.core.wmem_max = 1048576 |
通过 /sbin/sysctl -a |grep xxx 查看系统各参数,如果大于官方推荐值不修改,如果小于官方推荐值则修改为官方推荐值,写入/etc/sysctl.conf文件中,使用sysctl -p使其生效,示例如下
|
1
2
3
4
5
6
7
8
|
[root@localhost etc]# cat sysctl.conffs.aio-max-nr = 6815744kernel.sem = 250 32000 100 128net.ipv4.ip_local_port_range = 9000 65500net.core.rmem_default = 262144net.core.rmem_max = 4194304net.core.wmem_default = 262144net.core.wmem_max = 1048576 |
修改资源限制如下
|
1
2
3
4
5
6
|
[root@localhost etc]# vim /etc/security/limits.conforacle soft nproc 2048oracle hard nproc 16384oracle soft nofile 1024oracle hard nofile 65536oracle soft stack 10240 |
添加以下内容到/etc/pam.d/login
|
1
2
|
[root@localhost ~]# vim /etc/pam.d/loginsession required pam_limits.so |
添加以下内容到/etc/profile
|
1
2
3
4
5
6
7
8
9
|
[root@localhost ~]# vim /etc/profileif [[ $user = "oracle" ]]; then if [[ $shell = "/bin/ksh" ]]; then ulimit -p 16384 ulimit -n 65536 else ulimit -u 16384 -n 65536 fifi |
保存后执行source /etc/profile生效
配置oracle用户环境变量,在/home/oracle/.bash_profile中加入如下内容
|
1
2
3
4
5
6
7
8
|
[root@localhost ~]# vim /home/oracle/.bash_profileexport oracle_base=/u01/app/oracleexport oracle_home=$oracle_base/product/11.2.0/db_1export oracle_sid=orclexport path=$oracle_home/bin:$oracle_home/opatch:$oracle_home/jdk/bin:$pathexport lang="en_us.utf-8"export nls_lang=american_america.utf8export nls_date_format="yyyy-mm-dd hh24:mi:ss" |
创建oracle安装目录
|
1
2
3
|
mkdir -p /u01/app/oracle/product/11.2.0/db_1chown -r oracle:oinstall /u01/appchmod -r 775 /u01/app |
安装oracle 11g
挂载oracle11g安装包iso(也可以通过其他方式将oracle安装包传到主机),将安装文件复制到oracle home目录下,修改文件权限给oracle用户
|
1
2
3
4
5
6
|
[root@localhost /]# mkdir /mnt/oracle11g[root@localhost /]# mount /dev/cdrom /mnt/oracle11g/[root@localhost /]# cp -r /mnt/oracle11g /home/oracle/# 复制到oracle home目录下并修改权限[root@localhost oracle]# chown -r oracle:oinstall /home/oracle/oracle11g/[root@localhost oracle]# chmod -r 775 /home/oracle/oracle11g/ |
接下来使用oracle用户登录桌面

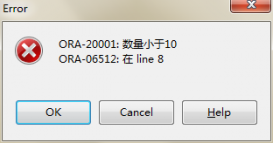
执行./runinstaller开始安装,centos 7安装的时候错误弹框有时候会变成一条竖线,安装无法进行下去,所以运行时执行
|
1
|
./runinstaller -jreloc /etc/alternatives/jre_1.8.0 |

每项操作如下
[configure security updates] 取消勾选 i wish to receive security updates via my oracle support,next
[installation option] install database software only,next
[grid options] next
[product languages] next
[enterprise edition] next
[installation location] next
[create inventory] next
[operating system groups] next
[prerequisite checks] next
[summary] finish,开始安装oracle 11g
安装到84%的时候可能会出现ins_ctx.mk相关的错误,如下

修改/u01/app/oracle/product/11.2.0/db_1/ctx/lib/ins_ctx.mk文件
|
1
2
3
4
5
6
|
# 源文件ctxhx: $(ctxhxobj) $(link_ctxhx) $(ctxhxobj) $(inso_link)# 修改为ctxhx: $(ctxhxobj) -static $(link_ctxhx) $(ctxhxobj) $(inso_link) /usr/lib64/stdc.a |
修改/u01/app/oracle/product/11.2.0/db_1/sysman/lib/ins_emagent.mk文件
|
1
2
3
4
5
6
|
# 源文件$(sysmanbin)emdctl: $(mk_emagent_nmectl)# 修改为$(sysmanbin)emdctl: $(mk_emagent_nmectl) -lnnz11 |
retry继续安装到94%时,弹出

使用root用户ssh到主机到上述目录分别执行orainstroot.sh与root.sh,执行root.sh时根据提示填入路径
/u01/app/oracle/product/11.2.0/dbhome_1/bin,执行完成后到ui点击ok,安装完成
环境配置脚本
- 使用root用户登录
- 确保系统iso驱动器已连接(/dev/cdrom可mount)
- 复制脚本到主机并给予可执行权限,执行脚本完成后即可开始安装oracle 11g
oracle 11g环境配置脚本
|
1
2
3
4
5
6
7
8
9
10
11
12
13
14
15
16
17
18
19
20
21
22
23
24
25
26
27
28
29
30
31
32
33
34
35
36
37
38
39
40
41
42
43
44
45
46
47
48
49
50
51
52
53
54
55
56
57
58
59
60
61
62
63
64
65
66
67
68
69
70
71
72
73
74
75
76
77
78
79
80
81
82
83
84
85
86
87
88
89
90
91
92
93
94
95
96
97
98
99
100
101
102
103
104
105
106
107
108
109
110
111
|
#!/bin/bash# 配置yum源为本地isofunction set_yum_media() { cd /etc/yum.repos.d/ for repo_file in `ls /etc/yum.repos.d/ | grep -v media` do new_file=$repo_file.bak mv $repo_file $new_file done mkdir -p /mnt/media-dir mount /dev/cdrom /mnt/media-dir sed -i -e 's/baseurl=file:\/\/\/.*/baseurl=file:\/\/\/mnt\/media-dir\//g' -e 's/enabled=0/enabled=1/g' `ls /etc/yum.repos.d/ | grep media` cd - rm -rf /var/run/yum.pid yum -y update}function install_packages() { for package in glibc glibc-devel glibc-headers ksh libaio libaio-devel libgcc libstdc++ libstdc++-devel make sysstat unixodbc unixodbc-devel pdksh compat-libcap1 compat-libstdc++ elfutils-libelf-devel gcc-c++ do yum -y install $package done}function create_oracle_user() { groupadd oinstall groupadd dba useradd -g oinstall -g dba oracle # 设置oracle用户密码为oracle echo oracle|passwd --stdin oracle}function set_system_parm() { sed -i '$a\fs.aio-max-nr = 1048576' /etc/sysctl.conf sed -i '$a\fs.file-max = 6815744' /etc/sysctl.conf sed -i '$a\kernel.shmall = 2097152' /etc/sysctl.conf sed -i '$a\kernel.shmmax = 536870912' /etc/sysctl.conf sed -i '$a\kernel.shmmni = 4096' /etc/sysctl.conf sed -i '$a\kernel.sem = 250 32000 100 128' /etc/sysctl.conf sed -i '$a\net.ipv4.ip_local_port_range = 9000 65500' /etc/sysctl.conf sed -i '$a\net.core.rmem_default = 262144' /etc/sysctl.conf sed -i '$a\net.core.rmem_max = 4194304' /etc/sysctl.conf sed -i '$a\net.core.wmem_default = 262144' /etc/sysctl.conf sed -i '$a\net.core.wmem_max = 1048586' /etc/sysctl.conf sysctl -p}function set_system_limit_parm() { sed -i '$a\oracle soft nproc 2048' /etc/security/limits.conf sed -i '$a\oracle hard nproc 16384' /etc/security/limits.conf sed -i '$a\oracle soft nofile 1024' /etc/security/limits.conf sed -i '$a\oracle hard nofile 65536' /etc/security/limits.conf sed -i '$a\oracle soft stack 10240' /etc/security/limits.conf}function set_profile_parm() { sed -i '$a\session required pam_limits.so' /etc/pam.d/login sed -i '$a\if [[ $user = "oracle" ]]; then' /etc/profile sed -i '$a\ if [[ $shell = "/bin/ksh" ]]; then' /etc/profile sed -i '$a\ ulimit -p 16384' /etc/profile sed -i '$a\ ulimit -n 65536' /etc/profile sed -i '$a\ else' /etc/profile sed -i '$a\ ulimit -u 16384 -n 65536' /etc/profile sed -i '$a\ fi' /etc/profile sed -i '$a\fi' /etc/profile source /etc/profile}function set_oracle_env() { sed -i '$a\export oracle_base=/u01/app/oracle' /home/oracle/.bash_profile sed -i '$a\export oracle_home=$oracle_base/product/11.2.0/db_1' /home/oracle/.bash_profile sed -i '$a\export oracle_sid=orcl' /home/oracle/.bash_profile sed -i '$a\export path=$oracle_home/bin:$oracle_home/opatch:$oracle_home/jdk/bin:$path' /home/oracle/.bash_profile sed -i '$a\export lang="en_us.utf-8"' /home/oracle/.bash_profile sed -i '$a\export nls_lang=american_america.utf8' /home/oracle/.bash_profile sed -i '$a\export nls_date_format="yyyy-mm-dd hh24:mi:ss"' /home/oracle/.bash_profile source /home/oracle/.bash_profile}function create_oracle_dir() { mkdir -p /u01/app/oracle/product/11.2.0/db_1 chown -r oracle:oinstall /u01/app chmod -r 775 /u01/app}function disable_firewall() { systemctl stop firewalld.service systemctl disable firewalld.service sed -i "s/selinux=enforcing/selinux=disabled/g" /etc/sysconfig/selinux setenforce 0}if [ `whoami` == "root" ]then set_yum_media install_packages create_oracle_user echo "set system parm" set_system_parm echo "set limits" set_system_limit_parm echo "set /etc/profile" set_profile_parm echo "set oracle env" set_oracle_env echo "create oracle dir" create_oracle_dir echo "disable firwall" disable_firewallfi |
到此这篇关于centos下oracle11gr2安装教程与自动化配置脚本的方法的文章就介绍到这了,更多相关oracle11gr2安装与自动化配置内容请搜索服务器之家以前的文章或继续浏览下面的相关文章希望大家以后多多支持服务器之家!
原文链接:https://www.cnblogs.com/tongh/p/13789625.html


