一、实验介绍
1.1 实验内容
在本节课中,我们将讲解Pygame的常用对象及其操作,包括图形、动画、文字、音频等,确保同学们对Pygame有一个基础的了解,同时为后续课程做好准备。
1.2 实验知识点
- Pygame图形
- Pygame动画
- Pygame文字
- Pygame音频
- Pygame事件
1.3 实验环境
- Python 2.7.6
- Xfce终端
1.4 适合人群
本课程难度为一般,属于初级级别课程,适合具有Python基础的用户,熟悉Python基础知识加深巩固。
1.5 代码获取
本节实验所用到的代码和相关资源文件可以通过下面命令下载到实验楼环境中,作为参照对比进行学习。
|
1
|
$ wget http://labfile.oss.aliyuncs.com/courses/940/foundation.zip |
解压缩至 /home/shiyanlou/foundation :
|
1
|
$ unzip foundation.zip |
二、开发准备
本次课程主要利用Pygame模块来进行开发,首先我们需要打开Xfce终端,并使用 pip 命令来安装Pygame
|
1
|
$ sudo pip install pygame |
安装完成之后进入Python的交互界面,输入以下命令查看是否成功安装。
|
1
|
import pygame |
若无异常,则说明安装成功。
三、实验步骤
3.1 HelloWorld
首先开始我们第一个HelloWorld程序:
|
1
2
3
4
5
6
7
8
9
10
11
12
13
14
15
16
17
18
19
20
21
22
23
24
25
26
27
28
29
30
31
32
|
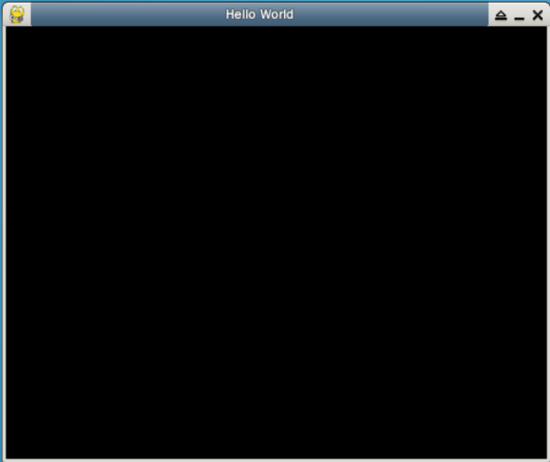
# -*- coding: UTF-8 -*-# helloworld.py# 导入所需的模块import pygame, sys# 导入所有pygame.locals里的变量(比如下面大写的QUIT变量)from pygame.locals import *# 初始化pygamepygame.init()# 设置窗口的大小,单位为像素screen = pygame.display.set_mode((500, 400))# 设置窗口标题pygame.display.set_caption('Hello World')# 程序主循环while True: # 获取事件 for event in pygame.event.get(): # 判断事件是否为退出事件 if event.type == QUIT: # 退出pygame pygame.quit() # 退出系统 sys.exit() # 绘制屏幕内容 pygame.display.update() |
效果图如下:

这里解释一下上面程序的运行方式
一个游戏循环(也可以称为主循环)就做下面这三件事:
- 处理事件
- 更新游戏状态
- 绘制游戏状态到屏幕上

3.2 绘制图形
Pygame的坐标原点(0,0)点位于左上角,X轴自左向右,Y轴自上向下,单位为像素。
这里介绍一下常用的方法:
pygame.draw.line(Surface, color, start_pos, end_pos, width)此方法用于绘制一条线段
pygame.draw.aaline(Surface, color, start_pos, end_pos, blend)此方法用于绘制一条抗锯齿的线
pygame.draw.lines(Surface, color, closed, pointlist, width)此方法用于绘制一条折线
pygame.draw.rect(Surface, color, Rect)此方法用于绘制一个矩形
pygame.draw.rect(Surface, color, Rect, width)此方法用于绘制一个矩形框
pygame.draw.ellipse(Surface, color, Rect)此方法用于绘制一个椭圆
pygame.draw.ellipse(Surface, color, Rect, width)此方法用于绘制一个椭圆框
pygame.draw.polygon(Surface, color, pointlist, width)此方法用于绘制一个多边形
pygame.draw.arc(Surface, color, Rect, start_angle, stop_angle, width)此方法用于绘制一条弧线
pygame.draw.circle(Surface, color, Rect, radius)此方法用于绘制一个圆
以下为示例代码:
|
1
2
3
4
5
6
7
8
9
10
11
12
13
14
15
16
17
18
19
20
21
22
23
24
25
26
27
28
29
30
31
32
33
34
35
36
37
38
39
40
41
42
43
44
45
46
47
48
49
50
51
52
53
54
55
56
57
58
59
60
61
62
63
64
65
66
67
68
69
70
71
72
73
74
75
76
|
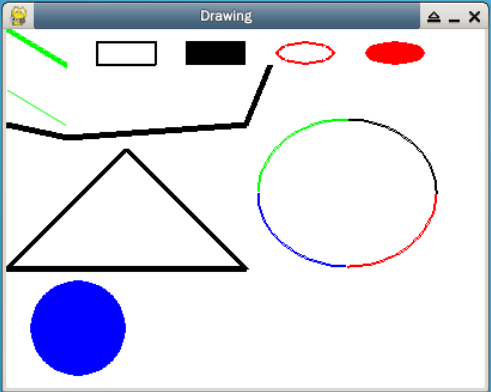
# -*- coding: UTF-8 -*-# drawing.py# 导入需要的模块import pygame, sysfrom pygame.locals import *from math import pi# 初始化pygamepygame.init()# 设置窗口的大小,单位为像素screen = pygame.display.set_mode((400,300))# 设置窗口标题pygame.display.set_caption('Drawing')# 定义颜色BLACK = ( 0, 0, 0)WHITE = (255, 255, 255)RED = (255, 0, 0)GREEN = ( 0, 255, 0)BLUE = ( 0, 0, 255)# 设置背景颜色screen.fill(WHITE)# 绘制一条线pygame.draw.line(screen, GREEN, [0, 0], [50,30], 5)# 绘制一条抗锯齿的线pygame.draw.aaline(screen, GREEN, [0, 50],[50, 80],True)# 绘制一条折线pygame.draw.lines(screen, BLACK, False, [[0, 80], [50, 90], [200, 80], [220, 30]], 5)# 绘制一个空心矩形pygame.draw.rect(screen, BLACK, [75, 10, 50, 20], 2)# 绘制一个矩形pygame.draw.rect(screen, BLACK, [150, 10, 50, 20])# 绘制一个空心椭圆pygame.draw.ellipse(screen, RED, [225, 10, 50, 20], 2)# 绘制一个椭圆pygame.draw.ellipse(screen, RED, [300, 10, 50, 20])# 绘制多边形pygame.draw.polygon(screen, BLACK, [[100, 100], [0, 200], [200, 200]], 5)# 绘制多条弧线pygame.draw.arc(screen, BLACK,[210, 75, 150, 125], 0, pi/2, 2)pygame.draw.arc(screen, GREEN,[210, 75, 150, 125], pi/2, pi, 2)pygame.draw.arc(screen, BLUE, [210, 75, 150, 125], pi,3*pi/2, 2)pygame.draw.arc(screen, RED, [210, 75, 150, 125], 3*pi/2, 2*pi, 2)# 绘制一个圆pygame.draw.circle(screen, BLUE, [60, 250], 40)# 程序主循环while True: # 获取事件 for event in pygame.event.get(): # 判断事件是否为退出事件 if event.type == QUIT: # 退出pygame pygame.quit() # 退出系统 sys.exit() # 绘制屏幕内容 pygame.display.update() |
效果图如下:

3.3 实现动画
由于人类眼睛的特殊生理结构,当所看画面的帧率高于24的时候,就会认为是连贯的,此现象称之为 视觉暂留 。
帧率(Frame rate)是用于测量显示帧数的量度,所谓的测量单位为每秒显示帧数(Frames per Second,简称:FPS)
一般来说30fps是可以接受的,但是将性能提升至60fps则可以明显提升交互感和逼真感,但是一般来说超过75fps一般就不容易察觉到有明显的流畅度提升了。
在我们原有坐标系的基础上添加偏移量,再重新绘制,依次一张一张的循环绘制下去,就会得到我们想要的物体移动的效果。
Pygame实现动画主要用到的方法:
pygame.image.load(filename)加载一张图片
pygame.Surface.blit(source, dest, area=None, special_flags = 0)将图片绘制到屏幕相应坐标上(后面两个参数默认,可以不传)
pygame.time.Clock()获得pygame的时钟
pygame.time.Clock.tick(FPS)设置pygame时钟的间隔时间
以下为示例代码:
|
1
2
3
4
5
6
7
8
9
10
11
12
13
14
15
16
17
18
19
20
21
22
23
24
25
26
27
28
29
30
31
32
33
34
35
36
37
38
39
40
41
42
43
44
45
46
47
48
49
50
51
52
53
54
55
56
57
58
59
60
61
62
63
64
65
66
67
68
69
70
71
72
|
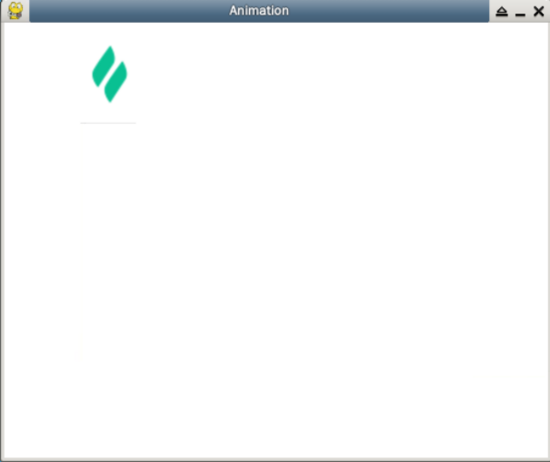
# -*- coding: UTF-8 -*-# animation.py# 导入需要的模块import pygame, sysfrom pygame.locals import *# 初始化pygamepygame.init()# 设置帧率(屏幕每秒刷新的次数)FPS = 30# 获得pygame的时钟fpsClock = pygame.time.Clock()# 设置窗口大小screen = pygame.display.set_mode((500, 400), 0, 32)# 设置标题pygame.display.set_caption('Animation')# 定义颜色WHITE = (255, 255, 255)# 加载一张图片(所用到的的图片请参考1.5代码获取)img = pygame.image.load('resources/shiyanlou.PNG')# 初始化图片的位置imgx = 10imgy = 10# 初始化图片的移动方向direction = 'right'# 程序主循环while True: # 每次都要重新绘制背景白色 screen.fill(WHITE) # 判断移动的方向,并对相应的坐标做加减 if direction == 'right': imgx += 5 if imgx == 380: direction = 'down' elif direction == 'down': imgy += 5 if imgy == 300: direction = 'left' elif direction == 'left': imgx -= 5 if imgx == 10: direction = 'up' elif direction == 'up': imgy -= 5 if imgy == 10: direction = 'right' # 该方法将用于图片绘制到相应的坐标中 screen.blit(img, (imgx, imgy)) for event in pygame.event.get(): if event.type == QUIT: pygame.quit() sys.exit() # 刷新屏幕 pygame.display.update() # 设置pygame时钟的间隔时间 fpsClock.tick(FPS) |
效果图如下:

3.4 绘制文字
如果你想绘制文字到屏幕上,Pygame提供了很方便的方法使用.ttf字体文件,这样我们就能很轻易的将文字绘制在屏幕上了。
这里我使用了ARBERKLEY.ttf作为字体,字体文件的获取请参考1.5代码获取。
主要用到的方法:
pygame.font.Font(filename, size)
filename:字体文件的文件名;
size:字体的高height,单位为像素;
pygame.font.Font.render(text, antialias, color, background=None)
text:要显示的文字;
antialias: 是否抗锯齿;
color:字体颜色;
background:背景颜色(可选参数);
.get_rect()
获得一个对象的rect,以便于设置其坐标位置
以下为示例代码:
|
1
2
3
4
5
6
7
8
9
10
11
12
13
14
15
16
17
18
19
20
21
22
23
24
25
26
27
28
29
30
31
32
33
34
35
36
37
38
39
40
41
42
43
44
45
46
47
48
49
50
51
52
53
|
# -*- coding: UTF-8 -*-# font.py# 导入需要的模块import pygame, sysfrom pygame.locals import *# 初始化pygamepygame.init()# 设置窗口的大小,单位为像素screen = pygame.display.set_mode((500,400))# 设置窗口的标题pygame.display.set_caption('Font')# 定义颜色WHITE = (255, 255, 255)GREEN = ( 0, 255, 0)BLUE = ( 0, 0, 128)# 通过字体文件获得字体对象fontObj = pygame.font.Font('resources/ARBERKLEY.ttf', 50)# 配置要显示的文字textSurfaceObj = fontObj.render('Pygame', True, BLUE, GREEN)# 获得要显示的对象的recttextRectObj = textSurfaceObj.get_rect()# 设置显示对象的坐标textRectObj.center = (250, 200)# 设置背景screen.fill(WHITE)# 绘制字体screen.blit(textSurfaceObj, textRectObj)# 程序主循环while True: # 获取事件 for event in pygame.event.get(): # 判断事件是否为退出事件 if event.type == QUIT: # 退出pygame pygame.quit() # 退出系统 sys.exit() # 绘制屏幕内容 pygame.display.update() |
效果图如下:

3.5 播放音频
在Pygame里播放音频有两个方法,一个用来播放特效声音,一个用来播放背景音乐:
pygame.mixer.Sound(filename)
该方法返回一个Sound对象,调用它的.play( )方法,即可播放较短的音频文件(比如玩家受到伤害、收集到金币等);
pygame.mixer.music.load(filename)
该方法用来加载背景音乐,之后调用pygame.mixer.music.play( )方法就可以播放背景音乐(Pygame只允许加载一个背景音乐在同一个时刻)
以下为示例代码:
|
1
2
3
4
5
6
7
8
9
10
11
12
13
14
15
16
17
18
19
20
21
22
23
24
25
26
27
28
29
30
31
32
33
34
35
36
37
38
39
40
41
42
43
44
45
46
47
48
|
# -*- coding: UTF-8 -*-# audio.py# 导入需要的模块import pygame, sysfrom pygame.locals import *# 初始化pygamepygame.init()# 设置窗口的大小,单位为像素screen = pygame.display.set_mode((500,400))# 设置窗口的标题pygame.display.set_caption('Audio')# 定义颜色WHITE = (255, 255, 255)# 设置背景screen.fill(WHITE)# 加载并播放一个特效音频文件(所用到的音频文件请参考1.5代码获取)sound = pygame.mixer.Sound('resources/bounce.ogg')sound.play()# 加载背景音乐文件pygame.mixer.music.load('resources/bgmusic.mp3')# 播放背景音乐,第一个参数为播放的次数(-1表示无限循环),第二个参数是设置播放的起点(单位为秒)pygame.mixer.music.play(-1, 0.0)# 程序主循环while True: # 获取事件 for event in pygame.event.get(): # 判断事件是否为退出事件 if event.type == QUIT: # 停止播放背景音乐 pygame.mixer.music.stop() # 退出pygame pygame.quit() # 退出系统 sys.exit() # 绘制屏幕内容 pygame.display.update() |
注意:因实验楼里暂时不能播放音频,上述代码在实验楼环境中可能无法正常运行,同学们可以在自己的电脑上尝试运行。
3.6 事件
Pygame里常用的事件如下表:
| 事件 | 产生途径 | 参数 |
|---|---|---|
| QUIT | 用户按下关闭按钮 | none |
| ACTIVEEVENT | Pygame被激活或者隐藏 | gain, state |
| KEYDOWN | 键盘被按下 | unicode, key, mod |
| KEYUP | 键盘被放开 | key, mod |
| MOUSEMOTION | 鼠标移动 | pos, rel, buttons |
| MOUSEBUTTONDOWN | 鼠标按下 | pos, button |
| MOUSEBUTTONUP | 鼠标放开 | pos, button |
| VIDEORESIZE | Pygame窗口缩放 | size, w, h |
以下为示例代码:
|
1
2
3
4
5
6
7
8
9
10
11
12
13
14
15
16
17
18
19
20
21
22
23
24
25
26
27
28
29
30
31
32
33
34
35
36
37
38
39
40
41
42
43
44
45
46
47
48
49
50
51
52
53
54
55
56
57
58
59
60
61
62
63
64
65
|
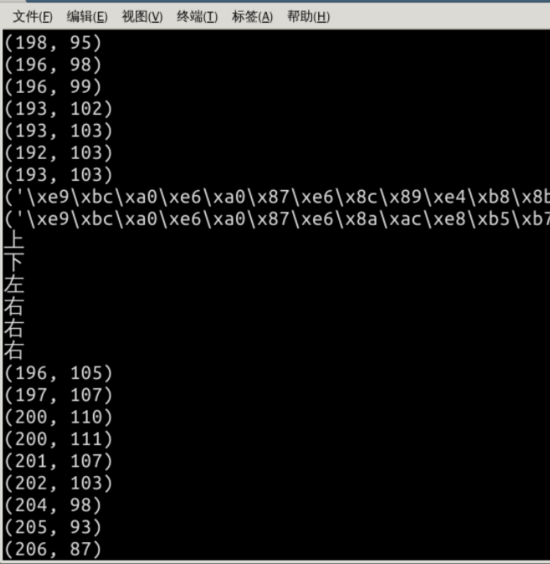
# -*- coding: UTF-8 -*-# event.py# 导入需要的模块import pygame, sysfrom pygame.locals import *# 定义颜色WHITE = (255, 255, 255)# 初始化pygamepygame.init()# 设置窗口的大小,单位为像素screen = pygame.display.set_mode((500,400), 0, 32)# 设置窗口的标题pygame.display.set_caption('Event')# 设置背景screen.fill(WHITE)# 程序主循环while True: # 获取事件 for event in pygame.event.get(): # 判断事件是否为退出事件 if event.type == QUIT: # 退出pygame pygame.quit() # 退出系统 sys.exit() # 获得鼠标当前的位置 if event.type ==MOUSEMOTION: print(event.pos) # 获得鼠标按下的位置 if event.type ==MOUSEBUTTONDOWN: print("鼠标按下:",event.pos) # 获得鼠标抬起的位置 if event.type ==MOUSEBUTTONUP: print("鼠标抬起:",event.pos) # 获得键盘按下的事件 if event.type == KEYDOWN: if(event.key==K_UP or event.key==K_w): print("上") if(event.key==K_DOWN or event.key==K_s): print("下") if(event.key==K_LEFT or event.key==K_a): print("左") if(event.key==K_RIGHT or event.key==K_d): print("右") # 按下键盘的Esc键退出 if(event.key==K_ESCAPE): # 退出pygame pygame.quit() # 退出系统 sys.exit() # 绘制屏幕内容 pygame.display.update() |
效果图如下:

四、实验总结
本节课程我们主要讲解了Pygame的一些常用对象及操作,这些都是我们后续课程需要用到的知识点,希望同学们能熟练掌握这些内容。若想要深入了解,可参考下方Pygame官方文档的链接。
五、参考链接
以上就是本文的全部内容,希望对大家的学习有所帮助,也希望大家多多支持服务器之家。
原文链接:https://www.hzl-fj.com/1141.html


