简单说明
由于之前是用Centos7搭建的,后来使用ubuntu 20.04的系统做为个人开发环境,所以想在ubuntu上也搭建一下环境,和Centos有一些小区别所以记录一下仅供学习。
安装前准备
下载软件:
php:7.3.18
nginx:1.18.0
mariadb:10.5.4
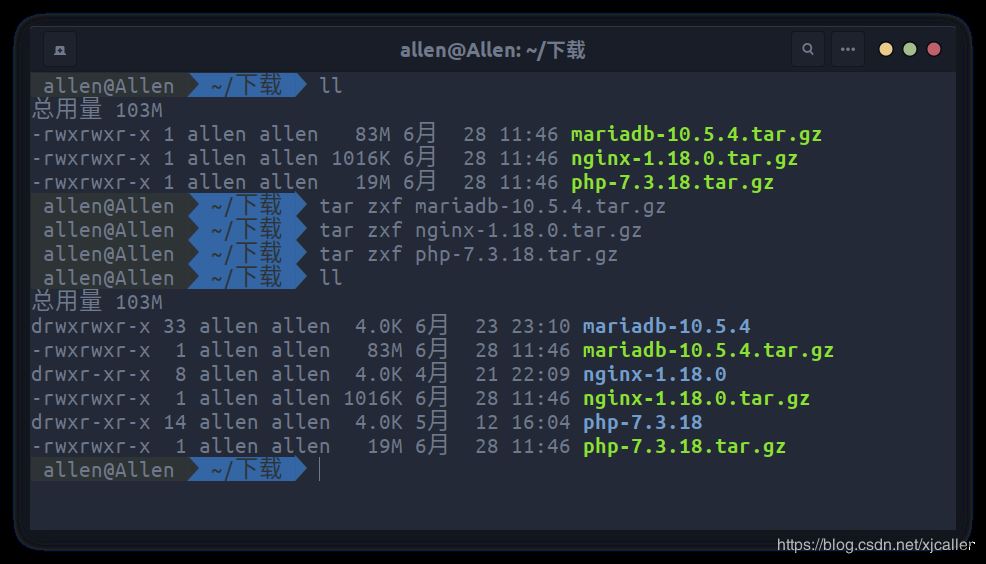
解压文件:
|
1
2
3
|
tar zxf php-7.3.18.tar.gztar zxf mariadb-10.5.4.tar.gztar zxf nginx-1.18.0.tar.gz |
安装Nginx
|
1
2
3
4
5
6
7
8
9
10
11
12
13
14
15
16
17
18
19
20
21
22
23
24
25
26
27
28
29
30
31
32
33
34
35
36
37
38
39
40
41
42
43
44
45
46
47
48
49
|
sudo groupadd -r nginx && sudo useradd -r -g nginx -s /sbin/nologin -d /usr/local/nginx nginxsudo apt install -y libpcre3-dev zlib1g-devcd /home/allen/下载/nginx-1.18.0./configure --user=nginx --group=nginxmake -j 4 && sudo make installsudo /usr/local/nginx/sbin/nginx -t#nginx: the configuration file /usr/local/nginx/conf/nginx.conf syntax is ok#nginx: configuration file /usr/local/nginx/conf/nginx.conf test is successfulsudo mv /usr/local/nginx/conf/nginx.conf /usr/local/nginx/conf/nginx.conf.backsudo vim /usr/local/nginx/conf/nginx.confuser nginx;worker_processes 4;events { worker_connections 1024;}http { include mime.types; default_type application/octet-stream; sendfile on; keepalive_timeout 65; log_format main '$remote_addr || $remote_user || $time_local || $request || $status || $body_bytes_sent || $http_referer || $http_user_agent || $http_x_forwarded_for'; include /data/www/*/*.conf;} sudo chown -R nginx:nginx /usr/local/nginxsudo vim /lib/systemd/system/nginx.service[Unit]Description=nginxAfter=network.target[Service]Type=forkingExecStart=/usr/local/nginx/sbin/nginxExecReload=/usr/local/nginx/sbin/nginx -s reloadExecStop=/usr/local/nginx/sbin/nginx -s quitPrivateTmp=true[Install]WantedBy=multi-user.targetsudo systemctl enable nginx#Created symlink /etc/systemd/system/multi-user.target.wants/nginx.service → /lib/systemd/system/nginx.service.reboot |
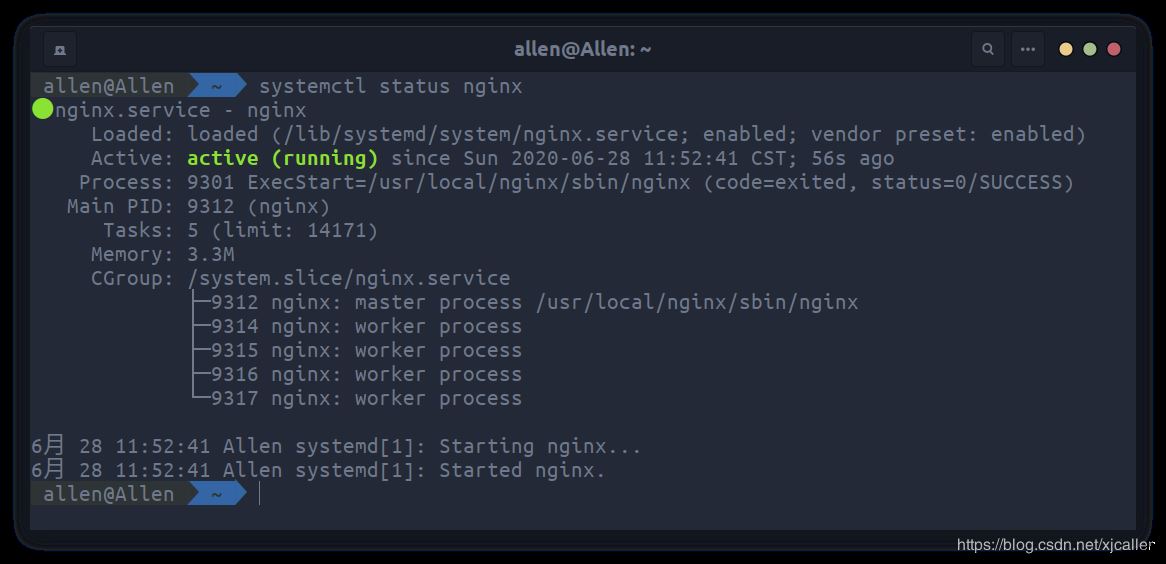
重启后看看有没有启动成功
安装Mariadb
|
1
2
3
4
5
6
7
8
9
10
11
12
13
14
15
16
17
18
19
20
21
22
23
24
25
26
27
28
29
30
31
32
33
34
35
36
37
38
39
40
41
42
43
44
45
46
47
48
49
50
51
52
53
54
55
56
57
58
59
60
61
62
63
64
65
66
67
68
69
70
71
72
73
74
75
76
77
78
79
80
81
82
83
84
85
86
87
88
89
90
91
92
93
94
95
96
97
98
99
100
101
102
103
104
105
106
107
108
109
110
111
112
113
114
115
116
117
118
119
120
|
sudo rm -rf /etc/mysqlsudo apt remove -y mysql-commonsudo apt autoremove -ysudo apt install -y cmake libncurses5-dev libgnutls28-devsudo groupadd -r mysql && sudo useradd -r -g mysql -s /sbin/nologin -d /usr/local/mariadb mysqlsudo mkdir -p /data/db /var/log/mariadbcd /home/allen/下载/mariadb-10.5.4/cmake . -DCMAKE_INSTALL_PREFIX=/usr/local/mariadb -DMYSQL_DATADIR=/data/db -DSYSCONFDIR=/etc -DWITHOUT_TOKUDB=1 -DMYSQL_UNIX_ADDR=/tmp/mysql.sock -DDEFAULT_CHARSET=utf8mb4 -DDEFAULT_COLLATION=utf8mb4_general_cimake -j 4 && sudo make installsudo /usr/local/mariadb/scripts/mysql_install_db --user=mysql --datadir=/data/dbsudo vim /etc/my.cnf[mysqld]datadir = /data/dbsocket = /tmp/mysql.sock# 建议禁用符号链接,防止各类安全风险symbolic-links = 0collation-server = utf8mb4_general_ciinit-connect = 'SET NAMES utf8mb4'character-set-server = utf8mb4[mysql]default-character-set = utf8mb4[client]port = 3306socket = /tmp/mysql.sockdefault-character-set = utf8mb4[mysqld_safe]log-error = /var/log/mariadb/mariadb.logpid-file = /var/run/mariadb/mariadb.pidsudo cp /usr/local/mariadb/support-files/mysql.server /etc/init.d/mariadbsudo vim /etc/profile.d/mariadb.shexport PATH=$PATH:/usr/local/mariadb/bin/sudo chmod 0777 /etc/profile.d/mariadb.shsource /etc/profile.d/mariadb.shsudo /etc/init.d/mariadb start#Starting mariadb (via systemctl): mariadb.service.sudo /usr/local/mariadb/bin/mysql_secure_installation #NOTE: RUNNING ALL PARTS OF THIS SCRIPT IS RECOMMENDED FOR ALL MariaDB# SERVERS IN PRODUCTION USE! PLEASE READ EACH STEP CAREFULLY!#In order to log into MariaDB to secure it, we'll need the current#password for the root user. If you've just installed MariaDB, and#haven't set the root password yet, you should just press enter here.#Enter current password for root (enter for none): #OK, successfully used password, moving on...#Setting the root password or using the unix_socket ensures that nobody#can log into the MariaDB root user without the proper authorisation.#You already have your root account protected, so you can safely answer 'n'.#Switch to unix_socket authentication [Y/n] y#Enabled successfully!#Reloading privilege tables..# ... Success!#You already have your root account protected, so you can safely answer 'n'.#Change the root password? [Y/n] y#New password: #Re-enter new password: #Password updated successfully!#Reloading privilege tables..# ... Success!#By default, a MariaDB installation has an anonymous user, allowing anyone#to log into MariaDB without having to have a user account created for#them. This is intended only for testing, and to make the installation#go a bit smoother. You should remove them before moving into a#production environment.#Remove anonymous users? [Y/n] y# ... Success!#Normally, root should only be allowed to connect from 'localhost'. This#ensures that someone cannot guess at the root password from the network.#Disallow root login remotely? [Y/n] n# ... skipping.#By default, MariaDB comes with a database named 'test' that anyone can#access. This is also intended only for testing, and should be removed#before moving into a production environment.#Remove test database and access to it? [Y/n] y# - Dropping test database...# ... Success!# - Removing privileges on test database...# ... Success!#Reloading the privilege tables will ensure that all changes made so far#will take effect immediately.#Reload privilege tables now? [Y/n] y# ... Success!#Cleaning up...#All done! If you've completed all of the above steps, your MariaDB#installation should now be secure.#Thanks for using MariaDB!sudo systemctl enable mariadb sudo chown mysql:mysql -R /usr/local/mariadb /data/db /var/log/mariadbreboot |
重启后看看有没有启动成功

安装PHP
|
1
2
3
4
5
6
7
8
|
sudo apt install -y libxml2-dev libssl-dev libbz2-dev libcurl4-gnutls-dev libjpeg-dev libpng-dev pkg-config libxslt1-dev libzip-dev libfreetype6-dev libfontconfig1-dev autoconfsudo groupadd -r php && sudo useradd -r -g php -s /sbin/nologin -d /usr/local/php phpsudo vim /etc/sudoersphp ALL=(ALL:ALL) ALLcd /home/allen/下载/php-7.3.18/./configure --prefix=/usr/local/php \--exec-prefix=/usr/local/php --with-fpm-user=php --with-fpm-group=php --enable-zip --with-curl --with-gettext --with-iconv-dir --with-kerberos --with-libdir=lib64 --with-mysqli --with-openssl --with-pdo-mysql --with-pdo-sqlite --with-pear --with-xmlrpc --with-xsl --with-zlib --with-bz2 --with-mhash --enable-bcmath --enable-inline-optimization --enable-mbregex --enable-mbstring --enable-opcache --enable-pcntl --enable-shmop --enable-soap --enable-sockets --enable-sysvsem --enable-sysvshm --enable-xml --enable-fpm --with-freetype-dir --with-gd --with-libxml-dir --with-pcre-regex --enable-libxml --enable-zip --with-png-dir --with-jpeg-dir |
有一个错误:
configure: error: freetype-config not found.
解决办法:
据说:https://www.doopsky.com/ops/981.html
这是由于在 Ubuntu 19.04 中 apt-get 安装的 libfreetype6-dev 版本为 2.9.1-3
http://changelogs.ubuntu.com/changelogs/pool/main/f/freetype/freetype_2.9.1-3/changelog
在 changelog 中写到:
The `freetype-config' script is no longer installed by default
(Closes: #871470, #886461). All packages depending on libfreetype6-dev
should use pkg-config to find the relevant CFLAGS and libraries.
freetype-config 被替代成 pkg-config ,新版本使用 pkg-config 管理 CFLAGS 和 库。
所以解决方法如下:
主要的思路就是用pkg-config代替freetype-config。安装pkg-config,我在上面已经安装了
|
1
2
3
4
5
6
7
8
9
|
cat ./configure | grep "freetype-config" -n34847: if test -f "$i/bin/freetype-config"; then34849: FREETYPE2_CONFIG="$i/bin/freetype-config"34855: as_fn_error $? "freetype-config not found." "$LINENO" 536568: if test -f "$i/bin/freetype-config"; then36570: FREETYPE2_CONFIG="$i/bin/freetype-config"36576: as_fn_error $? "freetype-config not found." "$LINENO" 5sed -i "s/freetype-config/pkg-config/g" ./configure |
|
1
2
3
4
5
|
cat ./configure | grep "FREETYPE2_CONFIG --cflags" -n34858: FREETYPE2_CFLAGS=`$FREETYPE2_CONFIG --cflags`36579: FREETYPE2_CFLAGS=`$FREETYPE2_CONFIG --cflags`sed -i "s/FREETYPE2_CONFIG --cflags/FREETYPE2_CONFIG freetype2 --cflags/g" ./configure |
|
1
2
3
4
5
|
cat ./configure | grep "FREETYPE2_CONFIG --libs" -n 34859: FREETYPE2_LIBS=`$FREETYPE2_CONFIG --libs`36580: FREETYPE2_LIBS=`$FREETYPE2_CONFIG --libs`sed -i "s/FREETYPE2_CONFIG --libs/FREETYPE2_CONFIG freetype2 --libs/g" ./configure |
|
1
2
3
4
5
6
|
cat ./ext/gd/config.m4 | grep "freetype-config" -n188: if test -f "$i/bin/freetype-config"; then190: FREETYPE2_CONFIG="$i/bin/freetype-config"196: AC_MSG_ERROR([freetype-config not found.])sed -i "s/freetype-config/pkg-config/g" ./ext/gd/config.m4 |
重新编译安装就OK
|
1
2
3
4
5
6
7
8
9
10
11
12
13
14
15
16
17
18
19
20
21
22
23
24
25
26
|
Thank you for using PHP.make -j 4 && sudo make installsudo cp php.ini-production /usr/local/php/lib/php.inisudo cp /usr/local/php/etc/php-fpm.conf.default /usr/local/php/etc/php-fpm.confsudo cp /usr/local/php/etc/php-fpm.d/www.conf.default /usr/local/php/etc/php-fpm.d/www.confvim /usr/local/php/etc/php-fpm.d/www.conflisten.mode = 0666pm.max_children = 128pm.start_servers = 20pm.min_spare_servers = 5pm.max_spare_servers = 35pm.max_requests = 10000slowlog = log/$pool.log.slowrlimit_files = 1024sudo vim /etc/profile.d/php.shexport PATH=$PATH:/usr/local/php/bin/sudo chmod 0777 /etc/profile.d/php.sh && source /etc/profile.d/php.shsudo cp sapi/fpm/php-fpm.service /etc/systemd/system/php.service |
安装xdebug
下载xdebug http://pecl.php.net/get/xdebug-2.9.6.tgz
|
1
2
3
4
5
6
|
cd /home/allen/下载tar zxf xdebug-2.9.6.tgzcd xdebug-2.9.6phpize./configure --with-php-config=/usr/local/php/bin/php-configmake -j 4 && sudo make install |
安装Apcu
下载Apcu http://pecl.php.net/get/apcu-5.1.18.tgz
|
1
2
3
4
5
6
|
cd /home/allen/下载tar zxf apcu-5.1.18.tgzcd apcu-5.1.18phpize./configure --with-php-config=/usr/local/php/bin/php-configmake -j 4 && sudo make install |
编辑PHP.INI
|
1
2
3
4
5
6
7
8
9
10
11
12
13
14
15
16
17
18
|
sudovim /usr/local/php/lib/php.inidate.timezone = Asia/Shanghaiexpose_php = offmax_execution_time = 0memory_limit = 4096Mdisplay_errors = Oncgi.fix_pathinfo=0extension_dir = "/usr/local/php/lib/php/extensions/no-debug-non-zts-20180731/"extension=pgsqlextension=apcuzend_extension=/usr/local/php/lib/php/extensions/no-debug-non-zts-20180731/xdebug.so[xdebug]xdebug.var_display_max_children=10240xdebug.var_display_max_data=20480xdebug.var_display_max_depth=50 |
启动
|
1
2
3
4
5
6
|
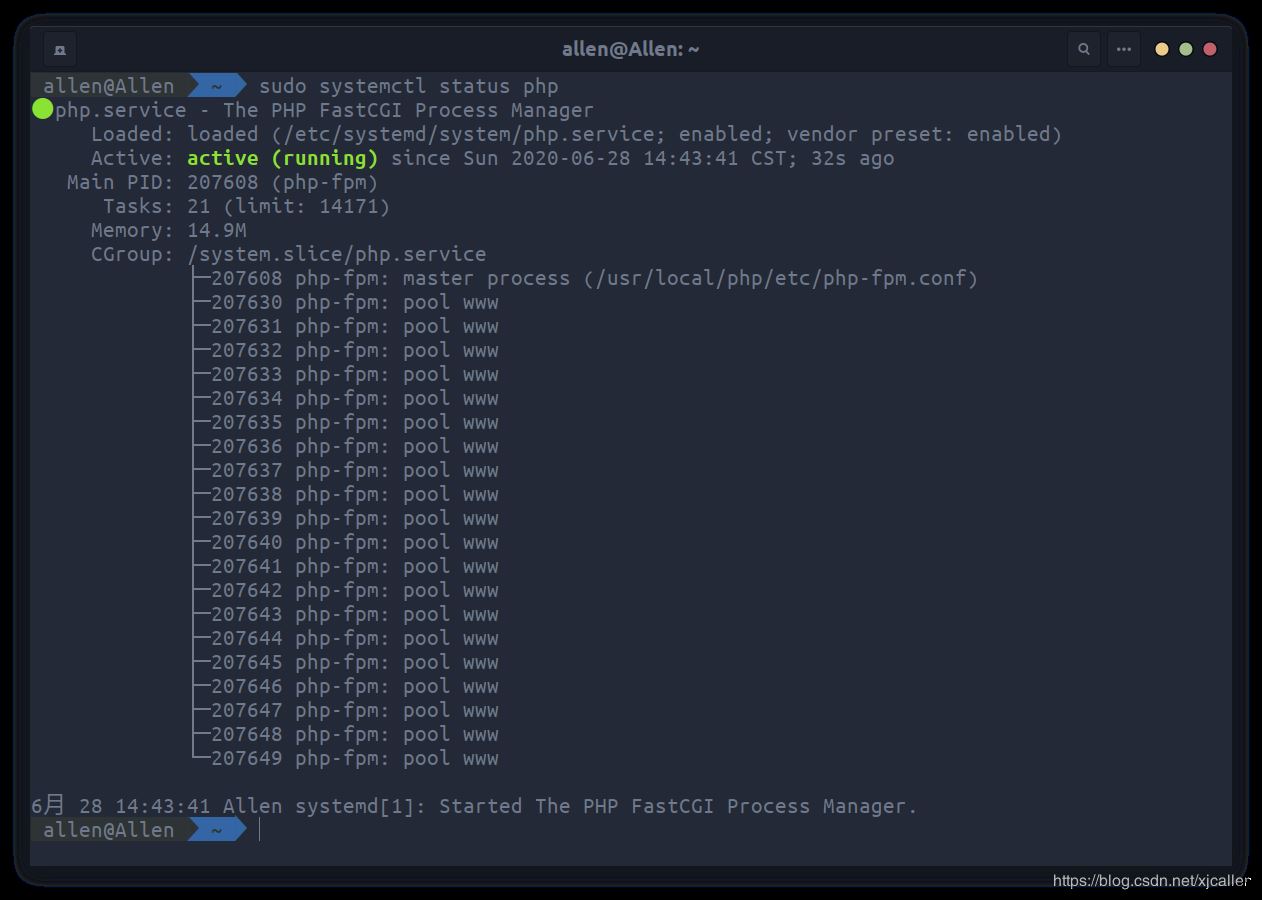
sudo systemctl enable php-fpmsudo chown -R mysql:mysql /usr/local/mariadbsudo chown -R nginx:nginx /usr/local/nginxsudo chown -R php:php /usr/local/phpreboot |
到此这篇关于ubuntu 20.04上搭建LNMP环境的方法步骤的文章就介绍到这了,更多相关ubuntu 20.04搭建LNMP内容请搜索服务器之家以前的文章或继续浏览下面的相关文章希望大家以后多多支持服务器之家!
原文链接:https://blog.csdn.net/xjcallen/article/details/106987381

